Mera Peak has the kind of reward you remember for years. You trek through the Hinku Valley, sleep in lodges and then on the snow at Mera High Camp, and you get professional guide support plus basic climbing practice before the summit push. I also like that the route builds altitude step by step, so you are not just thrown into a big day with zero prep.
One thing to plan for: Lukla flights can be weather-dependent, and the trek includes long walking days plus a technical pass area. You’ll want to be strong physically and accept that schedules can shift when clouds or rain roll in.
In This Review
- Key highlights at a glance
- Mera Peak’s route from Lukla: why this trek feels genuinely Himalayan
- Kathmandu setup and the domestic flight reality
- Days 3 to 4: Chhutanga and Chhatra La for first-pass confidence
- Hinku Valley days 5 to 7: Kothe, Thaknak, and Khare base camp
- Day 8 training at base camp: the skill-building you don’t want to skip
- Days 9 to 10: Mera La, Mera High Camp, and the early summit push
- Days 11 to 13: the return through Khare, Kothe, Thulikharka, and back toward Lukla
- Day 14 to 15: Lukla flight waiting, then Kathmandu decompression
- Price and logistics: where the $2,750 value really comes from
- Who should book Mera Peak with this operator style
- Should you book this Mera Peak climb
- FAQ
- How long is the Mera Peak climbing experience?
- Where does the tour start, and what time?
- Is airport pickup and drop-off in Kathmandu included?
- Are flights between Kathmandu and Lukla included?
- Are meals included during the trek?
- What permits and climbing support are included in the price?
- What climbing gear is provided, and what do I need to bring?
- Is emergency helicopter service included?
- What is the cancellation policy for a full refund?
Key highlights at a glance
- Lukla start with real trail vibes: forest tracks, Sherpa villages, and views that feel constant
- Chhatra La pass moments: a first real high/technical section, then again on the return
- Structured acclimatization: a dedicated day for base camp climbing practice
- Snow/ice teamwork on Mera High Camp: you go grouped for safer movement
- Summit timing built for conditions: early start with a planned return to Khare
Mera Peak’s route from Lukla: why this trek feels genuinely Himalayan
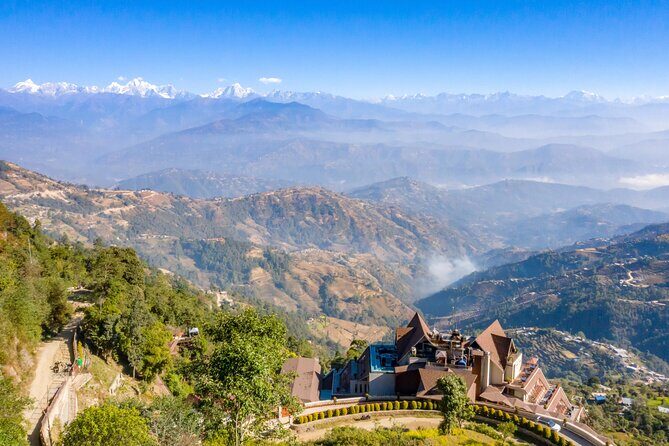
The Mera Peak experience is built around a classic Nepal formula: start high and fast, then earn your summit through a mix of valleys, passes, and slow altitude gains. You begin with a short but dramatic domestic flight to Lukla, then you walk into the Hinku Valley system where mountains sit close enough to feel wearable.
What makes this route special for your day-to-day experience is the variety. You’re not stuck only on one kind of trail. You’ll move from wooden bridges and wild forest to riverbanks with big white Himalayan scenery. Each change of scenery also changes your rhythm, which helps keep your legs working instead of getting mentally bored.
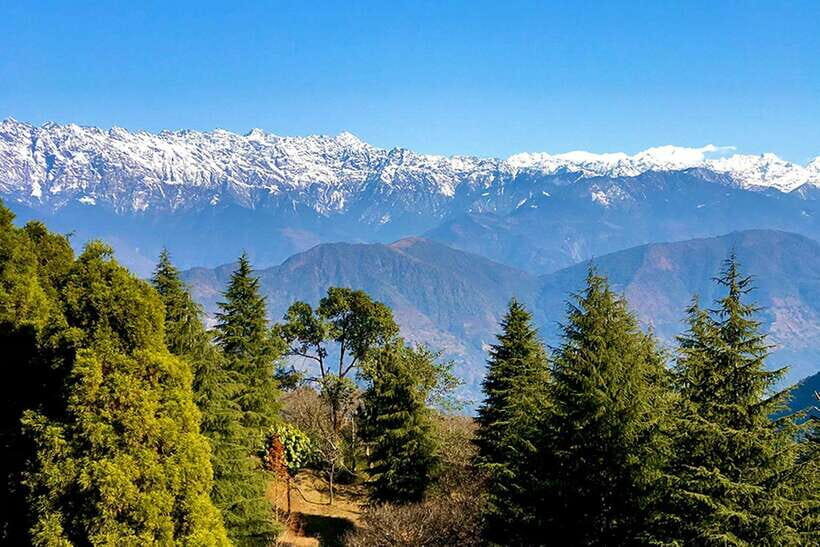
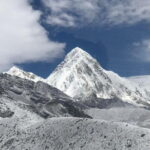
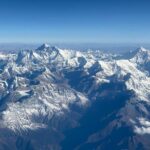
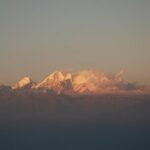
And Mera Peak itself sits in a sweet spot: you get big panoramic views that stretch across well-known Everest-area peaks like Everest, Lhotse, Cho Oyu, Makalu, and others—without needing the kind of extreme technical climbing you might associate with the most difficult lines. You still need to be comfortable moving on snow and ice, but you’re not guessing your way up.
You can also read our reviews of more tours and experiences in Kathmandu.
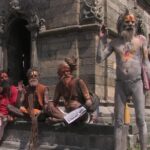
Kathmandu setup and the domestic flight reality
Your trip begins with airport pickup in Kathmandu and two nights in a 2 hotel, with breakfast included under a BB plan. It’s a practical start: you land, meet your representative, and go straight to rest instead of trying to manage logistics yourself.
Then comes the first reality check: the Kathmandu to Lukla flight is about 30 minutes, and it is also one of the most important variables in your schedule. The plan includes both-way domestic air tickets, and you’ll be told to reserve flights ahead because it can be hard to get one when you’re on the clock. If weather is rough, you may spend time waiting, and in past trips, guides like Rabin Gurung have worked hard to get people onto the plane when rain disrupted schedules.
The best way to handle this part is mindset. Treat Lukla flights like a checkpoint, not like a guarantee. The trip’s value holds up even with delays, because the route is structured and guided, but your mood will be better if you plan to be flexible.
Days 3 to 4: Chhutanga and Chhatra La for first-pass confidence
After your early Lukla acclimatization day, you move into trekking mode with a walk to Chhutanga. Expect a steady uphill feel at the start, some stream crossings, and wooden bridges that make the trail feel alive instead of monotonous. This is the kind of day where you build hiking rhythm and start learning how your body handles the air.
Next is Chhatra La pass, described as the first high and technical area. This is where your trip shifts from “walk and enjoy” to “walk and pay attention.” Pass areas can demand careful footing, especially when conditions are icy or snowed in. You’ll also be rewarded with excellent views of the east side of Nepal, including peaks like Kusum Kangaroo and Mera Peak itself, plus other trekking peaks that you will later recognize on your maps and in your photos.
If you’re someone who likes a trip that teaches you skills as you go, this is a good step. It’s early enough that you can still adjust, but serious enough that you feel you’ve entered the mountains properly.
Hinku Valley days 5 to 7: Kothe, Thaknak, and Khare base camp
From Chhutanga and Chhatra La, the route turns into a valley journey along the Hinku Valley. On day 5, you trek toward Kothe, and the walk includes a longer descent to reach the valley river area (the day is described around a 6–7 hour effort). You enter Arun Valley National Park territory, which usually means less “tourist road” feeling and more immersion in actual mountain life.
Day 6 takes you to Thaknak. The key detail here is pacing: you’ll be slowly walking along the bank of the Hinku Valley River, with the added note that you’re entering an acute mountain sickness (AMS) area. The instruction is simple but important—drink lots of water and eat well. You don’t need a fancy plan for altitude; you need consistency.
Then day 7 moves to Khare (Mera Base Camp). The trail is described as beautiful with gradual climbing and lots of photo stops. This is the emotional build-up part of the trip. Once you reach Khare, it’s not just “we climbed today.” It becomes: we are living at the base of the mountain you came for.
If you tend to under-eat when you’re tired, this is a moment to fix that habit. In high-altitude trekking, food is fuel, and your summit day will feel harder if you spent the week eating too lightly.
Day 8 training at base camp: the skill-building you don’t want to skip
Day 8 is one of the most valuable days in the whole experience, even if it doesn’t look like “summit day.” After breakfast, your climbing guide gives basic climbing training for Mera Peak, along with a short hike up and then a return to base camp.
Why this matters for you: the summit is not just about legs. It’s about movement mechanics—using crampon-ready footing, managing traction on snow, and handling the simple but crucial safety systems that come with glacier travel. Training doesn’t make the mountain easy, but it can make it safer and less stressful.
In this trip style, your guide support is a big part of that confidence. In past trips, guides like Danshingh/Dhansingh have been specifically praised as very nice and helpful. If your guide is calm and clear, your body has an easier time cooperating.
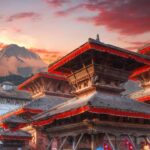
Days 9 to 10: Mera La, Mera High Camp, and the early summit push
On day 9, you go from base camp toward Mera High Camp, with a climb of around 800 meters over roughly 3–4 hours. You pass Mera La, described as around the Ampu Lapcha Pass or Sherpeni Col route options, and the emphasis is on snow and ice travel. The route is covered by snow/ice walking, and you move in groups so you can help each other with safer spacing and footing.
That group movement detail is not trivia. On snow and ice, it’s easy to lose your rhythm if you’re all spread out. Group travel helps keep the pace steadier and reduces the chance of someone getting isolated in a tough section.
Then you hit the summit timing. Day 10 starts with a wake-up around 1:00 AM, followed by breakfast, and a planned start around 2:00 AM. That’s a long night, but it’s also built for conditions. You climb to the summit and are treated to the big panoramic reward: the view includes Everest, Lhotse, Cho Oyu, Nuptse, Pumori, Barunche, Makalu, and more Himalayan peaks. After the summit, you descend back to High Camp for lunch, and continue down to Mera Base Camp at Khare for the night.
This is the day that separates “I did a trek” from “I climbed a peak.” Even if summit itself is reached by walking (as some guides describe it as more accessible than the most technical peaks), your body still needs to handle cold, fatigue, and the mental focus of moving when visibility is limited.
Days 11 to 13: the return through Khare, Kothe, Thulikharka, and back toward Lukla
After the summit, the route turns into a controlled descent and re-walking of the valley you came up. Day 11 takes you back to Kothe following the Hinku Valley. It’s the kind of day where your knees will complain even if your mind feels strong.
Day 12 brings you to Thulikharka on the same trail area. Then day 13 goes back to Lukla, which is another tough day because you pass Chhatra La around 4600 meters and then descend down through a technical area.
This return pass section is worth respecting. People often underestimate the way the return journey changes the risk equation. You’ve gained altitude, now you’re tired, and your footing can get sloppy. With a guided trip, you stay on schedule and movement stays controlled.
Day 14 to 15: Lukla flight waiting, then Kathmandu decompression
On day 14, you walk to the airport area and wait for your flight. The plan calls out something practical: at times it can be hard to get a flight and there can be lots of people waiting. That’s exactly why flight reservation matters before your trip starts moving.
When you reach Kathmandu, you get time to explore and shop for souvenirs for your family. It’s a small but real reward. After days of snow and altitude, normal city streets feel like a holiday.
Day 15 is your drop back at TIA for final departure. It’s a clean wrap-up: you don’t end on another hike.
Price and logistics: where the $2,750 value really comes from
The headline price is $2,750 per person, and the value is not just the summit itself. This cost bundle is doing a lot of heavy lifting: flights, meals, guides, key permits, high-camp camping support, and climbing infrastructure.
Here’s what stands out as value-building:
- Private Kathmandu transfers plus 2 nights in Kathmandu (2 hotel, BB plan) means you’re not scrambling after landing.
- Both-way domestic airfare to Lukla is included. For many first-time Nepal visitors, that’s the biggest stress reducer.
- All meals during the trek are included, with tea/coffee. That matters at altitude because you’re less likely to skip meals when you’re tired.
- Special climbing permit ($250 per person) and a garbage deposit ($500) are included. Waste control is not a nice-to-have in peak climbing; it’s part of responsible travel.
- Climbing Sherpa ($300 per person) includes climbing fee/insurance/equipment/food/accommodation (as described), which is a meaningful part of summit-day safety and logistics.
- Some key climbing equipment is included: harness, figure eight, rope, snow bar. You still need personal climbing equipment, but you’re not starting from zero.
- Emergency helicopter arrangement is included, but you’ll want to notice the fine print: it’s stated as being paid by your travel insurance company. So your insurance is still part of the equation.
- You get medical supplies (first aid kit available), plus an adventure certificate after a successful trip.
What can surprise you (so you can plan better):
- Tipping for guides, climbing Sherpa, cook, and porters is not included.
- Personal climbing equipment is not included.
- Extras like bottled drinks, boiled water, electronic device re-charge, hot shower, and Wi-Fi on the trek are not included.
- Travel insurance and evacuation insurance are listed as not included, so you’ll want your policy to cover climbing and high-altitude evacuation appropriately.
Also, the trip lists porters as 1 porter for 2 people, which is helpful. But if you have extra gear or want more comfort, there’s an option for an extra porter at $25 per day.
Who should book Mera Peak with this operator style
This is a great match if you want a guided peak climb that feels structured and safety-minded without turning into a complicated expedition. You’ll like it if you enjoy steady trekking and can handle long days, pass terrain, and a summit start that comes early.
You should also feel comfortable following instructions. This kind of route works best when you drink, eat, and move consistently. The plan repeatedly emphasizes hydration and good meals in the AMS area, which tells you how the operation expects you to manage altitude.
It’s likely not a good fit if:
- you cannot commit to a strong fitness baseline,
- you hate cold and early mornings (summit night starts around 1:00 AM wake and 2:00 AM summit time),
- or you aren’t okay with possible flight delays at Lukla.
Should you book this Mera Peak climb
If your main goal is to climb Mera Peak with professional guidance, learn basic climbing technique before the summit, and get major Himalayan views with a route that’s paced for acclimatization, then this booking looks like a smart choice.
I’d book if you’re willing to plan for altitude and weather variability, and if you’re comfortable covering the non-included items like personal climbing gear, tipping, and travel insurance details. I’d think twice if you’re trying to keep costs ultra-low or you need a perfectly fixed schedule for every flight connection.
FAQ
How long is the Mera Peak climbing experience?
It’s listed as approximately 15 days.
Where does the tour start, and what time?
The meeting point is Tribhuvan International Airport (Ring Rd, Kathmandu), and the start time is 9:45 am.
Is airport pickup and drop-off in Kathmandu included?
Yes. Airport transfers are included via private car/van/bus, including drop-off at the end.
Are flights between Kathmandu and Lukla included?
Yes. Round-trip domestic air tickets Kathmandu to Lukla and Lukla to Kathmandu are included.
Are meals included during the trek?
Yes. All meals (breakfast, lunch, and dinner) are included, with cup of tea or coffee during those meals. Extra meals and accommodation in Kathmandu are not included.
What permits and climbing support are included in the price?
A special climbing permit ($250 per person) is included, along with a climbing Sherpa fee ($300 per person) covering climbing fee, insurance, equipment, food, and accommodation as described.
What climbing gear is provided, and what do I need to bring?
Provided gear includes harness, figure eight, rope, and snow bar. Personal climbing equipment is not included.
Is emergency helicopter service included?
An emergency helicopter arrangement is included, but it is stated that it will be paid by your travel insurance company.
What is the cancellation policy for a full refund?
You can cancel up to 6 days in advance for a full refund. Changes made less than 6 full days before the start time are not accepted.