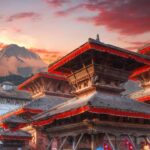
REVIEW · KATHMANDU
Everest Base Camp Trek
Book on Viator →Operated by Shankar Pandey · Bookable on Viator
Everest starts with a bumpy little flight. This Everest Base Camp trek uses a scenic (and sometimes weather-sensitive) jump from Kathmandu to Lukla, then follows classic routes through Phakding, the Dudh Kosi valley, and into the Everest region. I especially like how the trip builds in a real acclimatization rhythm, including a full day in Namche, and how the guide team puts safety and pacing first, with named guides like Shankar Pandey and Krishna showing up repeatedly in people’s feedback.
Two things I like a lot: the trekking days are paired with organized logistics and warm tea-house stops, and you get hands-on Sherpa culture along the way, not just a checklist of landmarks. One consideration: altitude plus Lukla flying means timing can shift if weather turns, and the trek is best for people with at least moderate fitness and comfort walking long mountain days.
In This Review
- Key highlights and practical perks
- Lukla Flight: Fast Access, Real-World Weather
- From Lukla to Phakding and the Dudh Kosi Valley Grind
- Namche Bazar Acclimatization Day: The Smart Time to Recover
- Syangboche Airport: Higher Ground With a Purpose
- Kalapatthar and Everest Base Camp: The Payoff (and the Effort)
- Meals and Tea-House Rhythm: More Than Just Fuel
- Sherpa Culture and the Guide Team You’ll Actually Rely On
- Price and Value: What $1,350 Really Covers
- Gear Checklist: Pack Light, Layer Smart, Stay Warm
- Who Should Book This Everest Base Camp Trek?
- Should You Book This Everest Base Camp Trek?
- FAQ
- What is the duration of the Everest Base Camp trek?
- Where does the trek start?
- What is included in the price?
- What gear do I need to bring?
- Do I need travel and rescue insurance?
- Are meals in Kathmandu included?
- Is tea or coffee included during the trek?
- What happens if weather cancels the experience?
Key highlights and practical perks
- Scenic Lukla flights to drop you into the Everest gateway fast
- Namche acclimatization day so your body has time to catch up
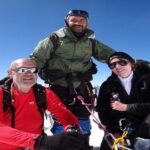
- Strong guide support from lead names like Shankar Pandey and guides such as Krishna and Shajan
- Kalapatthar + Everest Base Camp payoff for the big views
- Down gear included (down jackets and down sleeping bags) to lighten your load
- Porter-rights approach with a 15kg max carry allowance
Lukla Flight: Fast Access, Real-World Weather
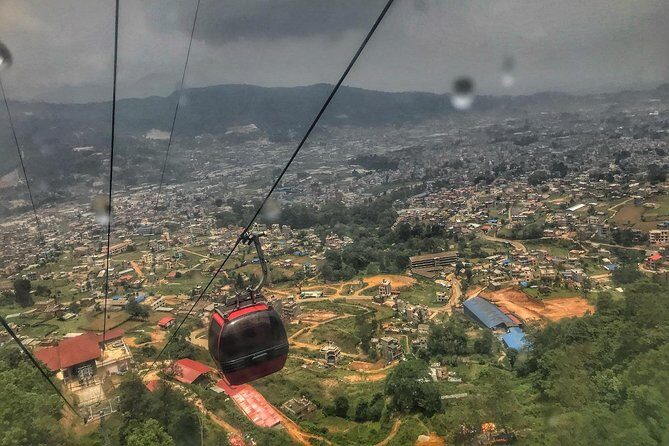
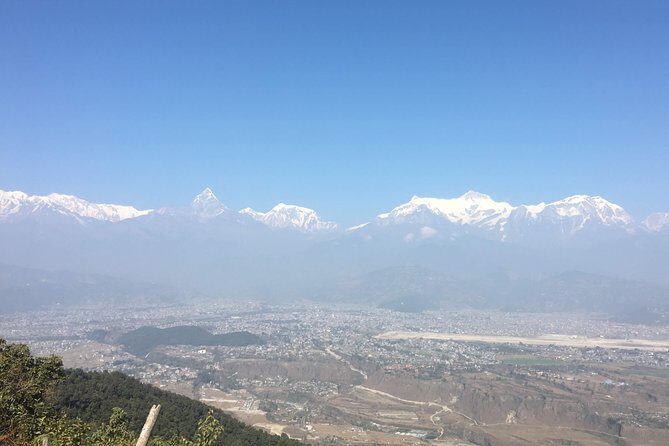
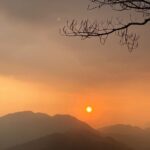
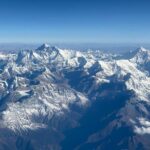
The first big moment is the flight from Kathmandu to Lukla. It’s famous for a reason: you get your first proper sense of the Himalaya’s scale long before your boots hit the trail. It also matters practically. Instead of wasting days crawling uphill from the lowlands, this route drops you near the action and lets the trek do the work.
That said, you should treat Lukla as a scheduling partner, not a guaranteed one. The trip requires good weather, and flight changes can happen. In one account, flights were affected by major storms and the group had to adjust by traveling toward Ramechhap. The takeaway for you: be flexible, and keep your expectations anchored to the overall trek plan rather than a single exact landing time.
A small but meaningful plus: the tour is described as a private activity, so you’re not sharing your experience with strangers from every direction. That usually makes pacing and decision-making easier on high-altitude days.
You can also read our reviews of more hiking tours in Kathmandu
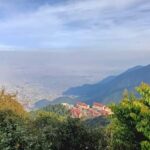
From Lukla to Phakding and the Dudh Kosi Valley Grind
After landing in Lukla, the itinerary heads north and puts you into motion right away. You walk for about three hours to Phakding, a classic first-day on-ramp where your body learns the rhythm: uphill effort, short breaks, and that steady mountain breathing you’ll get used to.
Then comes the push through the Dudh Kosi valley, moving you toward Namche Bazar. This is one of the smartest segments of the whole trek, because it’s enough walking to build momentum, but it’s still early enough that you can settle into your pace before altitude starts really demanding more from you.
What I’d watch for here: if you go too hard on day one, you’ll pay for it later. The good sign is when you feel strong enough to enjoy the scenery and talk during breaks. If you’re gasping just to “make time,” that’s your cue to slow down immediately.
A helpful trend from the way people describe the trip: guides often keep groups moving at a pace that matches real fitness levels, and they adjust when altitude starts to bite (especially above 5,000 meters). For you, that means the trek is less about proving toughness and more about finishing strong.
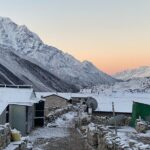
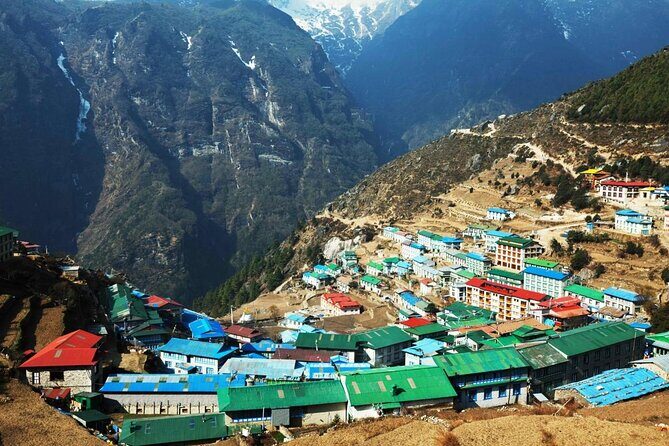
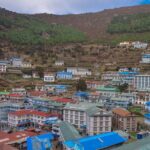
Namche Bazar Acclimatization Day: The Smart Time to Recover
You reach Namche Bazar and then get something that many people rush past on their first attempt at Everest: an acclimatization day. Your plan includes a full day here to help your body adapt, before you start climbing higher for the Kalapatthar and Everest Base Camp areas.
Namche is special for two reasons. First, it’s a high-mountain hub, so your experience includes the lived-in side of the Khumbu region—shops, lodges, and the day-to-day flow of Sherpa life. Second, acclimatization works better when you’re not just thinking about it—you’re actually resting and absorbing altitude.
Here’s the consideration: acclimatization days can feel like “wasted time” if you’re impatient. I think that’s the wrong mindset. On Everest-area treks, the goal isn’t speed. It’s staying healthy enough to enjoy the summit views you came for.
If you’re the type who gets tempted to constantly ask when the next big viewpoint is, use this day differently: hydrate, eat what you can, and take short walks at a comfortable pace. Your future self at Kalapatthar will thank you.
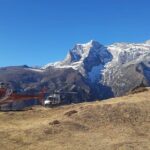
Syangboche Airport: Higher Ground With a Purpose
From Namche, the itinerary continues toward Syangboche Airport, a stop that matters because it sits high in the region and helps the trek keep its acclimatization logic. This part of the route is where altitude shifts from “noticeable” to “seriously relevant.”
What you’ll feel isn’t just your legs. It’s the way breathing changes during steady climbs. That’s why the guided approach matters. In multiple accounts, guide teams are praised for helping with tougher moments above 5,000 meters, including the way guides and assistants coordinate in bigger groups.
Your best strategy here: keep your effort consistent. Don’t sprint up short sections. Instead, aim for a steady pace where you can keep going for an hour without your breathing turning into survival-mode.
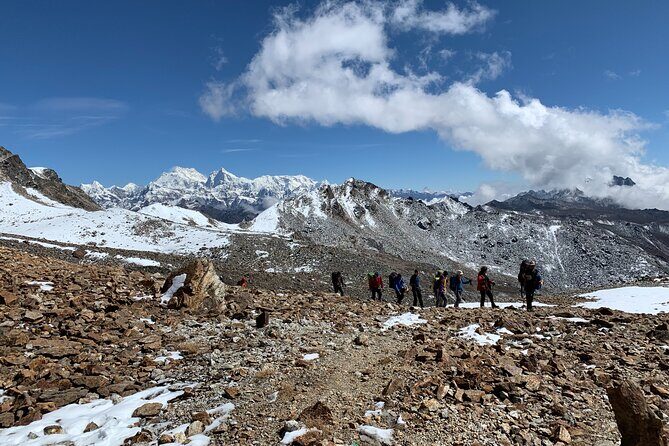
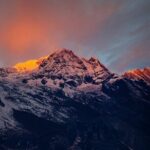
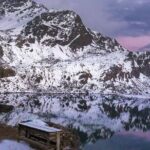
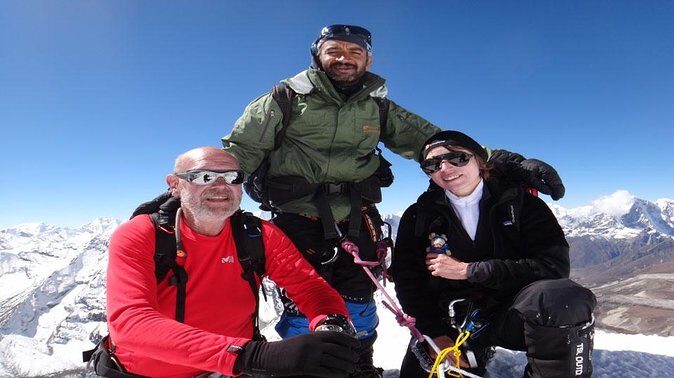
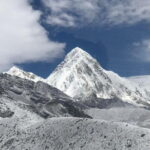
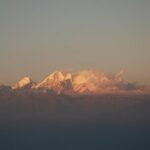
Kalapatthar and Everest Base Camp: The Payoff (and the Effort)
Finally, you reach the area many people dream about: Kalapatthar and Everest Base Camp. Kalapatthar is often where the big viewpoint payoff happens, because it’s known for dramatic perspectives on Everest and the surrounding peaks. From there, you continue to Everest Base Camp, where the experience becomes more about atmosphere than exercise.
A good way to understand this phase: your legs will do the work, but your eyes will do the appreciation. The reason this part lands so well for people is the combination of iconic scenery and the fact that you’re arriving after careful altitude management, not after reckless speed.
The practical consideration is that this segment is harder than it looks on paper. You’re higher, you’re tired, and you may be colder than you expect. If you’ve packed the right layers (more on that below), you’ll spend more time looking and less time fighting the cold.
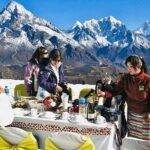
One detail worth highlighting from accounts of the trek: people describe tea houses as warm and comfortable, with comfortable food that supports energy on tough days. That matters more than it sounds, because a warm meal and a decent night’s rest can be the difference between pushing on smoothly and feeling wrecked.
Meals and Tea-House Rhythm: More Than Just Fuel
The tour includes breakfast, lunch, and dinner during the trek days. That’s a real value point because it reduces the mental work of tracking meals while you’re already managing altitude, weather, and timing.
One more practical plus: in feedback, people mention warm tea houses with good food and the ability to walk at their own pace. I’d take that as a sign the itinerary isn’t built like a marching band. You’ll still work hard, but you’re not trapped in one unchangeable schedule.
Small note on budget: tea and coffee during the trek are not included. That’s common on trekking routes, but it’s worth planning for so you don’t get surprised when you’re buying a hot drink on the coldest morning.
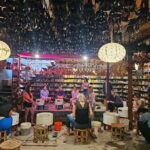
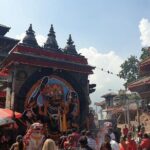
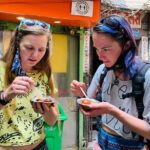
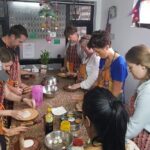
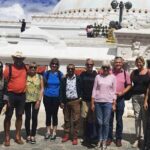
Sherpa Culture and the Guide Team You’ll Actually Rely On
This is a trekking trip, but Sherpa culture is part of the experience in a daily, real way—how people run tea houses, how you interact in mountain towns, and how locals help with what you need on the ground.
The biggest difference, though, is the guide team. Named guides like Shankar Pandey and Krishna show up in feedback, along with assistant and Sherpa support staff such as Shajan and Ngathe Sherpa. People also mention guide personalities and how they handle details—Krishna is described as knowledgeable and even helpful as a kind of personal photographer, which you might not need, but it’s nice when you’re trying to capture moments without slowing the group down.
Also, check the pattern of praise: organization, friendly support, and safety focus. You want a team that doesn’t just know routes; you want people who notice when someone is struggling and help them adjust.
If you’re nervous about altitude or unsure about your pacing, lean into that. A good guide doesn’t make you feel weak. They just help you manage the hike like a system.
Price and Value: What $1,350 Really Covers
At $1,350 per person, this trek isn’t a bargain in the sense of cheap. But it’s also not inflated for what you get. Here’s the value logic I see from what’s included:
You get meals (breakfast, lunch, dinner) on trek days, plus the trip includes pickup offered in Kathmandu and a mobile ticket. That’s important because Kathmandu travel costs add up fast once you’re factoring taxis and time.
You also get real trekking support infrastructure through the company’s gear approach. Adventure Magic provides down jackets and down sleeping bags. For you, that can reduce the amount of expensive high-warmth gear you’d otherwise have to bring or rent.
What’s not included is equally important for your budgeting sanity. Not included are:
- Lunch and dinner in Kathmandu
- Personal trekking equipment
- Personal expenses like phone calls, laundry, hot showers, battery charging, bar bills, and extra porters
- Travel and rescue insurance
- Tea and coffee during the trek
- Tips for driver, guides, and porters
- Any extending trips
So the question becomes: can you cover the remaining costs without stress? If yes, the package price starts to look like good value because it protects you from hidden day-to-day costs during the core trek.
Gear Checklist: Pack Light, Layer Smart, Stay Warm
You’ll need to think in layers, not just in warm clothes. The trip’s equipment list gives a solid framework, and a major plus is that you receive down jackets and down sleeping bags, which helps you travel smarter.
Here’s what I’d prioritize from the provided kit guidance:
- Footwear: walking boots, wool liner socks, plus sandals
- Weather shell: waterproof jacket and trousers
- Mid layers: micro fleece, mid to heavyweight fleece, and thermals/base layers
- Cold layer: a medium weight down jacket (and you’ll likely have additional warmth from what’s provided)
- Hands and head: fleece gloves, warmer mittens or gloves, wool/fleece hat, sun hat, scarf
- Eyes and essentials: sunglasses, lip salve, sunscreen, head torch with extra batteries
- Backpack system: one day backpack plus a duffel/large backpack for porter carry
- Water safety: water purification tablets
- Small comforts that help: favorite snacks, books, and anything you need to stay calm and steady
Two practical notes I really like in the equipment guidance:
1) You’re carrying items for the day in a smaller pack while the rest goes with a porter, which keeps you from turning the trek into a heavy-load contest.
2) There’s a maximum porter carry allowance of 15kg / 33 pounds, tied to porter rights and against exploitation. That affects quality of service and also keeps the operation aligned with basic fairness.
One optional add-on mentioned: Diamox can help with acclimatization, but that’s something you should discuss with your doctor before you go.
Who Should Book This Everest Base Camp Trek?
This trek is built for people with moderate physical fitness who can handle long hiking days and cold mountain conditions. It’s also a strong fit if you want a guided experience with structured acclimatization rather than a solo “figure it out” approach.
It’s especially suitable if you value:
- Clear pacing and safety attention
- A private-group feel
- The Everest highlights without turning the trip into a gear headache, thanks to down gear included
If you hate uncertainty and refuse to plan for weather changes, you might find the Lukla flight reality stressful. But if you can stay flexible, this trip can deliver the experience people talk about as a life-changing kind of achievement.
Should You Book This Everest Base Camp Trek?
I’d book it if you want classic Everest-area access with strong guide support, a real acclimatization stop in Namche, and a logistics setup that covers the essentials while you focus on your body and your enjoyment.
Skip or rethink if any of these are deal-breakers for you: you don’t have moderate fitness, you’re unwilling to pay for insurance and trekking-day extras, or you need perfectly fixed flight timing regardless of weather.
If you match the fitness level and you’re ready for altitude and cold, the mix of scenic Lukla flights, Namche acclimatization, and the Kalapatthar plus Base Camp finale makes this a smart way to check Everest Base Camp off your list.
FAQ
What is the duration of the Everest Base Camp trek?
The trek is listed as 14 days (approx.), with about 15 days trekking mentioned in the overview.
Where does the trek start?
You start in Kathmandu, Nepal, then fly to Lukla and trek from there.
What is included in the price?
The package includes pickup offered, mobile ticket, and breakfast, lunch, and dinner during the trek.
What gear do I need to bring?
You’re expected to bring personal trekking equipment like boots, layers, a day backpack, sleeping bag support is partly handled by provided gear, plus items like water purification tablets and a head torch. The company also provides down jackets and down sleeping bags.
Do I need travel and rescue insurance?
Yes. Travel and rescue insurance is not included, so you should arrange it before you go.
Are meals in Kathmandu included?
No. Lunch and dinner in Kathmandu are not included.
Is tea or coffee included during the trek?
No. Tea and coffee during the trek are not included.
What happens if weather cancels the experience?
The experience requires good weather. If it’s canceled due to poor weather, you’ll be offered a different date or a full refund.