REVIEW · KATHMANDU
Everest Three Pass Trek
Book on Viator →Operated by Base Camp Adventure Pvt. Ltd. · Bookable on Viator
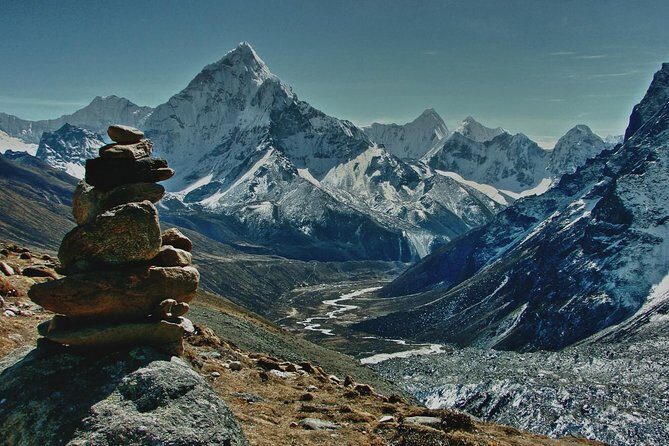
Three passes above Everest is the point. This trek stitches together Kongma La, Cho La, and Renjo La with a classic high-altitude moment at the Kala Patthar sunrise, plus plenty of Sherpa villages and major Himalaya viewpoints along the way.
I love the route planning that prioritizes altitude breathing time, especially the rest day in Namche and the jump from Dingboche to Chhukung before the first big pass. I also like the practical support built into the package: a licensed English-speaking guide, porter support, and included overnight gear like a down jacket and sleeping bag. One clear drawback: this isn’t a casual hike—Kongma La is steep, Cho La is ice-covered, and Lukla flights can be weather-sensitive, so you’ll want strong fitness and a calm mindset.
In This Review
- Key Things I’d Watch Before You Go
- Why the Three-Pass Route Feels Like a Whole Different Everest Trip
- Price and Logistics: What the $1,800 Actually Buys You
- Getting There: Kathmandu to Lukla by Plane (and Why It Matters)
- Day-by-Day Feel: From Dudh Koshi Rivers to Tengboche Views
- Day 1: Fly in and get your bearings
- Day 2: Dudh Koshi valley hiking and suspension bridges
- Day 3: Namche rest day, plus Everest View Hotel
- Day 4: Up Dudh Koshi to Phunke Tenga and onward to Tengboche
- Day 5: Dingboche push through rhododendron and major peak angles
- Day 6: Chhukung staging to set up Kongma La
- Kongma La (5535m): The First Big Pass and What to Expect
- Gorakshep and Kala Patthar: The Sunrise Payoff Day
- Cho La (5420m) and Gokyo Lakes: Ice, Effort, and Big Water Views
- Day 11: Gokyo Ri (5360m) for wide views
- Renjo La (5360m) and the Return to Namche
- Lukla Back to Kathmandu: Flights and the Last Mountain Glance
- Guides, Team Energy, and Why It Shows Up on Tough Days
- What’s Included (and What to Pack) for a Three-Pass Trek
- Weather Reality Check: Why Flexibility Is Part of the Deal
- Who Should Book This Everest Three Pass Trek (and Who Should Skip It)
- Should You Book It?
Key Things I’d Watch Before You Go

- Three passes, three different challenges: Kongma La starts with steep climbs, Cho La brings ice, and Renjo La adds snow and big exposure.
- Acclimatization built into the schedule: Namche rest, then higher staging at Dingboche/Chhukung before pass days.
- The Kala Patthar hit is real: early sunrise timing at 5,550m is part of the payoff.
- Included gear reduces what you carry: down jacket, sleeping bag, and a duffel/kit bag you return afterward.
- You’re not doing this solo: you travel with an English-speaking guide plus porters for your luggage.
- Everest view without crowd math: the trek pattern includes quieter stretches than the most basic Everest walks.
Why the Three-Pass Route Feels Like a Whole Different Everest Trip
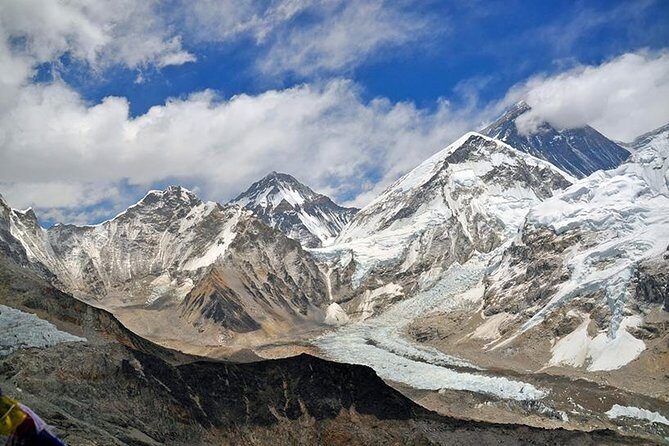
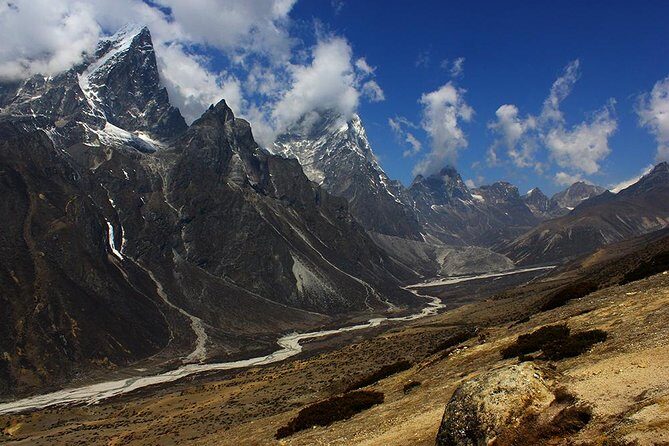
The Everest Three Pass Trek is interesting because it doesn’t just chase altitude. It connects altitude with variety. You start in the Dudh Koshi valley, build into the Namche region, then push higher through places like Tengboche, Dingboche, and Chhukung. After that, the trek becomes about transitions: climb to a pass, drop into a new valley system, then climb again.
That’s why the views feel like they keep changing. On a “single destination” trek, you get your big moments and you’re done. Here, you get repeated chances: high points (passes, Kala Patthar, Gokyo Ri), plus the long sightlines back across valleys when the weather window opens.
Also, the route’s geography matters. Kongma La, Cho La, and Renjo La each sit at different angles to the Mahalangur Himalaya. So even if the peaks feel familiar, the way they show up in your sight can feel new—more depth, different ridgelines, and different valleys framing Everest and friends.
You can also read our reviews of more hiking tours in Kathmandu
Price and Logistics: What the $1,800 Actually Buys You
At $1,800 per person for about 15 days, you should think of this as a fully managed high-altitude trek package, not just a “ticket to the mountains.”
What’s value-rich in the included list:
- Permits and access: National Park entry permit and TIMS permit are handled.
- Domestic flight logistics: Kathmandu–Lukla–Kathmandu is included, which is often the most stressful part for first-timers.
- Staffing: you get a local government licensed English-speaking guide plus the staff/porters to carry your luggage.
- You travel lighter: the included down jacket and sleeping bag can save you serious weight and hassle.
- Food coverage: breakfast, lunch, and dinners are included for the trekking days listed (14 breakfasts/lunches/dinners).
Where you’ll still spend extra (based on the provided info):
- Personal trekking gear (boots, layers, rain protection, etc.)
- Drinks and laundry or showers
- Tips for trekking staff
So if you’re the type who hates “logistics day,” this price can feel fair. If you already own nearly everything and want to keep control in your own hands, you might compare other trekking options. But for this kind of route—three passes, high points, and major logistical moving pieces—this package style is set up to reduce your risk of missed details.
One more practical note: the trek is often booked about 39 days in advance on average. If you’re flexible on timing, you may have room. If you’re not, plan early.
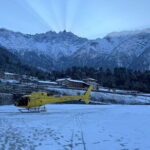
Getting There: Kathmandu to Lukla by Plane (and Why It Matters)
This trek starts with an early morning departure. You meet at BASE CAMP ADVENTURE PVT. LTD. in Kathmandu (Tridevi Sadak), with a start time listed as 6:15 am. Then you fly to Lukla using the Tenzing-Hillary Airport (you’ll hear a lot of hype about it because it’s one of the most dramatic airstrips in the Himalaya).
Why I take this seriously for value and comfort:
- You’re saving huge hiking distance that you’d otherwise need to cover to reach the trail network.
- Lukla flights can be weather-dependent, so the earlier you’re in place and ready, the better.
If you want to reduce stress, come in with a mindset that treats flight delays as a possibility, not a disaster. This trek also notes it needs good weather, and you’ll be offered a different date or a refund if it’s canceled due to poor weather.
Day-by-Day Feel: From Dudh Koshi Rivers to Tengboche Views
The trek rhythm follows a classic Khumbu structure: river valley trail, acclimatization stops in Sherpa hubs, then temple-and-viewpoints at higher elevations.
Day 1: Fly in and get your bearings
You fly from Kathmandu to Lukla and land at Tenzing-Hillary Airport. After that, you meet your trekking team and settle into the first night in Lukla’s orbit.
Practical tip: pack for quick changes. Even before you climb, weather can shift fast around the Himalaya.
Day 2: Dudh Koshi valley hiking and suspension bridges
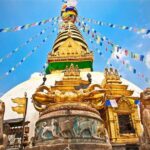
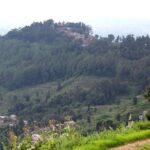
You continue hiking along the banks of the Dudh Koshi River, repeatedly crossing suspension bridges with prayer flags. You also enter Sagarmatha National Park and deal with fast ups and downs as the trail starts gaining altitude.
What you’ll likely like: the river valley trail is active but not technical. It’s a good “start your engine” day.
What can feel annoying: bridges and uneven trail surfaces add fatigue early if you’re carrying too much.
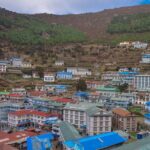
Day 3: Namche rest day, plus Everest View Hotel
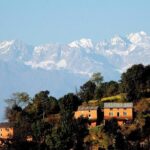
Today is built for acclimatization. You rest in Namche Bazaar, explore the Sherpa town, then climb a bit to Everest View Hotel for major peak views like Nuptse and Thamserku (and more in that general lineup).
This is one of the most important days for your success. You’re giving your body time, and you’re also getting a mental reward. When you feel that first big view, you understand why the passes are worth suffering over.
Day 4: Up Dudh Koshi to Phunke Tenga and onward to Tengboche
You follow Dudh Koshi upstream until you reach water-driven prayer wheels near Phunke Tenga, then hike above Imja Khola toward Tengboche.
Why this stop is special: Tengboche is where the trail starts feeling more “Himalaya ceremonial.” You also get the kind of viewpoint that makes you stop and look, even if you’re tired.
Day 5: Dingboche push through rhododendron and major peak angles
After breakfast, you ascend to Dingboche. This stretch is described with views of Ama Dablam, Lhotse, and Everest, and it includes passing through rhododendron forest and Pangboche village.
This is a day where you should keep your pace slow. The goal is progress, not speed.
Day 6: Chhukung staging to set up Kongma La
Instead of an extra day in Dingboche, you go to Chhukung to avoid a longer day later when you’ll be crossing Kongma La. Today is a short but uphill walk, and the trail runs through the Imja valley area.
If you’re worried about pass days, this is the day that usually decides how confident you feel later.
Kongma La (5535m): The First Big Pass and What to Expect
Day 7 is the first pass crossing: Kongma La at 5,535m, described as the highest of the three passes. The approach includes a steep uphill climb with difficulties. You prepare at breakfast, then work your way up to the top and continue onward for the next stage.
What makes this day hard in a non-hero way:
- Altitude is doing its job even if the hiking looks simple on paper.
- Steep uphill means you’ll work hard before you see relief.
- Exposed terrain can feel long when you’re breathing shallow.
What makes it worthwhile:
- Once you’re over, you get that “now we’re really in it” sense.
- The pass sets up the next climbing style for the rest of the trek.
Gorakshep and Kala Patthar: The Sunrise Payoff Day
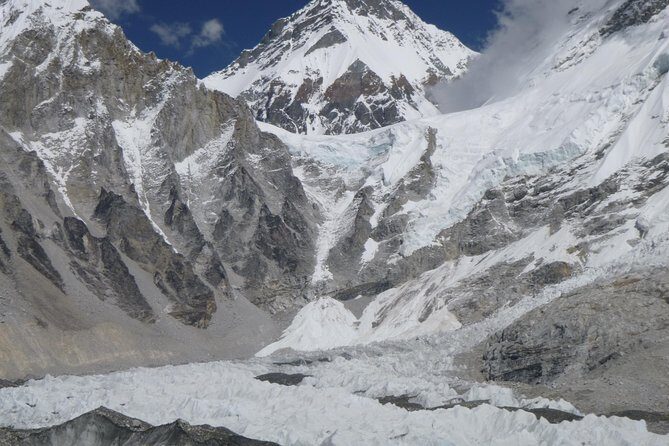
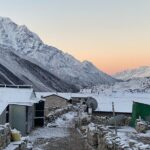
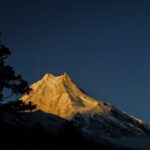
Day 8 takes you to Gorakshep after breakfast. The trek becomes stony in places, and you’re surrounded by dramatic snow and glacier scenery as you reach the high base area.
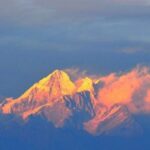
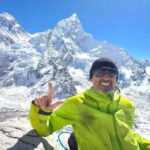
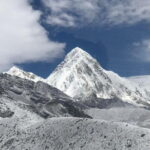
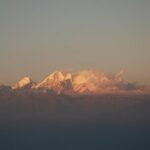
Day 9 begins very early with a hike to Kala Patthar (5,550m) for sunrise. From the top, you get breathtaking sightlines back across valleys and the first rays of sun hitting Mt. Everest (8,848m).
This is one of those days where timing matters more than effort. If you’re tempted to rush, don’t. Go steady, keep your breathing controlled, and focus on small steps. The reward is worth it.
One practical note: altitude sunrise means cold. Having the included down jacket and sleeping bag can help reduce how much you must carry and manage.
Cho La (5420m) and Gokyo Lakes: Ice, Effort, and Big Water Views
Day 10 is the tough second pass: Cho La at 5,420m. You climb across an ice-covered trail and reach the top after a steep uphill segment.
This is the day where you should expect the most “physical unknown” feeling, even if you’ve trained. Ice terrain is about careful foot placement, and it can sap energy quickly.
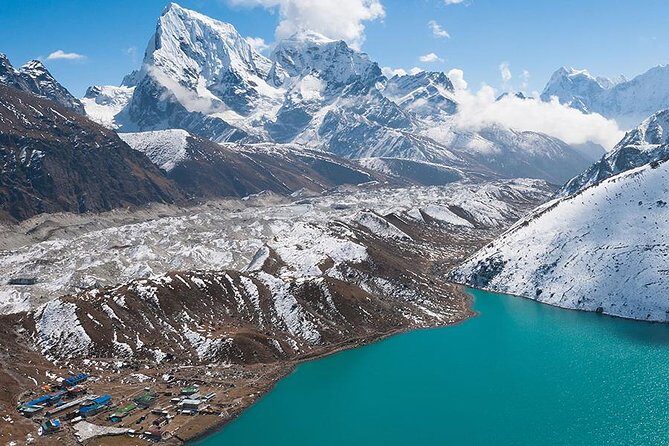
After crossing, you continue to Gokyo lakes, which is where the environment shifts. Instead of constant stone and ridges, you get open sightlines with lake basins and glacier-fed scenery.
Day 11: Gokyo Ri (5360m) for wide views
Day 11 is a rest day in Gokyo, with a hike up to Gokyo Ri (5,360m) in the morning. From the top, you enjoy views across the whole Gokyo valley and its many small lakes.
This day is a good break between pass exertion and the final pass push. It’s also a reminder that high altitude isn’t only about climbing; it’s also about standing still and letting your eyes take in the scale.
Renjo La (5360m) and the Return to Namche
Day 12 is the last pass: Renjo La at 5,360m. You start early and hike on a snow-filled path up to the top, with enthralling views back toward Cho and the Gokyo region.
What to watch for:
- Snow surfaces can be slow. Give yourself time and don’t try to “make up pace.”
- By now, your legs will know they’ve done the work. Keep your form smooth.
Day 13 is the descent back toward Namche, described as more relaxed on an easier trail. You can enjoy surrounding scenery and get distant views of Everest and other mountains.
Day 14 is your final trek day: Namche to Lukla. You cross villages, forests, and rivers over suspension bridges and reach Lukla. You rest and explore the market afterward.
This is the day where it feels good to be moving again, but it also becomes a “finish strong” test. Watch your knees on descents and keep hydration going.
Lukla Back to Kathmandu: Flights and the Last Mountain Glance
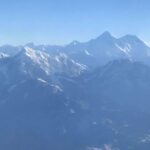
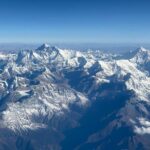
Day 15 is the return flight: Lukla to Kathmandu in the early morning. You should see lush green hills and snow-capped mountains during the flight.
It’s the moment you’ll realize how much you’ve climbed and how much the region changes day to day.
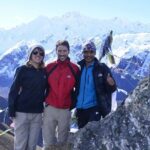
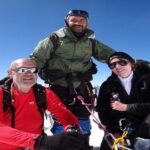
Guides, Team Energy, and Why It Shows Up on Tough Days
Even with a strong route, a trek like this lives or dies on how the team manages pace, safety, and morale.
From past experiences with this kind of operator structure, you may work with guides including Nabracht and others like Shiva and Jwala, along with Sherpas such as Bhim and Ram. You’ll also likely feel the kind of organization where the owner—Shree—is involved enough that trips run smoothly.
What you should care about practically:
- A good guide helps you pace for altitude and pass days.
- Clear support makes the “hard day” days feel less chaotic.
- When everyone knows the plan, you lose less time to confusion.
That’s the real value you feel on steep, cold days.
What’s Included (and What to Pack) for a Three-Pass Trek
The package is generous with core sleep and cold-weather items:
- Down jacket
- Sleeping bag
- Duffel/kit bag (returned after the trek)
You also get:
- Guesthouses during the trek (mainly twin sharing)
- National park permit + TIMS
- First aid medical kits
- Land transport and domestic airfare
- Meals (14 breakfasts, 14 lunches, 14 dinners)
What you still need:
- Personal trekking equipment
- Your own tips for staff (not included)
- Alcohol and personal drinks
- Laundry and hot showers
If you’re thinking about packing strategy, I’d prioritize rain protection, layers for cold pass nights/mornings, and footwear you trust. The altitude is the main drama, not fashion.
Weather Reality Check: Why Flexibility Is Part of the Deal
This trek requires good weather. The plan includes domestic flights, and pass days depend on conditions—especially with an ice-covered Cho La and snow-filled Renjo La.
So your best “gear” is flexibility:
- Start early when instructed.
- Don’t assume you can speed up bad weather.
- Keep a calm, patient mindset.
It’s not about being tough. It’s about being smart.
Who Should Book This Everest Three Pass Trek (and Who Should Skip It)
This trek suits you if:
- You have strong physical fitness
- You’re comfortable with steep uphill days and high altitude
- You want a structured itinerary with acclimatization stops and guide support
- You’d rather carry less because sleeping and cold gear are provided
You might want to think twice if:
- You want a lighter, easier “Everest views” hike only
- You get anxious on bridges, steep terrain, or icy paths
- You struggle with cold mornings and early starts
This is a serious trekking route. It’s also a meaningful one.
Should You Book It?
If you want a high-altitude Everest region trek that covers real passes—Kongma La, Cho La, Renjo La—with a payoff day at Kala Patthar, this is the kind of trip that makes sense. The included permits, guide, porter support, and key cold-weather gear make it feel more controlled than many self-planned treks.
I’d book it if you’re fit, patient, and ready for altitude. I wouldn’t book it if you’re looking for an easy walk or you’re not comfortable with cold, steep, and sometimes icy mountain travel.