REVIEW · KATHMANDU
Island Peak Climbing – 20 Days
Book on Viator →Operated by Annapurna Foothills Treks Expedition Pvt. Ltd. · Bookable on Viator
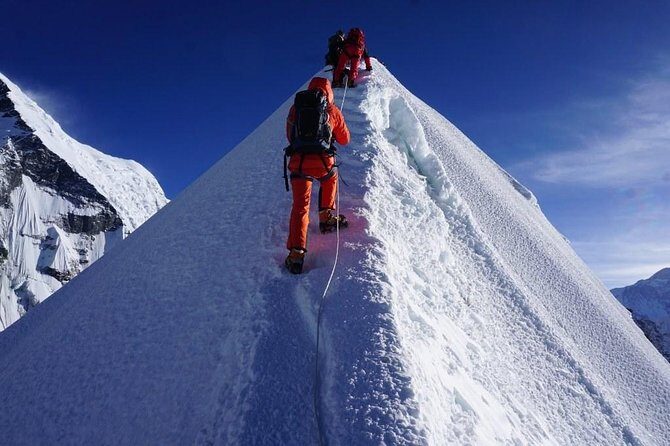
That 45-degree snow headwall is the whole point. This 20-day plan pairs the classic Everest-region trek with a real summit push on Island Peak and the exposed ridge above it. I love the way the schedule builds altitude slowly, then gives you a proper mountaineering step-up with pre-climb training before you go high. I also like the support you get throughout: an English-speaking, certified Sherpa guide plus full camping and climbing gear so you’re not scrambling at altitude. One thing to consider: this is weather-dependent, so your summit day needs flexibility even with a reserve plan.
You start in Kathmandu with a real prep day, then fly into the mountains and spend weeks moving upward on purpose—not just for cardio, but for safety. The trek brings you to big milestones like Everest Base Camp and Kala Pattar, and the reward is the view from Island Peak where giants crowd the horizon. The tradeoff is time and effort: you’ll be walking many hours each day, and the end of the trip is as demanding as the start.
In This Review
- Key highlights
- Why Island Peak feels like an Everest-region training climb
- Kathmandu warm-up: prep day, welcome dinner, and real planning time
- Lukla flight and the first trekking rhythm to Phakding and Namche
- Smart acclimatization around Namche to Dingbuche (the climb insurance plan)
- Everest Base Camp and Kala Pattar: the days with the biggest “wow” per hour
- From Dingboche to Island Peak Base Camp: switching gears to mountaineering
- Summit day on Island Peak: the headwall, the ridge, and the long return
- Why the reserve day matters (even when you’re sure weather will cooperate)
- Head back to Lukla, fly out to Kathmandu, then actually rest
- Price and value: what $3,250 per person really covers
- Who this trip fits best (and who should think twice)
- Final verdict: should you book?
- FAQ
- What is the tour starting and ending meeting point?
- What’s included in the price for this Island Peak trip?
- Do I need travel insurance?
- What permits and fees are covered?
- Is there a reserve day for weather?
- What about visa and meals in Kathmandu?
- Is this a private group trip?
Key highlights
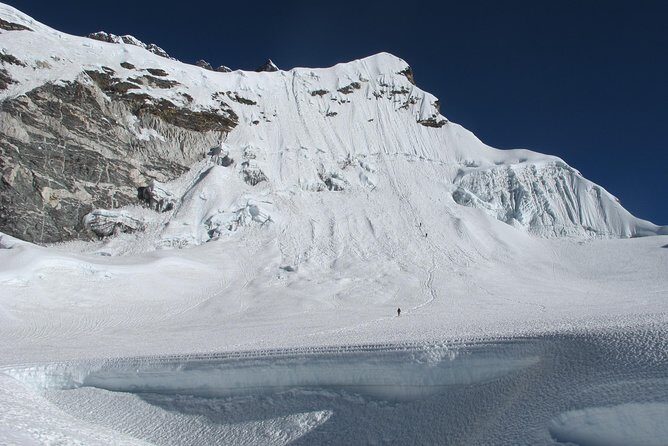
- Island Peak’s 300-meter, 45-degree snow headwall leading onto an exposed summit ridge
- Everest Base Camp and Kala Pattar built into the trek for a true Everest-region training arc
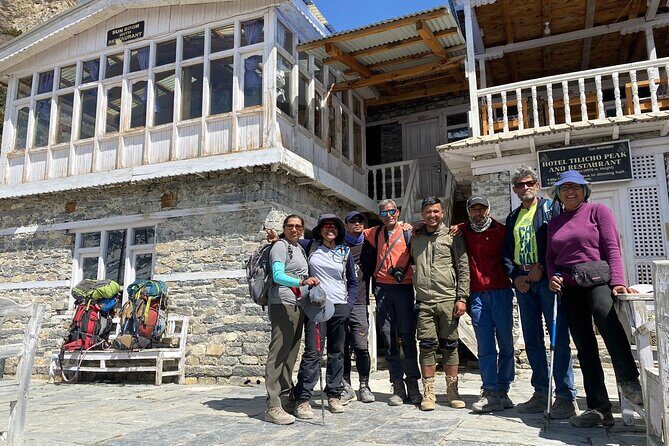
- Certified, English-speaking Sherpa guidance with climbing-focused support (teams like Tenzing and Mingma have been praised for taking care of groups)
- Permits and park fees handled (Island Peak climbing permit, Sagarmatha National Park fee, TIMS, and required documentation)
- One porter for two trekkers plus trekking cook and support staff to keep you moving efficiently
Why Island Peak feels like an Everest-region training climb
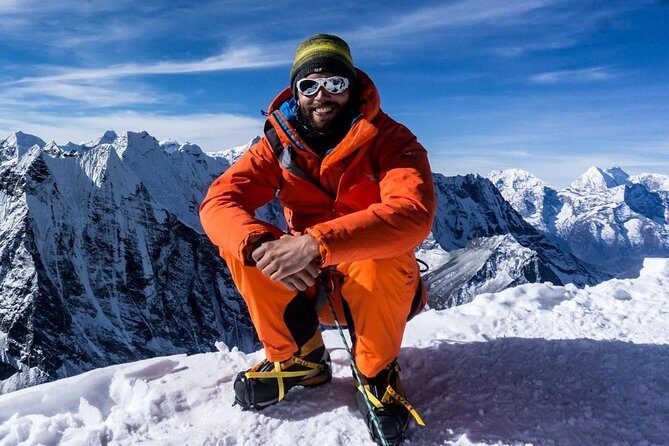
Island Peak (6189m) sits right in that sweet spot for climbers. It’s high enough to feel serious, but it’s also paired with a trek that takes you through the Everest Base Camp world at a realistic pace. You’re not just walking from lodge to lodge; you’re learning how mountain travel changes your body, your planning, and your habits.
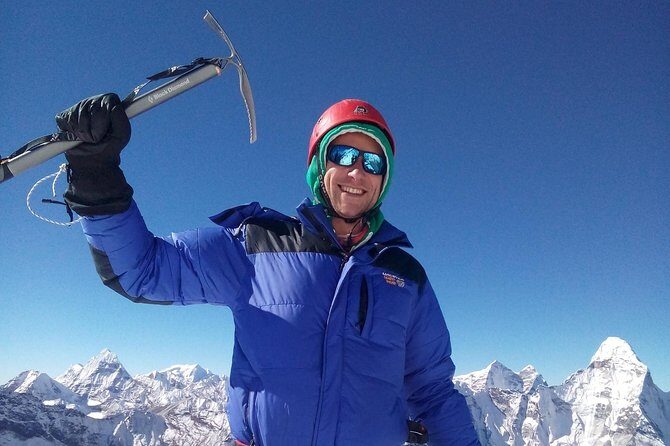
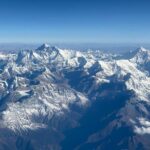
The summit payoff is not subtle. From the top, you can look out toward Nuptse, Lhotse, Lhotse Middle Peak, and the unclimbed Lhotse Shar, plus the Makalu pyramid to the east. If you get clear weather, the view stretches in multiple directions—Baruntse and Ama Dablam to the south, and the frozen waves of the Lhotse Shar Glacier in the mix. That’s the kind of horizon you remember long after your legs have recovered.
You can also read our reviews of more tours and experiences in Kathmandu.
Kathmandu warm-up: prep day, welcome dinner, and real planning time
You’ll begin in Thamel, Kathmandu, where this trip starts and ends. After arrival, you get a preparation day in Kathmandu, which matters more than people think. At 5000m and above, the smallest mistakes get expensive, and your prep day is where you handle the details so your body doesn’t have to.
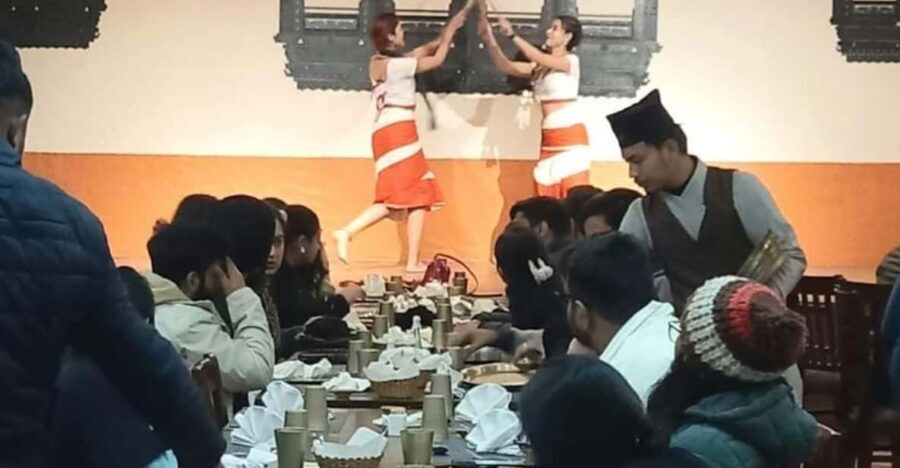
You also get four nights in Kathmandu on a twin-share bed and breakfast basis. On top of that, there’s an authentic Nepali welcome dinner with a live cultural program, which is a nice morale boost before you head for thinner air and colder nights. Planning is part of the trip, not separate from it.
One practical plus: this operator includes a lot of the paperwork costs in the package. That includes permits and fees needed for the trek and climb, which can save you time and stress once you’re already on the schedule clock.
Lukla flight and the first trekking rhythm to Phakding and Namche
The journey pivots quickly once you fly to Lukla. Your first trek day runs about four hours to Phakding, and that’s a good length to get your breathing settled. You’re moving at lower altitude, but you’re also starting the mental habit of hiking slowly and steadily—because the fast pace is what makes people pay later.
Then you push onward to Namche Bazaar, around six to seven hours. Namche is where the Everest region starts to feel like its own ecosystem: village life, lodge networks, and a steady stream of hikers sorting themselves by pace. If you’ve never hiked in the Himalaya before, Namche is where you learn what “normal” looks like when the air gets thinner.
The first big consideration here is pacing. Your goal is not to conquer the trail by lunch. Your goal is to stay controlled so your acclimatization days work the way they’re supposed to.
Smart acclimatization around Namche to Dingbuche (the climb insurance plan)
This trip uses acclimatization like a tool, not like an optional extra. After reaching Namche, you get an acclimatization day with trekking around the area, plus additional days later designed to raise your altitude gradually. That matters because your summit success depends on how well your body adapts before the big snow-and-ridge work.
You continue to Tengboche in about five to six hours, then to Dingboche in around five hours. Those are classic Everest-route waypoints, and the main value is how they set up the next step: higher altitude with smarter rest periods.
On the acclimatization day near Dingboche, you’ll hike either Nagarjun Hill or the Chhukung Valley. Those choices are about giving you altitude exposure without jumping straight to the highest camp. The idea is simple: you want your body to learn the new altitude, not fight it.
If you’ve got a history of altitude issues, this is where you’ll appreciate a guided plan. Your pace and routine get managed for you, and that lowers the chance you’ll overdo it when excitement hits.
Everest Base Camp and Kala Pattar: the days with the biggest “wow” per hour
The itinerary continues upward to Lobuche (about five hours). After that comes Gorak Shep, roughly a three-hour walk, and then the hike on to Everest Base Camp. This is one of those stretches where the effort feels constant, but the scenery changes in a way that makes you forget you’re tired—until you stop.
Your climb to Kala Pattar follows, with a descent back down to Dingboche afterward. Kala Pattar sits at around 5545m, and it’s famous for a reason: the views help you understand the scale of the Everest massif like nothing else. Expect long, effort-heavy movement on that day. You’ll likely start early, because weather can close in and because cooler conditions can feel easier on your body.
Then you go back down to Dingboche for a recovery window. That downshift is not wasted time—it’s what makes the next mountain phase possible.
From Dingboche to Island Peak Base Camp: switching gears to mountaineering
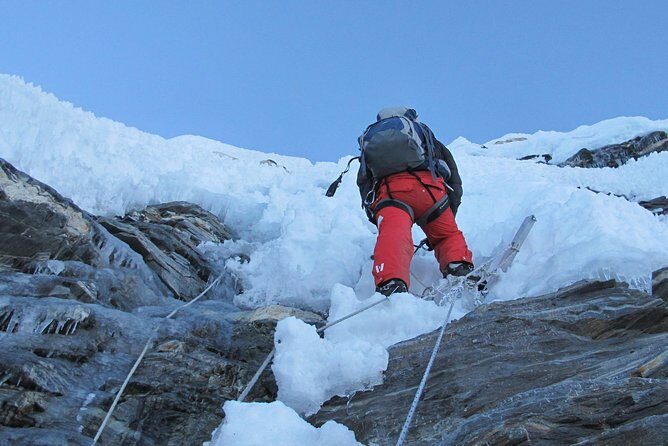
The trip shifts from trekking mode to climbing mode around Chhukung and Island Peak Base Camp. You’ll move from Dingboche to Chhukung, then head toward base camp at roughly 5200m in about three to four hours. This is the moment where your day-to-day rhythm changes again, because now you’re preparing to walk on snow and ice in steeper terrain.
Day 13 includes pre-climb training, then a trek to High Camp around 5450m. High Camp is short in hiking time (about two hours), but it’s heavy in meaning. You’re testing how you move with climbing gear, and you’re getting your mind ready for the summit push.
The practical value of this training is that it makes the summit day less mysterious. Even experienced hikers find that snow travel asks different questions—foot placement, balance, and how your body responds to cold and effort at altitude.
Summit day on Island Peak: the headwall, the ridge, and the long return
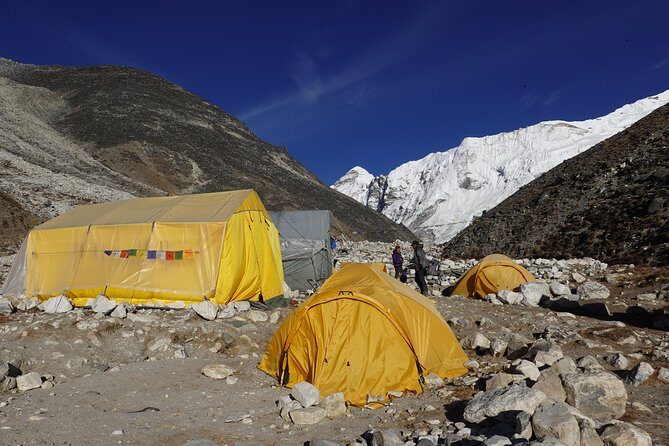
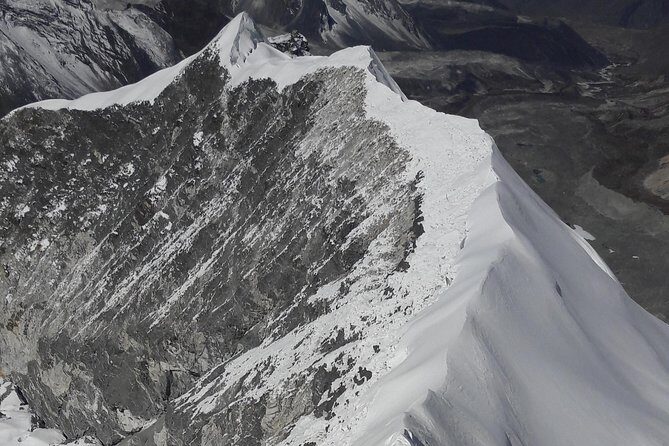
Here’s the part people talk about for a reason: Island Peak involves a 300-meter headwall of 45-degree snow slopes leading to the exposed summit ridge. That’s not a gentle incline where you can powerwalk your way through. It’s deliberate movement, steady tempo, and trust in technique and team pacing.
The summit push itself runs roughly 10 to 12 hours, and you’ll descend afterward back to Chhukung. A long day like that means you’ll want strong decision-making habits early: how you manage energy, how you sip and eat, and how you handle cold stress before it becomes a problem.
On a clear day, the views from the top are the kind of payoff that makes the whole trek feel like one continuous lesson. You can see Nuptse and Lhotse, with Lhotse Middle Peak and the unclimbed Lhotse Shar contributing to that jagged skyline. To the east, Makalu stands out as a perfect pyramid, and you can also take in the Lhotse Shar Glacier. To the south, Baruntse and Ama Dablam round out the horizon.
Why the reserve day matters (even when you’re sure weather will cooperate)
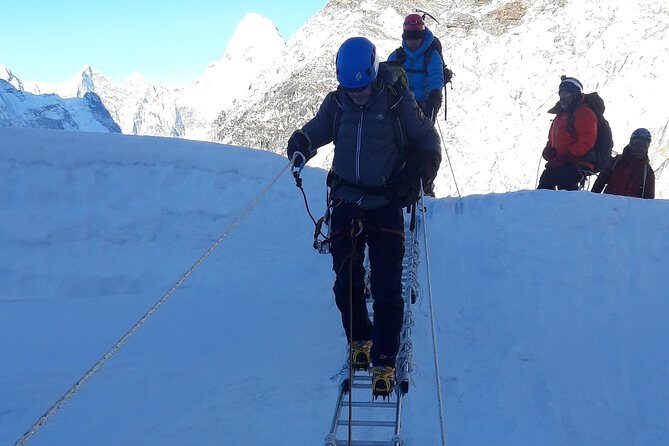
Even the best planning can’t override the sky. This trip includes a reserve day in case conditions aren’t good. That’s not just a safety cushion—it’s part of how you protect your odds.
Weather problems are most punishing at higher elevations. If you try to force a summit attempt when visibility is poor or conditions are unstable, it turns a climb into a gamble. Having a reserve day gives the group a controlled response, rather than a frantic one.
After the summit and descent to Chhukung, you still have real hiking ahead. Then comes the return trek toward Namche, then back down to Lukla for the flight.
Head back to Lukla, fly out to Kathmandu, then actually rest
After the climbing phase, you trek back to Namche (around seven to eight hours), then continue to Lukla (about seven to eight hours). That’s classic mountain wear-and-tear walking: not always steep, but long enough to make your knees negotiate with gravity.
You then fly from Lukla to Kathmandu and get time back in the city. There’s a free day in Kathmandu before departure, which is a big quality-of-life factor if you want a final meal with real comfort and zero layers of cold.
Because your ground logistics are handled—private vehicle transfer airport to hotel to airport—you can focus on recovery rather than hunting for rides with your altitude face still on.
Price and value: what $3,250 per person really covers
At $3,250 per person, the question isn’t just affordability. It’s whether the package reduces the expensive hassles that usually come with an Everest-region trek plus a high-mountain climb.
Here’s what you’re getting inside the price:
- Round-trip airfare between Kathmandu and Lukla (with airport tax included)
- Private transfers airport–hotel–airport in a car/van/Hi-ace/coaster
- Kathmandu lodging for four nights on twin-share bed and breakfast
- Trek lodging for 13 nights in local lodges with breakfast, lunch, and dinner
- Camping meals for one night at base camp and one night at high camp
- English-speaking experienced and certified Sherpa guide (government trained/license holder)
- A full support crew: trekking cook, kitchen staff, Trek Sherpa, and other support staff
- Porters: one porter for two trekkers
- Island Peak permit, Sagarmatha National Park fee, TIMS, and required documentation
- All camping equipment (including sleeping tents/mattresses and kitchen tent/equipment)
- Climbing personal and group equipment and gears (as listed in the included section)
- A first aid medicine kit and energy supplies (Snickers/Mars/Bounty plus fresh/canned fruit)
Now compare that to what usually costs extra if you plan pieces yourself: permits, guide time, equipment rentals, and the logistics of moving people and gear between villages and camps. This itinerary also includes a pretty critical ingredient for value: staff who manage camp life and food so you can keep hiking and climbing without turning the trip into a project.
What’s not included is also clear:
- Personal travel insurance
- Nepal entry visa fee
- Lunch and dinner in cities (budget $10–$14 per meal in tourist restaurants)
- Beverages like soft drinks, mineral water, boiled water, and beer
- Tips for guide/porters/driver
- Other personal expenses
One more note: the tour is listed as non-refundable and not changeable for any reason. If you buy this, buy it because you’re ready to commit and because you understand weather risk can still happen.
Who this trip fits best (and who should think twice)
You’ll be happiest on this plan if you want a structured trek that builds to a serious climbing day. The operator explicitly calls for a strong physical fitness level, and the route delivers: long walking days, high-altitude acclimatization, and then summit effort on snow.
This is especially good for you if you want one package that ties together:
- Everest-region trekking with base camp and Kala Pattar
- Mountaineering support with training and high-camp preparation
- A team setup that uses porters (one porter for two trekkers) so you’re not carrying everything yourself
This may be less ideal if you hate long days, dislike cold environments, or want a purely social, low-effort hike. The whole point of Island Peak is that final steep challenge, and your body has to show up.
Final verdict: should you book?
If you’re chasing that rare mix of big trekking achievement and real summit climbing, this 20-day Island Peak plan makes sense. I like that so much is taken care of—permits, guide support, camping gear, airfare, and food logistics—so you can focus on pacing and preparation instead of chasing details.
I’d book this if you’re honest about your fitness, you can handle cold and long days, and you want the Everest Base Camp experience paired with a high-mountain finish. If you’re unsure you can handle a snow headwall and a long summit day, don’t guess—talk with a guide first and be realistic.
FAQ
What is the tour starting and ending meeting point?
The start is Thamel, Kathmandu 44600, Nepal, and the activity ends back at the same meeting point.
What’s included in the price for this Island Peak trip?
The package includes airport–hotel–airport private transfers, Kathmandu lodging (four nights, twin share, bed and breakfast), trek lodge accommodation (13 nights with breakfast/lunch/dinner), camping for one night at base camp and one night at high camp, an English-speaking certified Sherpa guide plus support staff, porter support (one porter for two trekkers), permits and park fees (including Island Peak permit, Sagarmatha National Park fee, and TIMS), round-trip airfare Kathmandu–Lukla (airport tax included), first aid kit, energy supplies, and listed climbing and camping equipment.
Do I need travel insurance?
Yes. Personal travel insurance is not included.
What permits and fees are covered?
Included are the Island Peak climbing permit, Sagarmatha National Park fee, TIMS permits, and all required permits or official documentation.
Is there a reserve day for weather?
Yes. The itinerary includes a reserve day in case of unfavorable weather.
What about visa and meals in Kathmandu?
Nepal entry visa fees are not included. Also, lunch and dinner in cities are not included; the guidance is to allow $10 to $14 per meal at tourist restaurants.
Is this a private group trip?
Yes. It is listed as a private tour/activity, so only your group participates.