REVIEW · KATHMANDU
Everest Base Camp Trek – 15 days
Book on Viator →Operated by Outshine Adventure Pvt Ltd · Bookable on Viator
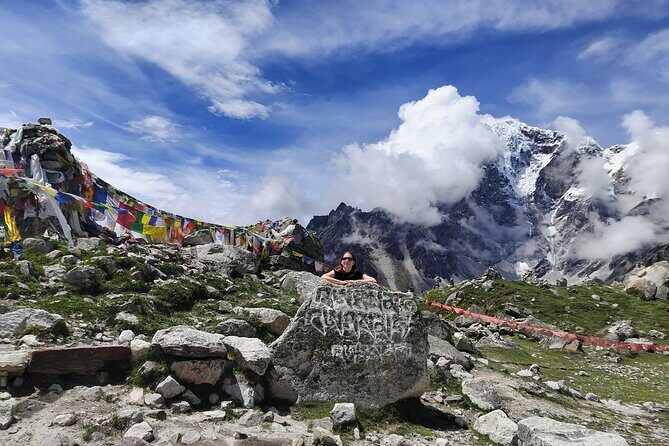
One plane ride away from Everest’s doorstep. This 15-day Everest Base Camp trek pairs classic Lukla-to-Base Camp logistics with Sherpa-led pacing and cultural stops, including a Kathmandu orientation before you ever step onto a trail. I also like that the plan explicitly targets big viewpoints like Kalapathar for sunrise, not just a check-the-box Base Camp photo. The main drawback to consider is that the itinerary still demands real altitude stamina, so you’ll want to take acclimatization seriously (and not treat any day as optional).
I like that the trip is capped at 15 travelers, which usually keeps things organized in busy villages and at teahouses. You’ll also get a strong support setup: licensed English-speaking guide, porters (shared for two people), and help with equipment if you need a down jacket or sleeping bag. Just keep your budget honest—city entrance fees, tips, and most meals are not included.
In This Review
- Key points worth knowing before you go
- Kathmandu first: how you set yourself up for Everest
- The Lukla flight: thrilling, yes, but plan for reality
- Trek Day by Day: what each section really feels like
- Day 3: Lukla down to Phakding (easy start, mountain energy)
- Day 4: Phakding to Namche Bazar (850m climb and a reality check)
- Day 5: Rest and Everest View Hotel (acclimatization with big payoff)
- Day 6: Namche to Tengboche (monastery atmosphere and Ama Dablam views)
- Day 7: Tengboche to Dingboche (rhododendron trail and Imjatse Valley)
- Day 8: Dingboche to Chhukung Valley and back (optional-feeling effort, real altitude work)
- Day 9: Dingboche to Lobuche (frozen-river vibe and Icefall proximity)
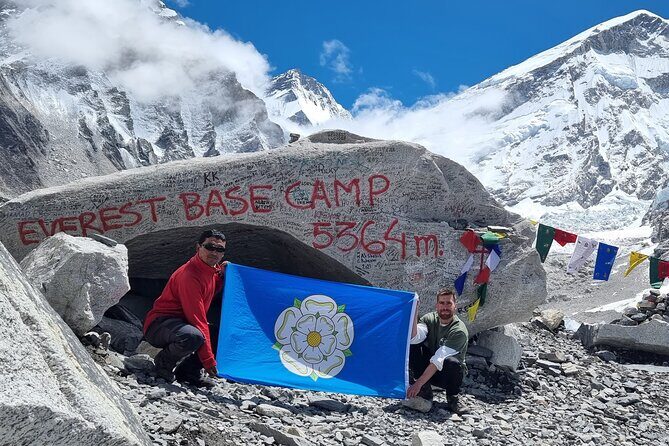
- Day 10: Lobuche area to Gorakshep, then Everest Base Camp (the “we’re here” day)
- Day 11: Kalapathar sunrise viewpoint (the long, worth-it payoff)
- Day 12: Kalapathar day to Namche Bazar (downhill is easy on paper, still work in practice)
- Day 13: Namche Bazar to Lukla (final trekking leg)
- Day 14: Lukla back to Kathmandu (brief joy, then rest)
- Day 15: depart Kathmandu
- Accommodation and food: what’s included, what you’ll still pay for
- Guides, porters, and how support affects your whole day
- Price and logistics: is $1,375 actually good value?
- Who this trek suits best (and who should think twice)
- Should you book this Everest Base Camp trek?
- FAQ
- What’s included for flights and transportation?
- How many nights do you stay in Kathmandu?
- What kind of accommodation do you get on the trek?
- Are meals fully included during the trek?
- Do you provide trekking gear?
- Is there a limit on group size?
Key points worth knowing before you go
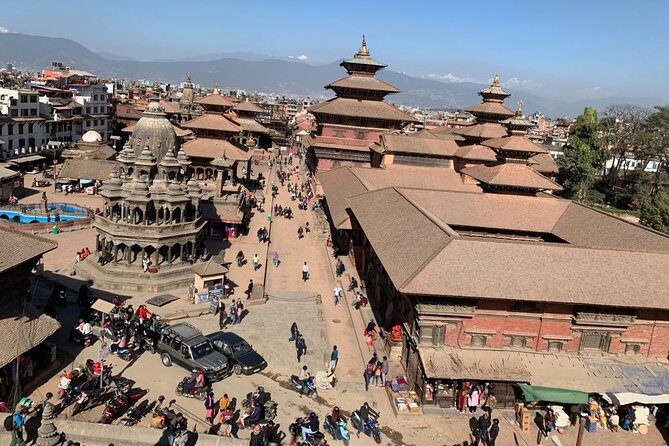
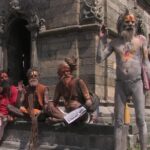
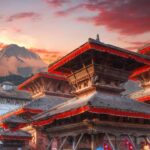
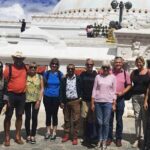
- Kathmandu warm-up before altitude: Durbar Square plus Swayambhunath, Boudhanath, and Pashupatinath with a private guide and car.
- Lukla flight built into the trek: Kathmandu–Lukla–Kathmandu flights are included, so you’re not piecing anything together.
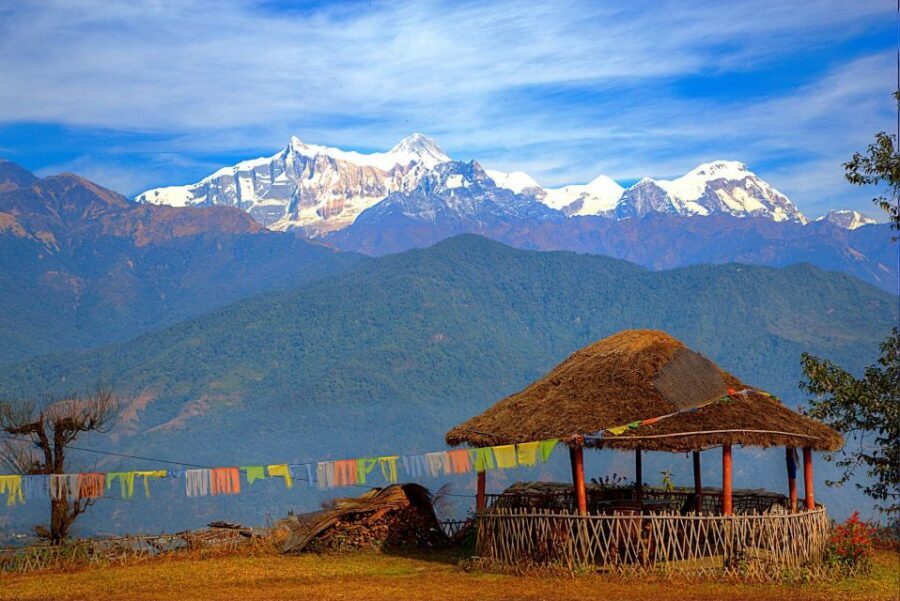
- Guesthouses on the trail: Twin-share guesthouse accommodation keeps you close to real trekking life.
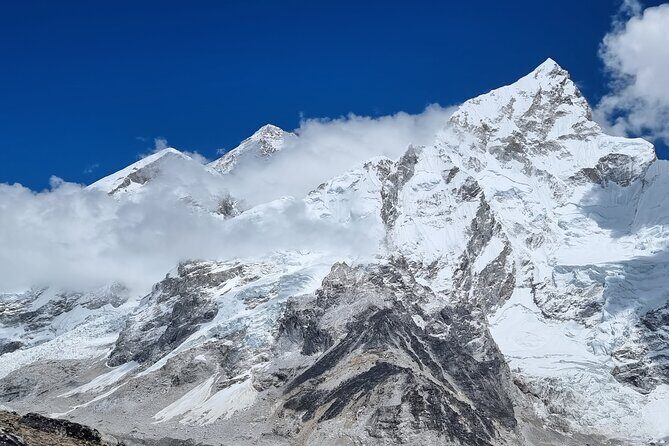
- Two “big sky” days: Everest Base Camp and the Kalapathar sunrise viewpoint (about 5,545m).
- Staff support includes the essentials: Porters carry your luggage, and your guide/crew logistics are covered (with insurance, equipment, and medicine for staff).
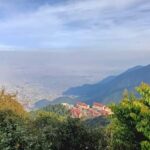
Kathmandu first: how you set yourself up for Everest
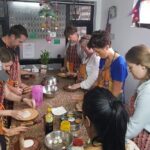
Day 1 and Day 2 are your buffer against jet lag and decision fatigue. You land at Tribhuvan International Airport, then you’re met by an Outshine Aventure airport representative (with a nameplate) and transferred to your Kathmandu hotel. After check-in, there’s documentation and trip information—useful if you want to clarify what you should carry, what you can rent or buy in advance, and how the first trekking days will feel.
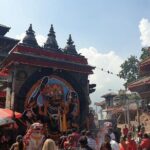
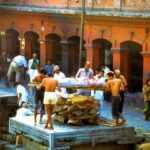
On Day 2, you get a guided Kathmandu sightseeing run by private car: Kathmandu Durbar Square, Swayambhunath, Boudhanath, and Pashupatinath. This is not just sightseeing; it helps you understand the cultural setting you’ll keep seeing in the Khumbu region. If you’re planning to buy trekking basics, the afternoon window is there for equipment shopping or preparation. The one catch: admission fees for city monuments aren’t included, so keep some cash aside for entry tickets.
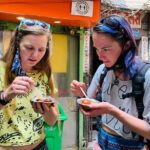
Practical tip: Kathmandu can be hectic. Even though the trek starts soon, use Day 2 for errands you don’t want to do later at altitude—simple stuff like spare warm layers, small gifts, or a few trail sundries.
You can also read our reviews of more hiking tours in Kathmandu
The Lukla flight: thrilling, yes, but plan for reality
Your trek begins with a short flight from Kathmandu to Lukla. The program has you breakfast at Lukla in a guest house, then you walk downhill to Phakding (about 200m lower, with around a 3-hour trek time). This is a smart first movement: you’re easing your body into hiking while already living with the reality of the Everest region’s thin air.
A Lukla flight is also the moment where weather rules everything. Your best strategy is a calm mindset: pack light, double-check essentials, and accept that scheduling can depend on conditions. The trip is organized around the flight being part of the plan—so if flights get disrupted, you’ll need patience more than control.
Trek Day by Day: what each section really feels like
Below is what the route is designed to do—how the climbs, rest days, and turns connect to acclimatization and views.
Day 3: Lukla down to Phakding (easy start, mountain energy)
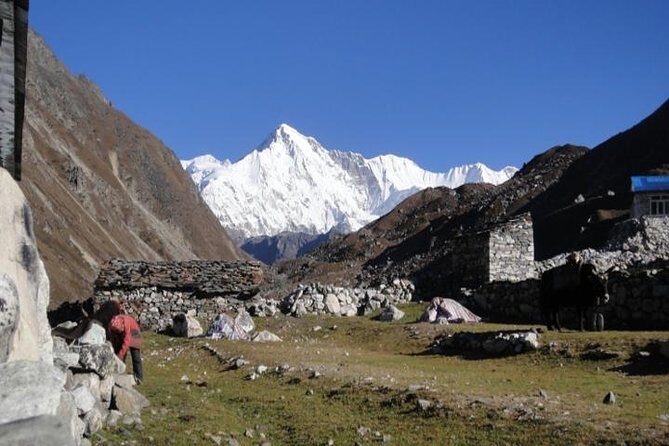
After your breakfast in Lukla, you trek down gradually along the Dudh Koshi river to Phakding. That “down first” approach matters: it helps you settle into rhythm without immediately hammering your legs. You’re also surrounded by early glimpses of the mountain scenery that makes Everest treks addictive.
The day is described as relatively gentle, and it gives you a chance to learn your gear: how your boots feel, how quickly you need water, and whether your layers are right.
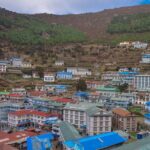
Day 4: Phakding to Namche Bazar (850m climb and a reality check)
Today you climb about 850 meters to Namche Bazar over roughly 5 hours, still following the Dudh Koshi river corridor. This is the first real climb on the trek, and it’s where many people feel the “Okay, this is serious” moment—especially if you went hard on sightseeing or sleep was off.
Namche Bazar is more than a waypoint. It’s a major trekking hub with shopping and supplies. The upside is that you can top up basics; the downside is you’ll likely want to slow down and not overdo it, even if the village is exciting.
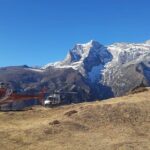
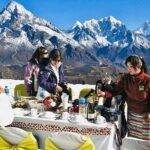
Day 5: Rest and Everest View Hotel (acclimatization with big payoff)
This is your built-in acclimatization day. You hike up to Everest View Hotel for a panoramic look at Everest and surrounding peaks—plus a tea break with the views. Then you descend back to Namche Bazar.
The value here is simple: it helps your body adapt while still giving you that unforgettable “wow” factor. If you’re tempted to rush the climb, resist it. Take your time. At altitude, pace is everything.
Day 6: Namche to Tengboche (monastery atmosphere and Ama Dablam views)
You trek to Tengboche in about 5 hours, arriving in a village known for Tengboche Gompa and monastery views. From this area, you’re in position to catch dramatic scenery, especially Ama Dablam.
The program notes that you can visit the monastery and see lamas doing worship in the morning and evening. Even if you’re not religious, it’s one of the most grounded parts of the trek: a reminder that people live here beyond the trekking circuit.
Day 7: Tengboche to Dingboche (rhododendron trail and Imjatse Valley)
Today takes you to Dingboche in around 5 hours. The route is described as gradually climbing, including rhododendron-covered areas and then into the Imjatse Valley. You pass large mani stupa points and continue toward a place where the mountains start to feel close enough to reach.
Views are a big theme: Ama Dablam and Kantega show prominently as you continue, and Dingboche is set up for more acclimatization-friendly time.
Day 8: Dingboche to Chhukung Valley and back (optional-feeling effort, real altitude work)
Another acclimatization day trip: Dingboche out to Chhukung Valley, then return. The program frames this as a chance to explore the area and enjoy the north face of Ama Dablam and the Lhotse–Nuptse ridge.
The payoff is not just scenery. It’s the training effect—your body gets more time at altitude without the same stress level as pushing to a much higher sleeping elevation.
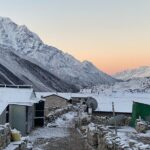
Day 9: Dingboche to Lobuche (frozen-river vibe and Icefall proximity)
You hike about 5 hours toward Lobuche, described as passing alongside frozen rivers with icy wilderness conditions and stone houses. From ridge tops and the track, the route aims for views of the Khumbu Icefall and peaks like Pumori.
Even when the day feels calm, this is emotionally heavy terrain. It’s the kind of place where you’ll understand why people keep coming back.
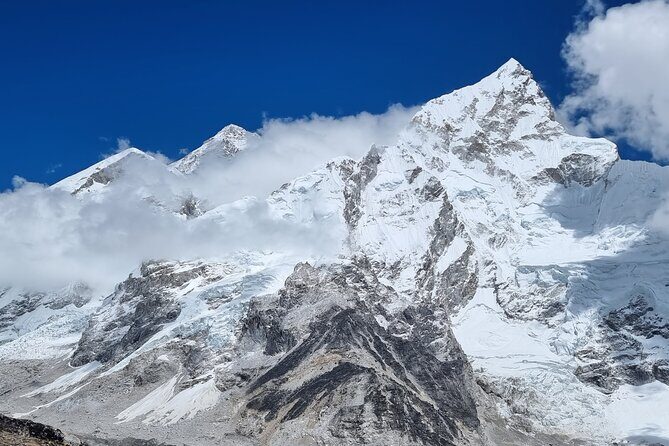
Day 10: Lobuche area to Gorakshep, then Everest Base Camp (the “we’re here” day)
Today is built around comfort and payoff. It takes about 3.5 hours to Gorakshep, and then you hike to Everest Base Camp and back for the night stay. The program notes a short look of the Khumbu Glacier on the way.
This is one of your central trek goals: reach Everest Base Camp (about 5,400m) and return while still having energy. The route description also mentions chances to hear avalanche sounds—your reminder that the scenery is alive and unpredictable.
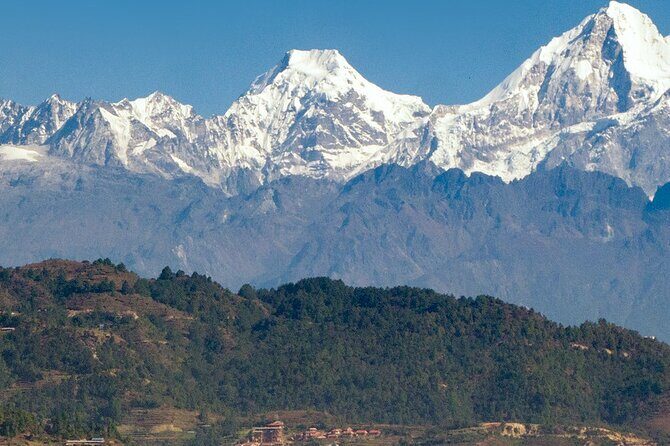
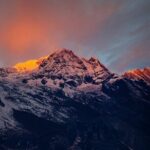
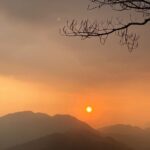
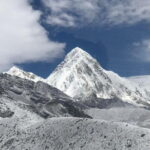
Day 11: Kalapathar sunrise viewpoint (the long, worth-it payoff)
You start early and climb to Kalapathar (about 5,545m) in roughly 6 hours total. This is the best viewpoint-style day on the whole trek: expansive views of Everest and many surrounding peaks, with the emotional boost that often comes when you’ve done the hard part and can still see the world clearly.
The program also notes you often feel better and less tired because of altitude acclimatization by this stage. That aligns with how the trek’s earlier rest and side hikes set you up.
Day 12: Kalapathar day to Namche Bazar (downhill is easy on paper, still work in practice)
Going back down takes around 6 hours to Namche Bazar. The program frames it as mostly downhill with great mountain views. This is where you’ll feel the difference between legs that can handle altitude and legs that can handle continuous descent.
Use the day to steady yourself. Get warm, keep your pace controlled, and let your body recover.
Day 13: Namche Bazar to Lukla (final trekking leg)
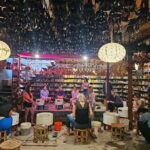
About 5.5 hours gets you back to Lukla, via Phakding. The description calls it a last-day trek with time to relax in Lukla afterward—bars, restaurants, and shops included in the village atmosphere.
This is also when many people buy small souvenirs they didn’t think of earlier. You’ll know what you’re missing by now: a warm layer, a gift, or a final snack you wish you’d had sooner.
Day 14: Lukla back to Kathmandu (brief joy, then rest)
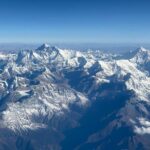
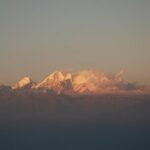
You fly from Lukla to Kathmandu after an early breakfast. The program highlights the chance to see panoramic Everest range through the small windows during the flight back—one last look at the “why did I do this?” view.
Then it’s back to city logistics: shower, laundry if you want it, and a proper meal.
Day 15: depart Kathmandu
After breakfast at your hotel, you’re transferred to the international airport based on flight time. The trek ends back at the meeting point (Tribhuvan Airport area), and the operator notes they can add activities if you have extra days.
Accommodation and food: what’s included, what you’ll still pay for
On the trail, you stay in guesthouses on a twin-sharing basis. Guesthouse accommodation is part of the real trekking vibe here: small rooms, shared dining spaces, and the comfort that comes from knowing the next night is arranged for you.
For Kathmandu, you get standard hotel accommodation for 3 nights. The program includes hotel pick-up and drop by private car, plus a guided city tour.
Food coverage is partial. The inclusions specify dinner and breakfast (2), and meals and drinks are listed as not included otherwise. Translation: you should budget for lunches and any drinks you want at tea houses or in towns. Don’t treat the mountain as a place where eating is automatic—plan snacks, hydration, and warm drinks.
Guides, porters, and how support affects your whole day
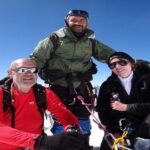
A big part of why this trek works is the staffing model. You get an expert licensed English-speaking Sherpa/trekking guide and porters to carry luggage during the trek (noted as shared for two people). The operator also includes staff insurance, equipment, medicine, salaries, and your own provided gear if needed (a down jacket and sleeping bag).
From a reader’s point of view, that translates into less mental load. You can focus on breathing, pace, and staying warm rather than carrying everything in a bag that feels like it’s doubling in weight at altitude.
If you’re the type who likes to learn while you hike, this tour’s structure also supports that: the route includes time where a guide can explain monuments and trekking context, including the monastery days and the Kathmandu cultural stops.
Price and logistics: is $1,375 actually good value?
At $1,375 per person (15 days, Kathmandu + trek + flights), the value is mostly in logistics that are hard to DIY: the Kathmandu–Lukla–Kathmandu flights, the pre-planned guesthouse nights, and having licensed guiding plus porter support.
This price also helps you avoid the “hidden work” of arranging altitude trekking basics—especially the early parts of the trip in Kathmandu and the flight-day stress around Lukla. In short, you’re paying for the structure that keeps you moving and reduces decision points.
Where you still need to budget: travel insurance (including altitude coverage is not included), city entrance fees, meals and drinks, and tips for trekking staff and the driver. If you don’t plan for those, the trek can feel more expensive than it looks on paper. Also, if you want additional comfort upgrades or extra activities beyond what’s described, you’d pay separately.
Who this trek suits best (and who should think twice)
This trek is aimed at people with moderate physical fitness and the patience to handle altitude day after day. The itinerary includes multiple climbing days, plus side trips for acclimatization, so it’s not for anyone wanting an easy walking vacation.
It fits well if you:
- Want a classic Everest Base Camp + Kalapathar outcome with structured acclimatization.
- Prefer guesthouse trekking over camping.
- Like having a guide handle the details, from city sightseeing timing to trek-day pacing.
If you struggle with sustained uphill effort, or if you get anxious about weather affecting flights, you’ll want to prepare mentally (and ask questions before you go).
Should you book this Everest Base Camp trek?
Yes—if you’re ready for altitude discipline and you want your hardest days supported. This itinerary is built around the right priorities: acclimatization days with viewpoint goals, a planned route from Lukla all the way to Everest Base Camp, and a sunrise-style highlight at Kalapathar.
Before you book, do three practical checks:
- Make sure your training and gear match cold-weather trekking, since the plan reaches above 5,500m.
- Confirm your travel insurance includes altitude coverage, since it’s not included in the package.
- Budget for lunches, city entrance tickets, and tips so you’re not stuck improvising at the worst possible time.
If that sounds like your style, this tour is a strong, organized way to earn those mountain views the hard way—without carrying the whole operation on your back.
FAQ
What’s included for flights and transportation?
Flight tickets are included for Kathmandu–Lukla–Kathmandu, and you also get hotel pick-up and drop by private car in Kathmandu.
How many nights do you stay in Kathmandu?
You stay in Kathmandu for 3 nights at a standard hotel, as included in the package.
What kind of accommodation do you get on the trek?
On the trek you stay in guesthouses on a twin-sharing basis.
Are meals fully included during the trek?
No. Dinner is included, and breakfast is included for 2 days. Meals and drinks are listed as not included otherwise.
Do you provide trekking gear?
The package includes a down jacket and sleeping bag provided by Outshine Adventure if necessary.
Is there a limit on group size?
Yes. The trek has a maximum of 15 travelers.