REVIEW · KATHMANDU
Kyajo Ri Peak Climbing
Book on Viator →Operated by Nepal Guide Treks and Expedition P. Ltd. · Bookable on Viator
Kyajo Ri is a serious climb with real payoff. You get a Kathmandu–Lukla scenic flight, then a trek into the Everest region through Sherpa villages before you’re finally dealing with altitude and glacier-climb decisions near the top. I also like that the trip is built around timing, not just effort—especially the plan for reaching the summit before midday winds show up.
My other favorite part is the way acclimatization is treated like a first-class feature. You rest in Namche Bazaar, then take more pressure off at base camp and again at Camp I before fixed ropes and crampons enter the picture. The one drawback to consider is that this is not a casual hike: you’ll be at high altitude for many days and the route includes technical sections, plus your Lukla flights can be weather-dependent.
In This Review
- Key things that make Kyajo Ri feel like the real deal
- Kyajo Ri at 6,186 meters: what the summit promise really means
- Kathmandu prep: UNESCO day sightseeing plus practical trip paperwork
- The Kathmandu–Lukla flight: why this part is both exciting and a little fragile
- Lower trekking to Phakding, Monjo, and Namche: the acclimatization starts early
- Namche Bazaar rest day: exploration that doubles as altitude training
- Bhote Khosi Valley to Mende: trading routes, waterfalls, and big scenery
- Kyajo Drangka and base camp: going remote, setting up for real climbs
- Camp I: stepping up to about 5,200 meters
- Camp II and the technical climb: fixed ropes and crampons
- Summit day: reaching Kyajo Ri before noon
- Descent back to Namche: recovery as part of the route
- Flight back to Kathmandu and a last round of city time
- Value and cost: is $3,350 worth it for Kyajo Ri?
- Who this trip fits best, and who should think twice
- Should you book Kyajo Ri Peak Climbing with Nepal Guide Treks and Expedition?
- FAQ
- FAQ
- What is the summit altitude for Kyajo Ri?
- How long is the Kyajo Ri Peak climbing trip?
- Where does the trip start and end?
- Is hotel pickup and drop-off included?
- Is a scenic flight included?
- What does the trip include for meals and lodging?
- Do I need to bring personal climbing gear?
- Is travel insurance included?
- How many porters are provided?
- Can I cancel for a full refund?
Key things that make Kyajo Ri feel like the real deal
- Kathmandu–Lukla scenic flight cuts travel time and drops you right into the Khumbu adventure zone
- Structured acclimatization with built-in rest days at Namche Bazaar, base camp, and Camp I
- Technical summit day approach with fixed ropes and crampons used on the higher sections
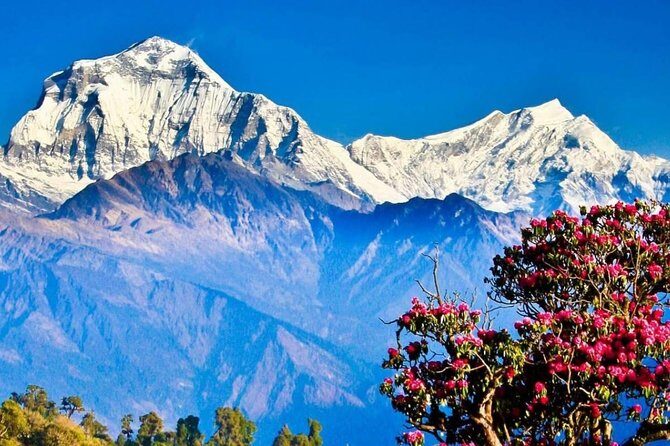
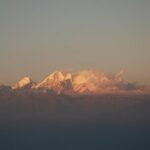
- Major Everest-area views on clear days of Everest, Lhotse, Makalu, Cho Oyu, Ama Dablam, and more
- Sherpa support team on the mountain with hands-on gear checks and camp setup
Kyajo Ri at 6,186 meters: what the summit promise really means
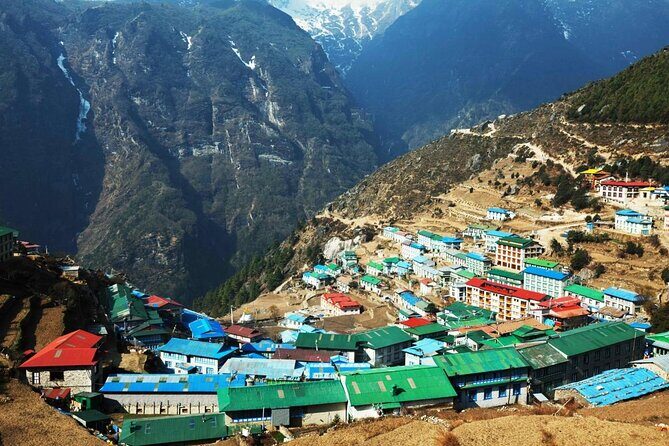
Kyajo Ri sits at 6,186 meters, and the trip is designed for you to earn those views step by step. You’re not just “going higher.” You’re repeatedly teaching your body how to handle altitude: lower trekking days, then real rest days, then higher camps, then a summit push.
What you’re aiming for is a specific kind of summit experience: early starts, careful pacing, and the ability to make good decisions when conditions change. The plan calls for starting the final climb early and targeting the summit before noon because strong winds after midday can make it impossible to continue.
This matters because it changes how you think about success. You’re not only training your legs. You’re training your judgment—how you respond to cold, fatigue, and the mental weight of climbing at altitude.
You can also read our reviews of more tours and experiences in Kathmandu.
Kathmandu prep: UNESCO day sightseeing plus practical trip paperwork
Your trip begins in Kathmandu with pickup and support from Nepal Guide Treks and Expedition. You’re met at Tribhuvan International Airport, transferred to a central hotel, and helped through check-in. In the evening, there’s a welcome dinner to get everyone organized and comfortable with the team.
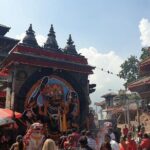
Day two is split between Kathmandu sights and trip preparation. The plan is to tour UNESCO sites in the Kathmandu Valley, but it’s honest about limits: you can’t see all of them in a single day. You’ll choose about 3–4 places for sightseeing, plus you’ll complete the paper work and make final preparations for Kyajo Ri.
I like this setup because it reduces last-minute stress. When you’re about to fly to Lukla and start trekking, you want your documents and logistics sorted early. It also gives you a chance to get oriented in Kathmandu without rushing.
If you arrive with time and energy, use your remaining Kathmandu afternoon to walk and get your bearings around central areas. When your departure day comes, you’ll feel calmer knowing you already know where you are.
The Kathmandu–Lukla flight: why this part is both exciting and a little fragile
On trekking Day 3, you take an early morning scenic mountain flight from Kathmandu to Lukla—the gateway to Khumbu and the Everest region. It’s short, dramatic, and it immediately changes the pace of the trip. You land, then start trekking right away, passing Sherpa villages and dense rhododendron forest along the Dudh Koshi River.
Here’s the practical catch: flights to Lukla depend on weather. In one example of the trip in action, a flight to Lukla was cancelled due to bad weather, and the group flew the next day. So build in flexibility. Your trekking start date may shift by a day depending on conditions.
If you’re the kind of person who gets stressed by schedule changes, talk with your guide early about how weather disruptions are handled. You’ll be more relaxed if you expect that possibility instead of being surprised by it.
Lower trekking to Phakding, Monjo, and Namche: the acclimatization starts early
After landing in Lukla, Day 3’s route heads toward Phakding. You’ll follow the river corridor, passing Sherpa settlements and rhododendron and pine forest. This section is important because it sets your routine: eat, hydrate, move steadily, and get used to the altitude gradually.
Day 4 is the long-trail day toward Namche Bazaar. You cross suspension bridges and pass through small villages like Benkar. You’ll cross the Dudh Koshi River again, then climb to Monjo, where the Everest National Park entry post becomes part of the process. After that, you descend over stone steps to another suspension bridge, cross, then climb again to arrive at Namche Bazaar—the Sherpa capital.
I like arriving in Namche because it feels like a “real town” at altitude, not just a staging area. It’s also where your body begins to realize it’s not in Kathmandu anymore.
One practical note: suspension bridges and stone steps are part of this route. Bring footwear that handles uneven ground, and take your time on the descents.
Namche Bazaar rest day: exploration that doubles as altitude training
By Day 5, you’re already technically over 3,000 meters. That makes the next day crucial. Today you rest at Namche Bazaar for acclimatization and exploration.
This is one of the best design choices in the plan. You’re high enough to benefit from being active, but you’re not yet high enough to risk overdoing it. You’ll have options for short hikes that also serve as altitude prep. Two named possibilities are:
- Hike toward Khunde Hospital, associated with Sir Edmund Hillary
- A one-hour hike to Syangboche for views of Everest, Lhotse, Cho Oyu, Nuptse, Thamserku, Kusum Kanguru, and Ama Dablam
Even if you only do one short hike, you’ll feel the difference. You’re getting circulation going, testing how your lungs respond, and seeing the mountain panorama you came for.
This is also a day where you can slow down mentally. Sit, eat well, and get sleep. That matters because future climbing days get harder.
Bhote Khosi Valley to Mende: trading routes, waterfalls, and big scenery
From Namche, Day 6 heads west toward the Bhote Khosi Valley, once a popular trading route into Tibet. The trail passes dense rhododendron forest, cascades of waterfalls, and views of Kwangde Peak to your left.
The path turns toward Thamo, then you climb steeply for about an hour to Mende, where you overnight. This “steep hour” matters because it teaches you what climbing feels like once you’re already at altitude. Don’t try to force speed. Focus on rhythm.
When you reach Mende, it’s a good moment to think ahead: the trip is moving from village trekking into more remote high-valley terrain.
Kyajo Drangka and base camp: going remote, setting up for real climbs
Day 7 is your move into Kyajo Drangka, an isolated broad valley south of Kyajo Ri. You follow a faint yak trail over passes, and the views expand: Thamserku, Kusum Kangaru, Kwangde Peak, Parchamo Peak, and other snow-capped peaks.
After a few hours uphill, you reach summer yak pasture ground and set up base camp. Your Sherpa crew handles camp setup and begins the checks needed for higher camps. This is the point where the trip stops feeling like a trek and starts feeling like an expedition.
Day 8 is base camp acclimatization at over 4,500 meters. This rest day isn’t wasted. You can hike locally for acclimatization and views while the Sherpa crew checks climbing gear. It’s also where you learn whether your altitude response is improving or getting worse.
If you’re prone to headaches, nausea, or unusual fatigue, this is where you take those warning signs seriously and follow your guide’s instructions.
Camp I: stepping up to about 5,200 meters
After the base camp rest day, Day 9 climbs toward Camp I at around 5,200 meters. The route goes over grassy spurs and boulders, then up a steep rocky trail to a campsite overlooking Kyajo Ri and glacial lakes.
This is a “work day,” but it’s also a transition. You’re moving into a zone where conditions can change faster—wind, cold, and the way your body feels at each hour of exertion.
Day 10 repeats the pattern on purpose: acclimatization at Camp I with additional hikes that help your body adjust. At the same time, your crew checks health conditions and confirms gear readiness for the summit attempt.
This is where you’ll appreciate the expedition mindset. It’s not only about reaching the top; it’s about getting there with the best chance of staying safe.
Camp II and the technical climb: fixed ropes and crampons
Day 11 is higher and more technical. You climb over rocks and glaciers using fixed ropes and crampons. Once you reach a campsite near a big glacial lake at about 5,700 meters, the Sherpa crew sets up quickly and prepares for the final summit climb the next day.
This day is a reality check. If you’ve never climbed with fixed lines, the best approach is to rely on your guide’s instruction and keep movements deliberate. Rushing is where mistakes happen.
Also, pay attention to how you conserve energy. At this height, a little efficiency goes a long way.
Summit day: reaching Kyajo Ri before noon
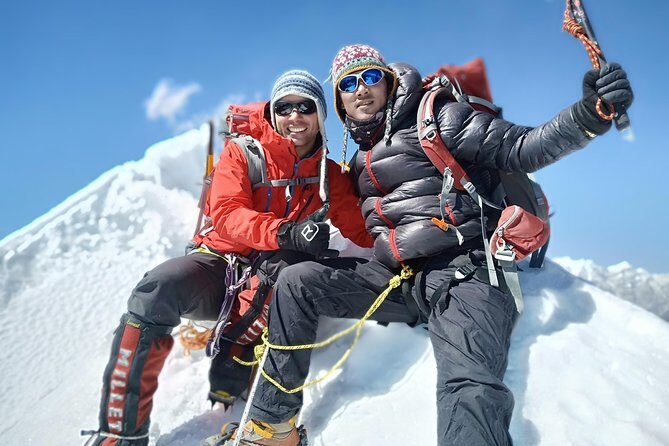
Day 12 starts early with a target: reach the summit before noon. The reason is simple—winds after midday can block progress.
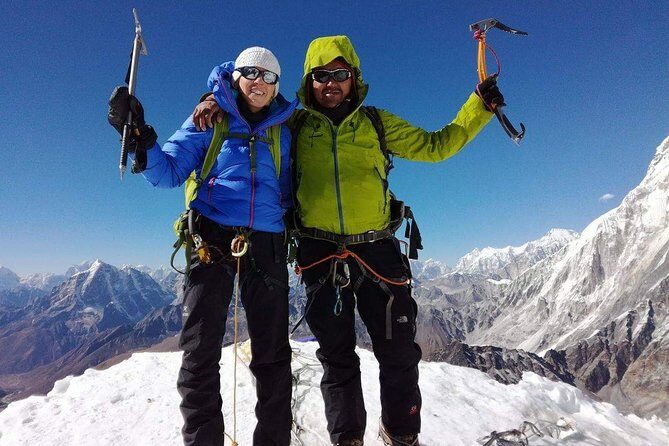
The climb includes several technical sections. You follow instructions from experienced climbing experts, then work your way toward the sharp summit of Kyajo Ri Peak at 6,186 meters. At the top, you get splendid panoramic views of Everest, Lhotse, Makalu, Cho Oyu, Baruntse, Ama Dablam, and more.
You’ll also learn something important about “the reward.” The summit time is short by design. Then it’s back down the same route to Camp II.
I like that the plan is clear about the climb-return rhythm. It reduces decision fatigue on the day. You know what you’re aiming for, and you know when you start turning that goal into descent.
Descent back to Namche: recovery as part of the route
Day 13 is your descent. After breakfast, you follow the route back from Camp II to Camp I, then continue down to base camp. Descents can be tough on your legs, so treat this as recovery work, not a victory lap.
Day 14 continues descent through Mende and back toward Namche. You leave alpine vegetation and enter sub-tropical forested terrain with rhododendron trees. The trek feels easier, but the altitude fatigue can linger—so you still keep a steady pace.
Day 15 is the walk to Lukla via Namche. You’ll pass dense rhododendron forest with only a few short uphill sections before descending to the Bhote Koshi River. The trail crosses it three times, then includes one last uphill climb of about forty-five minutes to reach Lukla. You land back in Lukla and celebrate the successful completion with your team.
A quick reality check: celebrate, but don’t ignore hydration and food. This is still trekking country, and you’ll feel better if you keep your recovery habits strong.
Flight back to Kathmandu and a last round of city time
Day 16 brings an early morning scenic flight from Lukla back to Kathmandu. After landing, you’re transferred to the hotel. If you still want more sightseeing, this is your second chance at UNESCO sites you didn’t cover on Day 2, plus time around Thamel market streets.
Day 17 ends with an airport drop-off timed to your international flight schedule.
This sequencing is smart. It gives you a proper final day to settle back into normal routines without packing up immediately after the trek.
Value and cost: is $3,350 worth it for Kyajo Ri?
At $3,350 per person, Kyajo Ri Peak climbing is priced like a true expedition, not a budget trek. The big value piece is what’s included:
- Meals (breakfast, lunch, dinner) and accommodation as per the route
- Taxes, national park fees, and handling charges
- A professional guide and one porter for every two people
- Hotel pickup and drop-off
- Scenic flight Kathmandu–Lukla–Kathmandu
That inclusion matters because altitude climbing drives costs up fast. Park fees, logistics, and the time and responsibility of a climbing team aren’t the stuff you want to budget-hammer your way through.
What’s not included is also important. You provide personal climbing gears, personal insurance, and tips for staff. If you don’t already have the right equipment or you haven’t budgeted for insurance, you’ll feel the cost gap quickly. The pricing makes most sense if you’re prepared to show up ready for a cold, technical mountain environment.
Who this trip fits best, and who should think twice
This is best for you if:
- You have strong physical fitness and you’re comfortable spending many days at altitude
- You want technical mountaineering components, including fixed ropes and crampons
- You like a trip that balances culture (Sherpa villages and daily life exposure) with a serious objective
- You want a guided expedition style with camp setup and gear checks handled by the crew
Think twice if:
- You get anxious about schedule changes due to weather, especially around Lukla flights
- You’re looking for a scenic trek only, with no technical glacier/rope sections
- You’re not prepared for the slow pacing needed for acclimatization
In plain terms: if you want a peak climb experience that feels disciplined and supported, Kyajo Ri delivers. If you want an easy hike with a summit sticker, this one isn’t built for that.
Should you book Kyajo Ri Peak Climbing with Nepal Guide Treks and Expedition?
I’d book it if you want Everest-area scenery with an expedition structure that takes acclimatization and technical climbing seriously. The plan is practical: rest days, staged camps, and a summit target tied to wind conditions. The Sherpa crew support and gear checks are also a big plus, and named climbing leaders like Dendi Sherpa and Sona Sherpa come through in examples of how the team runs the climb.
If you’re flexible with weather and you’re ready to train for high altitude, this is a strong choice. If not, you might be happier with a lower-altitude trekking program that avoids crampons and fixed ropes.
FAQ
FAQ
What is the summit altitude for Kyajo Ri?
Kyajo Ri Peak climbing targets a summit at 6,186 meters.
How long is the Kyajo Ri Peak climbing trip?
The duration is about 17 days.
Where does the trip start and end?
It starts in Kathmandu (Kathmandu Valley) and ends back at the meeting point.
Is hotel pickup and drop-off included?
Yes, hotel pickup and drop-off are included.
Is a scenic flight included?
Yes. The trip includes Kathmandu – Lukla – Kathmandu scenic flight.
What does the trip include for meals and lodging?
Breakfast, lunch, dinner, and accommodation are included as per the itinerary.
Do I need to bring personal climbing gear?
Yes. Personal climbing gears are not included.
Is travel insurance included?
No. Personal insurance is not included.
How many porters are provided?
The trip includes one porter for 2 people.
Can I cancel for a full refund?
You can cancel up to 24 hours in advance for a full refund.