REVIEW · KATHMANDU
Manaslu Circuit Trek
Book on Viator →Operated by Touch The Himalaya Treks & Expedition · Bookable on Viator
A quieter circuit with big-mountain payoffs. This trek takes you through Manaslu Conservation Area country, where Tibetan-influenced villages, prayer walls, and long river valleys lead to the high drama of Larkya La Pass. You’ll walk among glaciers, alpine forests, and Himalayan viewpoints—without the heavy crowds that many Everest-style routes get.
I especially like the way this itinerary mixes hard days with breathing room, including an acclimatization day in Samagaun (and optional hikes like Birendra Lake/Manaslu Base Camp or Pungen Gumpa). I also like the logistics: transfers from Kathmandu to Machha-Khola and back, plus permits and a local guide handled through Touch The Himalaya Treks & Expedition.
The main thing to consider is that you’re committing to real altitude work. You’ll reach over 5,000m on the pass day, and while teahouses keep you fed and sheltered, hot showers and extras like WiFi aren’t part of the standard package.
In This Review
- Key things to know before you go
- Why the Manaslu Circuit route feels special (and quieter)
- Price and value: what $589 buys you, and what you still pay for
- Day 1: Kathmandu logistics to Machha-Khola and your first river valley walk
- Days 2–3: Jagat, Philim, and Deng—forests, waterfalls, and mani-wall calm
- Day 4: Namrung—when the Ganesh and Shringi lineup gets clearer
- Day 5: Lho and the permit-check rhythm—oak, fir, rhododendron, and village breaks
- Days 6–7: Samagaun (Sama/Ryo) and acclimatization—360-degree days and optional hikes
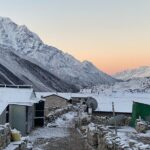
- Day 8: Samdo—slow climbing to a Tibetan refugee camp
- Days 9–10: Dharmasala to Bhimtang—Larkya La Pass, cameras charged and knees braced
- Day 11: Down to Tilje—sunrise views and the long downhill work
- Day 12: Tilje to Dharapani, then a jeep to Besisahar
- Permits and guides: why this trek stays organized in the best way
- Teahouses, comfort, and what to expect when facilities are basic
- Packing and fitness: how to prepare for a 5,000m pass
- Who should book this trek, and who should reconsider
- Should you book Touch The Himalaya’s Manaslu Circuit Trek?
- FAQ
- How long is the Manaslu Circuit Trek?
- Where does the trek start and end?
- What permits are included?
- Do I travel with a guide?
- Is pickup included?
- Are meals and accommodation included during the trek?
- Is WiFi available on the trek?
- Cancellation Policy (quick note)
Key things to know before you go
- Restricted-area trekking means fewer people and better-preserved trails
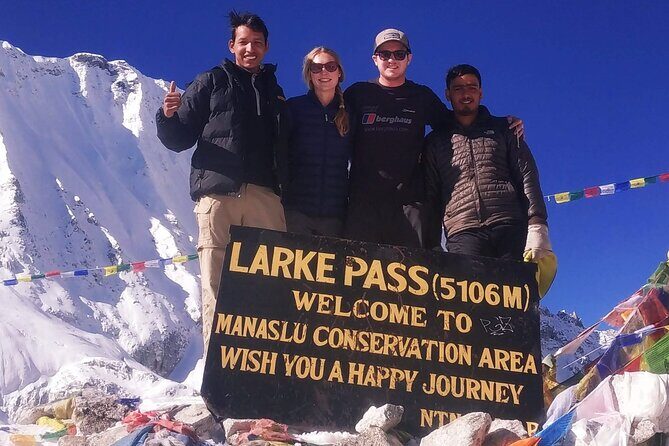
- Larkya La Pass is the storyline payoff at roughly 5,100–5,160m on this route
- Teahouses keep the trek practical at high altitude, even when facilities are basic
- Guides and support matter on a permit-heavy trek, with names like Roshan and Madan showing up repeatedly in experience stories
- Manaslu views stack daily—Ganesh Himal, Shringi, Kutang, Himal Chuli, and more show up as you climb
Why the Manaslu Circuit route feels special (and quieter)
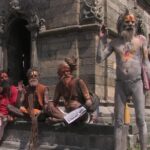
Manaslu isn’t just another “follow-the-trail” trek. It’s run as a restricted trekking area, which means you need the right paperwork and a registered guide—exactly the sort of gatekeeping that keeps the route from turning into a stampede. The result is a landscape that still feels remote, with slower village rhythms and a stronger sense of place.
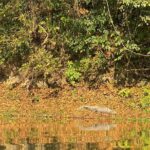
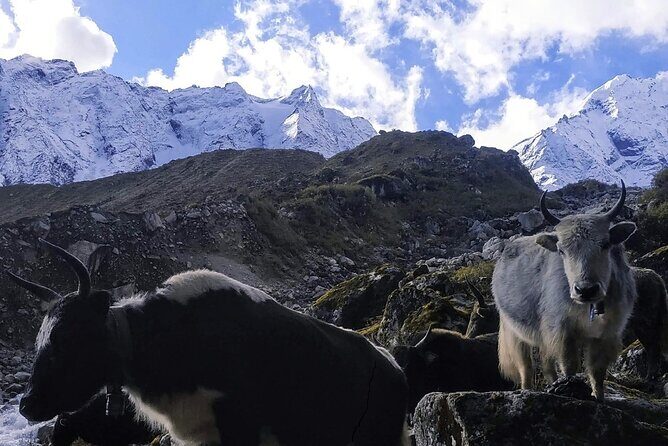
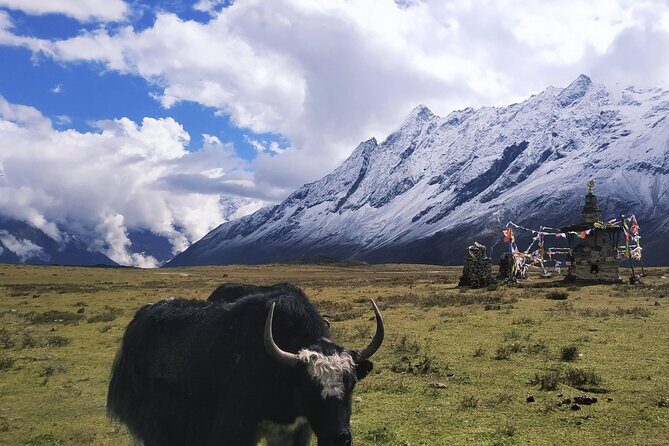
This area sits inside the Manaslu Conservation Area, so you’re walking in habitat where rare animals like snow leopards and red pandas are part of the bigger picture. Of course, you can’t plan on seeing wildlife on any given day, but knowing you’re in serious conservation country adds weight to every view.
You can also read our reviews of more hiking tours in Kathmandu
Price and value: what $589 buys you, and what you still pay for
At $589 per person, this is a value-focused setup for a trek that requires multiple permits and guided support. Included are key parts that usually cost extra if you DIY: transfers between Kathmandu and the trekking start/end, trekking permits (including ACAP, MCAP, Manaslu Restricted Area Permit, and TIMS), and an expert local guide with meals, accommodation, salary, and insurance.
Where your budget needs planning: the trek’s foods, drinks, and accommodation during the trek aren’t included in the base price (though they can be provided with an added charge). You’ll buy meals at tea houses along the way, and you should expect to pay for extras like hot showers, WiFi, and battery charging separately. If you’re the type who wants full-service comfort at every stop, you may spend more than you expect.
Day 1: Kathmandu logistics to Machha-Khola and your first river valley walk
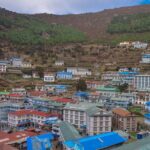
You start in Kathmandu with a pickup, then you head out by bus or private vehicle toward the trekking starting point at Machha-Khola. This first transfer matters more than it sounds: you’re trading city stress for river scenery early, and you’ll arrive ready to step into the Budhi Gandaki valley.
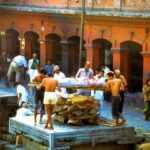
Machha-Khola is a tiny place known for local trade from the northern Gorkha region, and it sits on the bank of the Bhudhi Gandaki River. After dinner and an overnight stay there, you’re positioned for the next day’s forest trek into the villages.
A practical note: because this is a longer circuit, you’ll do better if you treat Day 1 as a “landing day.” Walk at an easy pace, keep water handy, and don’t use your first hours like they’re a fitness test.
Days 2–3: Jagat, Philim, and Deng—forests, waterfalls, and mani-wall calm
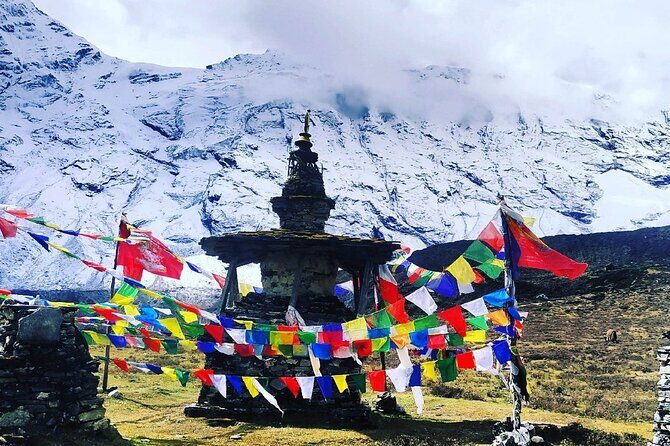
From Machha-Khola, the trek moves toward Jagat through forests where you might spot monkeys, birds, and deer. You’ll also pass mani walls, with stone inscriptions carrying Buddhist prayers—small roadside details that make the route feel lived-in, not just scenic.
Jagat is at the foot of the Ganesh Himal, and it’s a popular overnight stop with teahouses and lodges. That matters because it gives you a reliable rhythm: walk, eat, sleep, repeat—without the “where will we sleep tonight?” panic that comes with more rugged routes.
Day 3 continues toward Philim, then onward to Deng. This segment includes suspension bridge crossings over the Bhudi Gandaki River, so you’ll get used early to the steady, swinging feeling of highland bridges. Deng is a valley village with teahouses, making it another practical night with food options at hand.
Day 4: Namrung—when the Ganesh and Shringi lineup gets clearer
On this day, the trail drops you down to the riverside, crosses again, then climbs upward through segments like Ranagoan and onward toward Bihi Phedi and Ghapa, before reaching Namrung. It’s a classic “climb through scenery” day, with more slope time than the first couple days.
Namrung is where the Himalayan view starts to feel bigger and more personal. The route specifically calls out clear views of Ganesh, Shringi, and Kutang Himal, which is exactly what you want before the higher-altitude section takes over.
One consideration: this kind of day can feel straightforward until the afternoon fatigue hits. Keep your pace slow on the climbs, and don’t be surprised if you feel more “winded” than you did on lower trails even when the distance isn’t huge.
Day 5: Lho and the permit-check rhythm—oak, fir, rhododendron, and village breaks
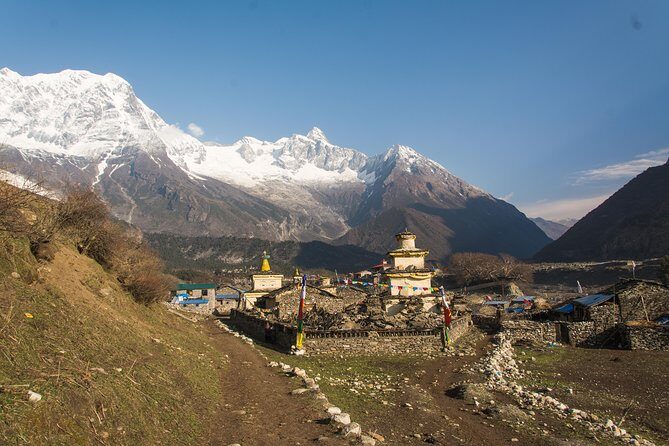
The day starts from Namrung, heading toward Lho via a forest corridor of oak, fir, and rhododendron. You’ll also hit a permit check post, where you show your trekking permit—one of the real reasons this route stays organized and preserved.
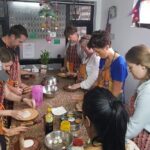
You’ll pass through villages including Lihi Gaon and Sho Goan before reaching Lho at around 3,280m. The plan includes lunch at a local restaurant in Lho and dinner at your lodge, which makes this a good day to refuel properly. Treat the meal breaks as part of the trek, not as a pause from it.
Days 6–7: Samagaun (Sama/Ryo) and acclimatization—360-degree days and optional hikes
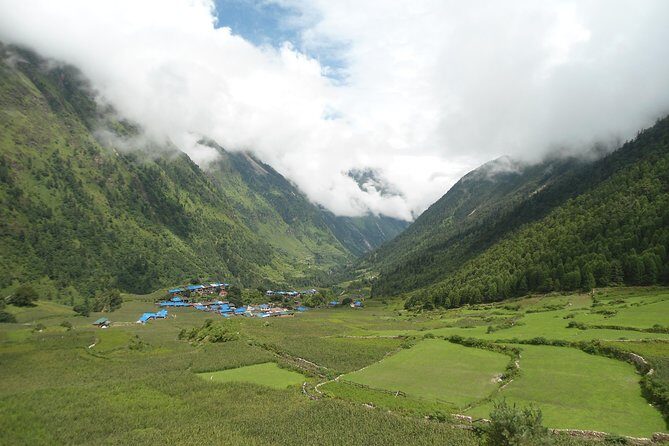
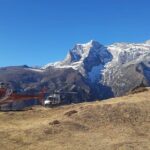
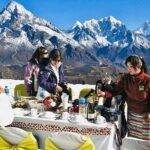
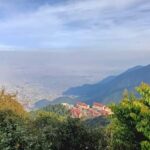
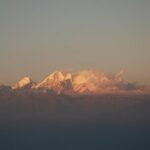
Next you reach Sama (Samagaun) after trekking through Shyala, a viewpoint stop where you can catch 360-degree Himalayan views. This is one of those days that makes photos feel like they don’t do justice, because you’re standing in the middle of a view spread across multiple peak groups.
The route highlights big-name ranges you’ll likely see from this zone: Manaslu, Himal Chuli, Nadi Peak, Naike Peak, Kutang Himal, and Pangbuche Himal. Even on days when you can’t identify everything, the sense of scale here is what sticks.
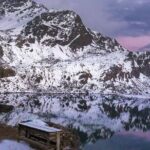
Day 7 is your acclimatization day in Samagaun. You can choose between hikes around Birendra Lake and Manaslu Base Camp, or go up to Pungen Gumpa. I like that you’re not forced into one option—this is where you match the hike to your energy, not the other way around.
Day 8: Samdo—slow climbing to a Tibetan refugee camp
You trek up to Samdo at high elevation, and the route specifically asks you to move slowly because altitude makes everything feel harder. By lunchtime, you’ll reach Samdo village, with an afternoon option to hike toward Samdo Peak if you feel good.
Samdo is described as a Tibetan refugee camp, and that cultural angle matters. You’re not just passing scenery—you’re meeting communities shaped by displacement and resilience, with Himalayan views as daily backdrop.
If you’re deciding whether to do Samdo Peak, use this rule: if you’re getting enough breath and your head feels steady, it’s worth the effort. If you feel even slightly off, rest in Samdo and let tomorrow’s pass day stay your focus.
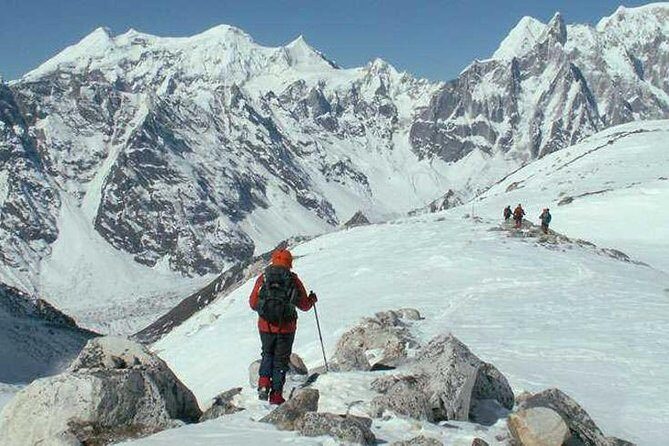
Days 9–10: Dharmasala to Bhimtang—Larkya La Pass, cameras charged and knees braced
Day 9 moves you toward Dharmasala (also known as Larkya Phedi). The trail leads upward slowly to your overnight stop, with time built in for acclimatization and relaxing in the afternoon. There’s also a mention of a seasonal Tibetan market called Larke Bazaar beside the Budhi Gandaki River, plus monasteries you’ll pass along the way—good texture before the pass.
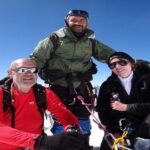
Then comes Day 10: the early wake-up and the walk to Larkya La Pass. This is the crucial day, and you’ll climb gradually until you reach the pass, then take a break to enjoy the views before descending to Bhimtang. The trek time here is long—about 7 to 8 hours—so think of this as your “main event.”
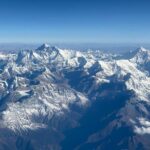
Altitude hits hard on pass day, and you’ll be walking at roughly 5,160m on this route. I strongly suggest you treat sleep and pacing like real gear. Get warm before you start, keep your layers on, and don’t race the trail just because you can see the top.
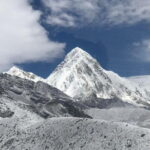
The payoff is dramatic. From the pass zone, the route notes views of Cheo Himal, Gyaji Kung, Kang Guru, and Annapurna II (all above 6,000m). Even if cloud or visibility changes, the effort usually feels validated once you crest and look out.
Bhimtang is a celebratory place in the itinerary mindset, which makes sense. After such a big push, you’ll want a proper sit-down dinner and a night that helps your body recover.
Day 11: Down to Tilje—sunrise views and the long downhill work
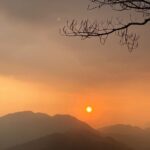
Day 11 is mostly a downhill hike from Bimtang toward Ghoa, then onward to Tilje. The route specifically suggests waking early for a possible sunrise view from the teahouse. This is the kind of tip that can make a “recovery day” feel rewarding instead of merely tiring.
Tilje is described as a beautiful village where you can find good hotels, and there’s also a note about free WiFi after crossing the mountain. Still, don’t plan your whole day around the signal—consider WiFi a bonus, not part of your schedule.
Day 12: Tilje to Dharapani, then a jeep to Besisahar
On the final day, you continue from the trekking zone down to Dharapani, crossing through pine forests and small villages. You’ll have lunch in Dharapani, then arrange a jeep drive to Besisahar (about 2 hours) and check into your hotel.
This ending matters because it closes the loop. You’re not just dropping bags and hoping for transport—you’re ending with a practical transfer that turns “trek day” into “real travel day” again.
Permits and guides: why this trek stays organized in the best way
This route is built on the idea that a protected area needs structured access. That means you’ll be dealing with permits like the Manaslu Restricted Area Permit plus TIMS, along with ACAP and MCAP permits (all listed as included). The itinerary also notes permit checks in the trek flow, not just paperwork in Kathmandu.
I like this structure because it reduces guesswork for you. When the guide is already lined up and your permits are handled, your mental energy goes toward the trail instead of chasing forms.
Across the experiences shared in the provided info, the names Roshan and Arjun show up tied to attentive guiding and smooth execution. The manager/operator Madan is also repeatedly referenced for making the process feel easy from start to finish, including prompt help before arrival.
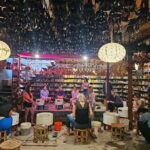
Teahouses, comfort, and what to expect when facilities are basic
Teahouses are the backbone of comfort on this circuit. They provide essential shelter and food even in higher areas, which lets you focus on walking rather than survival logistics.
But your expectations should match the setting:
- WiFi, battery charging, and hot showers are not included
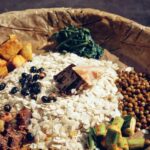
- You should buy meals and drinks at tea houses
- Expect the typical rhythm of charging gear only when available and paying separately for convenience items
A good way to plan is to bring lite snacks and energy bars for long days. That keeps you from waiting until the next meal to get your energy back—especially on pass day and long downhill days.
Packing and fitness: how to prepare for a 5,000m pass
Even though this is a teahouse trek, you’re still climbing to a high pass and spending multiple days at elevation. The tour notes “moderate physical fitness” but also stresses strong fitness for the trek, so I’d treat this as a “serious walk” rather than a casual stroll.
Your must-haves are practical:
- trekking boots
- warm clothes for the high passes
- trekking gear
- a plan for staying hydrated and eating regularly
Your best advantage is pace control. The itinerary includes acclimatization days and slower sections, but your job is to cooperate with them—go slower than you want early, so you don’t pay the price later.
Who should book this trek, and who should reconsider
This works well for you if you want:
- a remote circuit with fewer crowds
- real high-altitude scenery centered on Larkya La Pass
- a guided trek with permits handled for you
- a day-by-day pace that includes acclimatization and optional hikes
Consider reconsidering if you’re not comfortable with long hiking days (including roughly 7–8 hour pass day effort) or if altitude makes you nervous without the chance to rest and adjust.
Should you book Touch The Himalaya’s Manaslu Circuit Trek?
If you want a value-focused guided Manaslu Circuit with permits, transfers, and a local team ready to manage the restricted-area requirements, this is a strong option. The itinerary’s mix of scenery-building days (Jagat, Namrung, Samagaun) and the big payoff pass day at Larkya La is exactly the formula that makes circuits memorable.
One more decision point: budget realistically for food and lodge costs during the trek. The base price covers the big-ticket planning pieces, but your day-to-day comfort will come from tea-house meals you purchase on site. If that fits your style, booking makes sense.
FAQ
How long is the Manaslu Circuit Trek?
The duration is listed as about 12 days.
Where does the trek start and end?
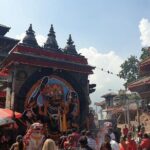
The experience starts in Kathmandu, with transfers to the trekking starting point at Machha-Khola. It ends back in Kathmandu at the meeting point after returning to Besisahar and hotel transfer timing.
What permits are included?
The package lists ACAP Permits, MCAP Permit, Manaslu Restricted Area Permit, and TIMS Card as included.
Do I travel with a guide?
Yes. The tour includes an expert Manaslu local guide. There is also an assistance guide mentioned at a ratio of one assistance guide per five trekkers.
Is pickup included?
Yes. Airport pick up and drop off by car, jeep, Hiace, or bus is included, and transfers between Kathmandu and Machha-Khola are included as well.
Are meals and accommodation included during the trek?
No. Foods, drinks, and accommodation during the trek are listed as not included, though they can be provided with an additional charge.
Is WiFi available on the trek?
WiFi is listed as not included, and charging extras like battery charge are also not included. You may find free WiFi in some villages such as Tilje after crossing the mountain, but it is not guaranteed as part of the package.
Cancellation Policy (quick note)
Free cancellation is offered if you cancel at least 24 hours before the start time for a full refund.