Rim trekking starts right outside Kathmandu. This short hike circles the valley edge and takes you through rural villages and forest trails with big mountain views. Kathmandu Valley Rim Hike keeps things human-scale, yet you still get moments that feel properly epic when the sky clears.
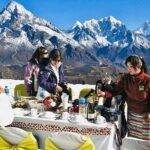
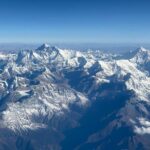
I really like how the days are built around viewpoint payoffs, not just walking for walking’s sake. You climb up toward Chisapani with sweeping views of peaks like Dorje Lakpa, Langtang, Ganesh Himal, Gaurisankar, and even part of the Everest range. I also love that the trip is arranged with real support: a guide for trekking, plus meals and basic lodging while you’re out.
One thing to consider: this is still a multi-hour walking trek on hilly ground. Even though they say it can work for any fitness level that can handle long walks, you should go in ready for steady effort rather than an easy stroll.
In This Review
- Key Things I’d Put on Your Radar
- Day One: Sundarijal to Chisapani’s Panoramic Switch-On
- Day Two: Nagarkot With Forest Trails and Big-Peak Focus
- Day Three: Dhulikhel Ridge Feel, Changunarayan Temple, and Back to Kathmandu
- Price and Logistics: What $381 Actually Buys You
- Stops That Make the Hike Feel Like More Than a Walk
- The Guide Experience: Why Riman Was a Standout
- How Much Fitness You Need (And How to Pace It)
- Who This Hike Suits Best
- Should You Book the Kathmandu Valley Rim Hike?
- FAQ
- How long is the Kathmandu Valley Rim Hike?
- Where does the trek start?
- Where does the experience end?
- What time does it start?
- What’s included in the price?
- What is not included?
- Is a passport required?
- Can I cancel for a full refund?
Key Things I’d Put on Your Radar
- Rim views over the Kathmandu valley edge with panoramic Himalayan sightlines
- Chisapani hill climb (about a 1,000-meter accent) for wide mountain panoramas
- Nagarkot View Tower and ridge viewpoints for that early-light feeling
- Two nights covered with trekking lodging and all trekking meals
- A private group with pickup and drop support from central Kathmandu
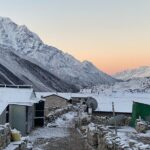
Day One: Sundarijal to Chisapani’s Panoramic Switch-On
Your morning starts in Kathmandu, meeting at View Nepal Treks & Expedition on Thamel Marg at about 7:15 am. From there, you head toward the start of the trek and begin walking from Sundarijal toward Chisapani.
The whole first day is about transition. You leave the city’s noise behind and step into a trail that moves through jungle and changing vegetation. The point isn’t to sprint from A to B—it’s to let the scenery change as you gain elevation. The route is also set up for that classic rim-trek moment: as you work your way up to Chisapani hill, the view gets wider and more dramatic.
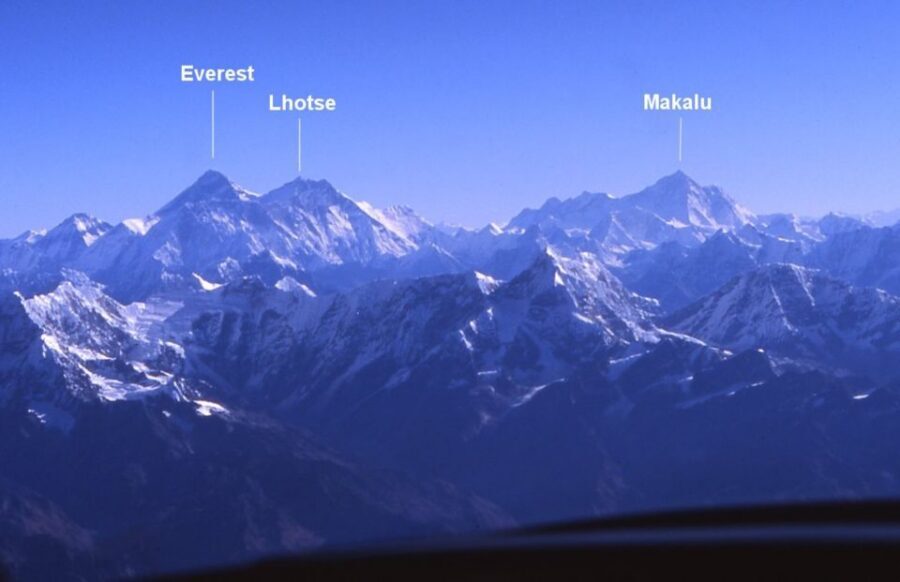
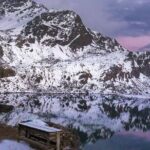
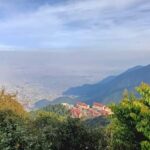
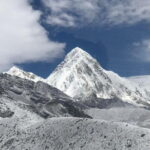
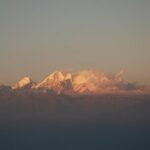
Chisapani is a highlight because of what it reveals. From there, you can observe a panoramic set of Himalayan peaks, including Dorje Lakpa, Langtang, Ganesh Himal, Gaurisankar, and parts of the Everest range. The weather can always be a factor in Nepal, but the trek’s timing and structure are clearly aimed at giving you the chance to see what you came for. You’re not doing a long expedition; you’re doing a short trek that still tries to deliver the goods.
How it feels: a day of steady climbing with a satisfying payoff when the peaks open up. The drawback is simple—there’s elevation gain. If you pace yourself from the start and take breaks when you need them, it stays enjoyable.
You can also read our reviews of more hiking tours in Kathmandu
Day Two: Nagarkot With Forest Trails and Big-Peak Focus
Day two shifts you from Chisapani toward Nagarkot, another iconic name on the Kathmandu rim. This is the kind of hiking day where your eyes keep bouncing between the trees and the sky-line. The description of the trek emphasizes jungle walking with different plants and a chance to spot local flora and fauna, and that’s exactly what makes this day feel alive.
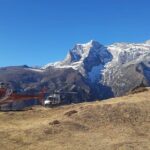
Nagarkot is where the trek leans into views again. You don’t just want to be near mountains; you want to see them clearly. This route is designed for that, and you also get a specific stop at Nagarkot View Tower, which helps you get your bearings quickly and maximize your time looking out over the region.
You’ll also get named mountain-range context along the way: Langtang, Ganesh Himal, Gaurisankar, and the broader Mahalangur Himalayan range are part of the view story. In plain terms, this isn’t random hillside hiking. The walk is routed so that each major movement brings you closer to another chance at mountain panoramas.
The challenge: still multi-hour walking. There’s nothing in the provided details about a lot of flat, easy ground. If you like day hikes that feel like actual hikes, you’ll be happy. If you want “mostly sitting with a view,” this is not that kind of trip.
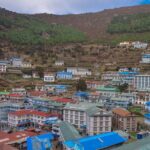
Day Three: Dhulikhel Ridge Feel, Changunarayan Temple, and Back to Kathmandu
Day three has two roles: a final viewpoint and a cultural finish. After your overnight trekking lodging, you hike down toward Changunarayan temple, then you drive back to Kathmandu.
This is one of those endings that helps you appreciate what you walked. Instead of just returning to the start point, you end near a landmark with meaning in the region. The plan is to trek down to the temple area and then make the final transfer back to Kathmandu.
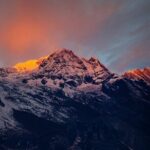
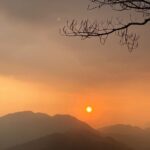
The information you’re given also points to the Nagarkot and Dhulikhel scenic zone for striking sunrise-style views. Even if you’re not guaranteed perfect weather, the route is clearly shaped around early-light mountain viewing. If you’re someone who enjoys the calm of the morning ridge scene, this part of the itinerary is where the trip’s value really clicks.
A practical note: downhill days can feel easier until your knees and thighs remember what goes up must come down. Go slow on descents and you’ll feel better at the end.
Price and Logistics: What $381 Actually Buys You
$381 for three days can sound high or fair depending on what’s included. Here, what matters is that the price covers the stuff that usually adds hidden cost on trekking trips.
In the included portion, you get:
- Two nights of accommodation during trekking
- All meals while trekking (breakfast, lunch, dinner)
- A trekking guide, plus an additional guide option depending on language needs
- Transport by private vehicle that matches your group size (private car/jeep/mini bus/tour bus)
- Pickup and drop to the airport
What you do not get: Kathmandu meals and hotel, soft/hard drinks, personal expenses, Nepal visa, and international airfare. Tips for guide and driver are also not included.
So is it good value? For me, it feels like it is, because the trip reduces the number of decisions you have to make. You’re not trying to stitch together your own transportation, meals, lodging, and guide coverage across multiple areas around the valley rim. If you want a simple, structured walking experience with meal support, this package makes sense.
If you’re the type who enjoys planning every detail yourself, you might pay less by building the route independently. But you’d likely spend extra time and effort to match the same level of coordination.
Stops That Make the Hike Feel Like More Than a Walk
There are a few named moments that help this trek feel purposeful.
- View Nepal Treks & Expedition (meeting stop): This is the starting anchor in central Kathmandu, near Thamel Marg. It’s helpful when you don’t want to hunt for logistics on day one.
- Nagarkot View Tower: This is a targeted viewpoint moment. You’ll get a chance to pause, adjust your sight lines, and enjoy what the ridge offers.
- Chisapani: This is your first big panoramic payoff area, tied to the mountain views listed in the trip description.
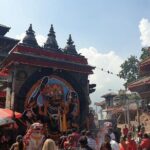
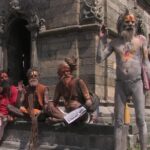
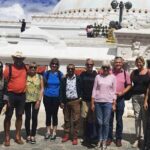
- Changunarayan temple: The end has a cultural cue. It gives the trek a satisfying shape: hike up, hike across viewpoints, then finish with something meaningful rather than just walking back out.
These stop points matter because they prevent the trip from turning into one long trail blur. You always know why you’re moving.
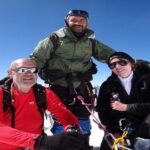
The Guide Experience: Why Riman Was a Standout
A trekking guide can make or break a short trek like this. You don’t have days to recover from a confusing route or missed viewpoint chances.
One review highlighted the guide experience strongly, naming Riman. The feedback was clear: Riman was kind, and he brought the know-how to make the trek feel smooth and rewarding. For a solo traveler especially, this matters. You can focus on the walking and the views instead of second-guessing directions.
Also, this type of tour can be flexible in how it’s delivered. The tour details note that it may be operated by a multi-lingual guide, depending on needs. That gives you more comfort if language is a concern.
If you care about how the trip feels moment to moment—good pacing, clear directions, and the right questions answered—this is the kind of trekking setup where the guide really counts.
How Much Fitness You Need (And How to Pace It)
The info is refreshingly honest: the trek works for any fitness level if you can walk for multiple hours each day, and it suggests you should have at least moderate fitness.
So don’t plan to treat this like a museum visit. Treat it like a steady hike. Your success will depend more on pacing than on speed.
My practical advice:
- Start slow on climbs. Your legs feel better later.
- Take short breaks when needed. You’re aiming for consistent movement, not hero mode.
- Bring basic comfort items you’d use for any day hike (sturdy shoes, a way to handle sun or light rain). The trek includes forest and ridge walking, so conditions can shift.
If you handle multi-hour walking days comfortably, you should be fine.
Who This Hike Suits Best
I think this trek is a great fit if you want:
- A short Nepal trek that still gives major Himalayan-view time
- A mix of rural farm village life and forest trail walking
- A structured plan with meals and lodging handled while you hike
- The chance to see Nagarkot and the Dhulikhel ridge zone for morning-style views
It’s also a good pick for solo travelers who want a private group format and a guide they can rely on—especially if you prefer not to assemble logistics by yourself.
You might want to skip it if you:
- Want fully flat walking
- Hate the idea of climbing for a viewpoint payoff
- Expect a casual stroll rather than multi-hour trek days
Should You Book the Kathmandu Valley Rim Hike?
Yes, if your goal is a short, well-supported rim trek with real viewpoint moments. The mix of Chisapani panoramic views, Nagarkot ridge stops, and a Changunarayan temple finish is a strong combination for the time you’re investing. And with meals and trekking lodging included, you’re less likely to feel nickel-and-dimed mid-trip.
Before you book, ask yourself one simple question: can you comfortably walk for several hours on hilly ground? If the answer is yes, this hike is a smart value play at $381.
If that sounds like you, go for it. You’ll come back with sore legs, clear views, and a trip that feels like it’s showing you the outside-of-the-city Kathmandu rhythm—not just ticking boxes.
FAQ
How long is the Kathmandu Valley Rim Hike?
It’s about 3 days.
Where does the trek start?
The trek starts from Sundarijal and goes toward Chisapani on the first day.
Where does the experience end?
It ends back at the meeting point in Kathmandu.
What time does it start?
Start time is 7:15 am.
What’s included in the price?
Included are 2 night accommodation in trekking, all trekking meals (breakfast, lunch, dinner), a guide for trekking, transport by private vehicle (type depends on group size), and pickup/drop to the airport.
What is not included?
Not included are food and hotel in Kathmandu, soft and hard drinks, personal expenses, Nepal visa, international airfare/flight ticket, grocery/shopping items, and tips for the guide and driver.
Is a passport required?
Yes. A current valid passport is required on the day of travel, and passport details are needed at booking.
Can I cancel for a full refund?
Yes. You can cancel up to 24 hours in advance for a full refund. If you cancel less than 24 hours before the start time, the amount paid is not refunded.