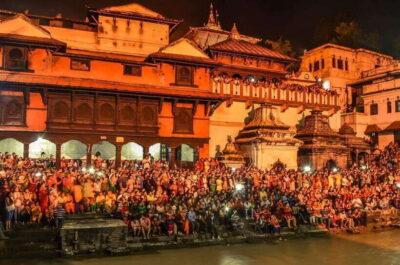
REVIEW · KATHMANDU
Everest Base Camp Trek
Book on Viator →Operated by Recreation Holidays Pvt. Ltd. · Bookable on Viator
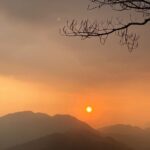
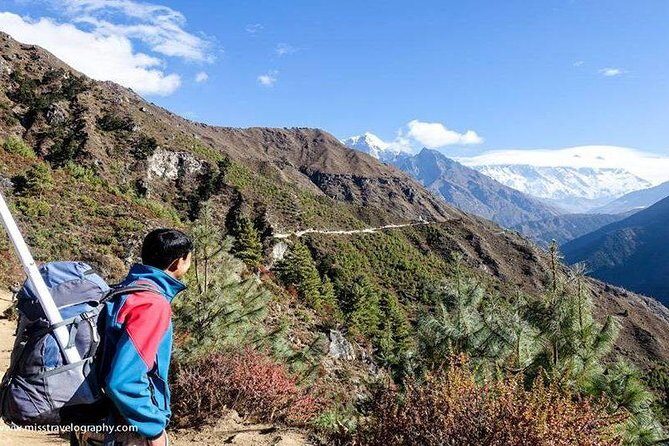
Prayer flags and altitude hit you fast in Nepal. This Everest Base Camp trek mixes big-mountain drama with up-close culture as you pass mani walls and colorful prayer flags, stop in Sherpa settlements, and walk among forests, rocky trails, and high ridgelines where the views keep getting louder.
What I like most is how the trek’s core logistics are handled for you, including both-way flights to Lukla and comfortable lodge stays with meals, so you spend less time managing details and more time moving well. The only real drawback to consider is altitude and cold: even with moderate fitness, you’ll need to take the acclimatization days seriously and dress for harsh weather changes.
In This Review
- Key highlights at a glance
- From Tribhuvan to Lukla: the first day’s altitude lesson
- Namche Bazaar: climbing smart starts before you feel it
- Tengboche: forests, monasteries, and that quiet kind of awe
- Dingboche and its second acclimatization: where your body earns the summit
- Lobuche to Gorakshep to Everest Base Camp: the long one you remember
- Kala Patthar and the descent to Pheriche: where the views cost work
- Back through Namche and Phakding toward Lukla
- Kathmandu arrival and what you still need to budget
- Price and logistics: is $1,390 worth it?
- Guides who do more than point: the on-the-ground difference
- Packing and pacing: how to handle all-weather trekking
- Should you book this Everest Base Camp trek?
- FAQ
- Where does the trek start and when?
- How long is the Everest Base Camp trek?
- What does the price of $1,390 per person include?
- Are Kathmandu to Lukla flights included?
- Is trekking insurance included?
- Is a vegetarian meal option available?
- Will there be a trekking guide with me?
- Is this trek private or shared with others?
- What is the cancellation and refund policy?
- What about tips for the guide or porter?
Key highlights at a glance
- Flights plus lodge meals included makes the trek feel simpler from day one
- Real acclimatization rhythm with stops at Namche Bazaar and Dingboche
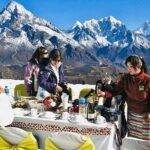
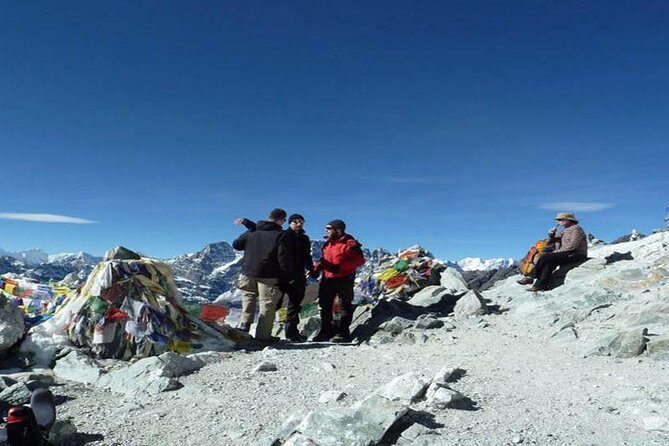
- Buddhist culture on the trail through monasteries, chortens, and mani walls with prayer flags
- Step-by-step mountain support from guides such as Hari, Ongchhu, and Nima
- Kala Patthar timing so you can chase the classic viewpoint moments before descending
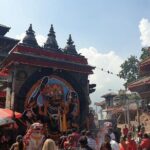
From Tribhuvan to Lukla: the first day’s altitude lesson
Your adventure starts at Tribhuvan Airport in Kathmandu with a 6:00 am start and a private vehicle pickup and drop. That early departure matters. It gives you time to handle the usual Nepal-day logistics without rushing your body into the trek.
Then comes the jump to Lukla. The flight from Kathmandu to Lukla is the doorway to the Everest region, and it’s included both ways. Once you land, you’re not easing in on a treadmill—you’re walking on mountain paths. Your first trek day takes you from Lukla to Phakding, usually a gentler introduction that lets your legs wake up while your brain starts absorbing the scale of the Himalaya.
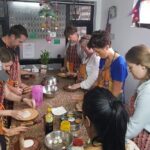
What makes this first day good value is the structure: you’re not left guessing where to sleep or what to eat. You’ll be in a guest house/lodge with included meals, which helps a lot when weather turns cool or cloudy and you just want to keep momentum.
The main thing to plan for on day one: expect that your breathing feels different. Even if you feel fine, don’t treat it like a casual hike. Take small steps, keep water nearby, and focus on steady effort.
You can also read our reviews of more hiking tours in Kathmandu
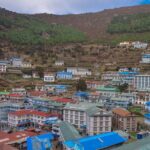
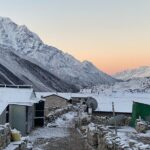
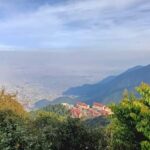
Namche Bazaar: climbing smart starts before you feel it
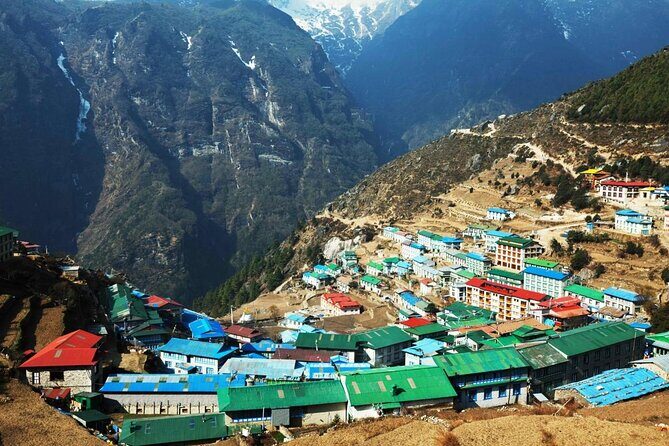
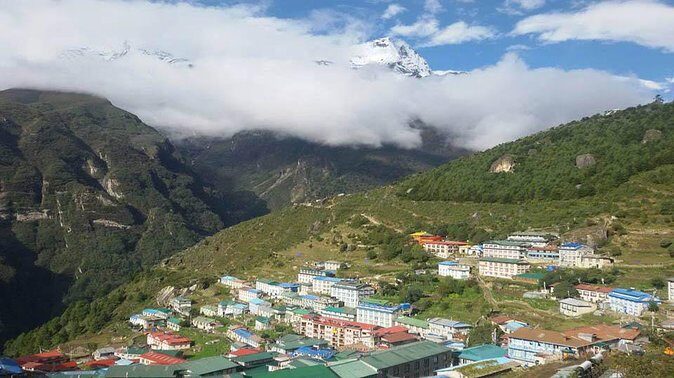
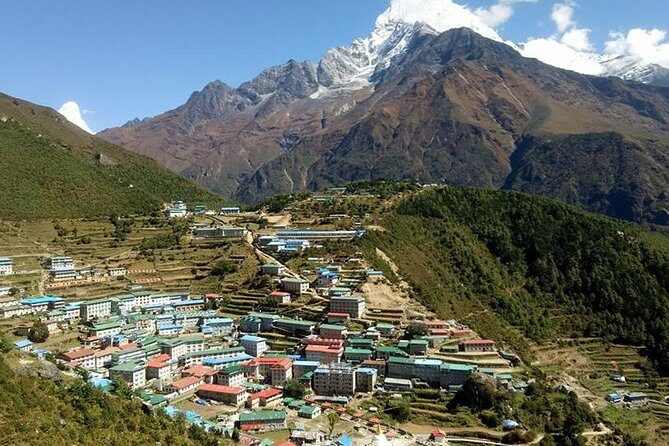
After Phakding, your second day pushes you toward Namche Bazaar, a key hub for the Everest region. This is where the trek stops being only about scenery and becomes more about community—shops, teahouses, and a clear Sherpa presence. It’s also where your body starts to notice the altitude in a more obvious way.
Day three is your first acclimatization day at Namche Bazaar. This is one of the best design choices for a guided Everest Base Camp trek because it gives you time to absorb altitude rather than climbing through it like a checklist. An acclimatization day isn’t wasted time here—it’s how you reduce the chances of feeling wrecked later.
A smart way to use Namche acclimatization is to do a light “get your bearings” walk and then rest hard. You’ll likely feel tempted to push, especially when the views look close enough to touch. Resist that. The whole point is to help your body adjust before higher days.
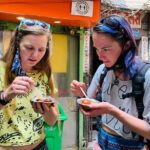
The cultural side is also a treat. Namche sits in a region full of Buddhist symbolism, and you’ll see prayer flags and local religious markers along the route that make the trek feel less like a nature mission and more like a living landscape.
Tengboche: forests, monasteries, and that quiet kind of awe
From Namche Bazaar you head toward Tengboche. This part of the trek is known for its trail variety: forests can soften the hike rhythm, and you’ll move through fir and pine country for stretches where the air feels cooler and quieter.
Tengboche is special because of the monastery atmosphere and the role of Buddhist sites along the trail. When you see chortens and prayer flags set against mountain backdrops, it changes how you experience the climb. It’s not just elevation; it’s a spiritual route that people walk with meaning.
Trek day tradeoff: this section can feel like steady work, especially if you’re carrying your energy too high from the earlier days. I recommend keeping your pace conservative here. Save extra gas for when you need it later around Gorakshep and Kala Patthar.
If you’re the type who likes stopping and looking, Tengboche rewards you. You get the sense that the trek has a pulse—people moving between villages, carrying supplies, and living in the same high-country rhythms you’re experiencing for the first time.
Dingboche and its second acclimatization: where your body earns the summit
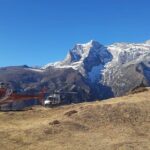
From Tengboche you trek to Dingboche, a place that feels both practical and dramatic—practical because it’s built around trekkers and local life, dramatic because the surrounding mountains keep pulling your eyes upward.
Then comes day six: acclimatization at Dingboche. This is your second chance to adjust. If you felt okay so far, Dingboche is where you learn that altitude doesn’t care about optimism. The second acclimatization stop is a strong safety-value piece of the schedule, and it’s part of why this route works better than a straight-line grind.
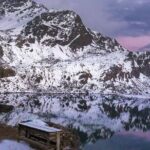
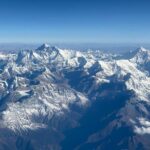
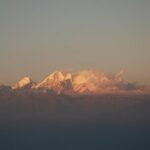
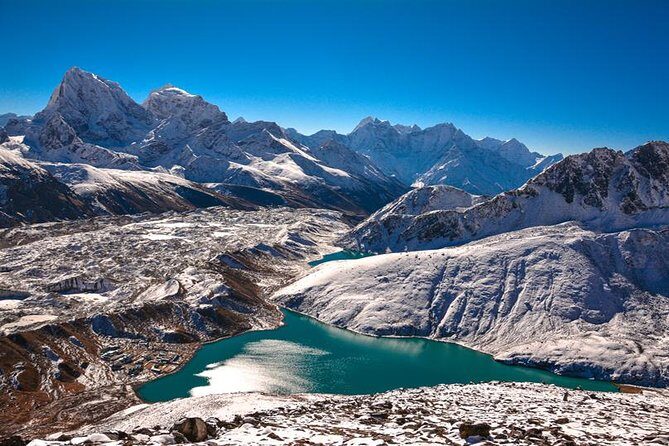
You’ll also notice how the scenery shifts as you go higher. Rocky trail sections become more common, and the glacier presence in the wider views starts feeling closer. Emerald ice forms and the shapes of high ridgelines are the kind of visuals that stick in your memory—not because they’re fancy, but because they’re real.
Here’s the practical lesson: during acclimatization days, hydration and rest matter as much as sightseeing. I like to treat them like training days for your lungs. Even if you want to keep walking, do it lightly and keep your energy for the climb to come.
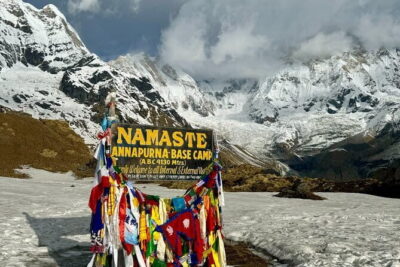
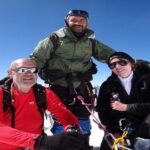
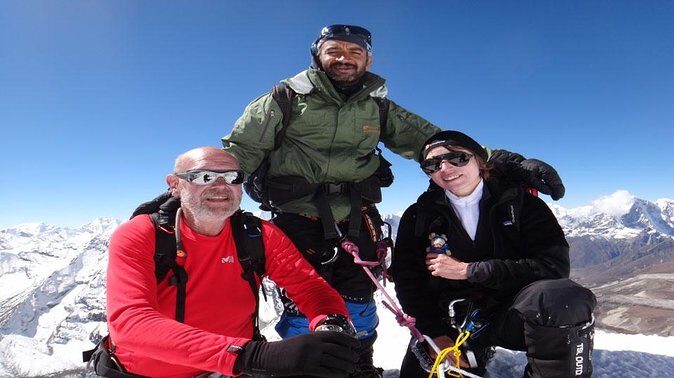
Lobuche to Gorakshep to Everest Base Camp: the long one you remember

Day seven takes you from Dingboche to Lobuche. This is often where the trek starts feeling more serious. You’re farther from the comforts of lower elevations, and the trail can feel harsher. The payoff is that the mountains keep looking more defined—and your focus sharpens.
Day eight is the big effort day: you go from Lobuche to Everest Base Camp via Gorakshep, and then you return to Gorakshep. That round-trip structure is a key detail. You’re not just walking forward; you’re going out and coming back, so the day is long even if the distances feel manageable on paper.
Gorakshep becomes your staging point. From there, Everest Base Camp is a moment you experience with your whole body, not just your eyes. You’ll feel cold more quickly, and the effort can feel heavier because altitude changes what “normal walking” feels like.
Practical advice: keep your gear simple, drink regularly, and don’t burn all your energy early. The base camp moment will feel better if you arrive with enough strength to enjoy it without looking like you just fought the mountain.
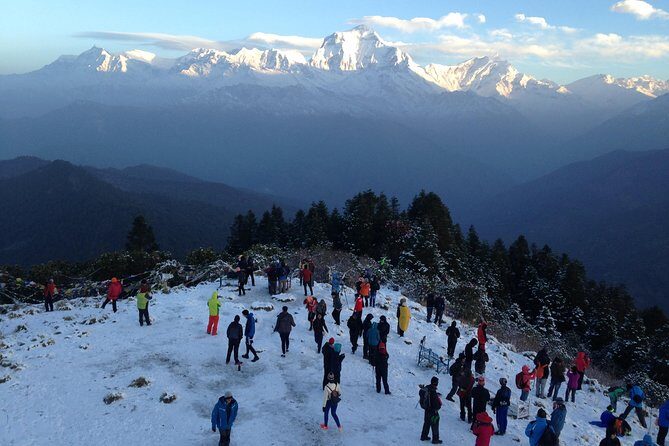
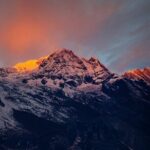
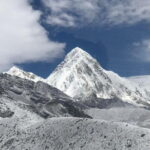
Kala Patthar and the descent to Pheriche: where the views cost work
On day nine you go from Gorakshep to Kala Patthar, then trek to Pheriche. Kala Patthar is one of those high-altitude viewpoints that people talk about for a reason: the views can be jaw-dropping, and the effort to reach them makes the reward feel earned.
You’ll work for the viewpoint. That’s the trade. Cold and wind can make it feel harder than the walking itself, so dress like you expect weather to change quickly. Once you reach the viewpoint, you get that rare combination of perspective and scale—Everest region geography suddenly makes sense.
Then it’s time for the descent to Pheriche. Descent is mentally easier, but it can be tough on knees and ankles. Use controlled steps. Don’t rush it just because you’re going downhill.
This day also helps you emotionally. By the time you reach Pheriche, you’ve done the big mountain work. You’re not done, but the hardest parts are behind you, and your confidence usually rises.
Back through Namche and Phakding toward Lukla
Day ten takes you from Pheriche back to Namche Bazaar. Day eleven continues to Phakding and then Lukla. The return route is not just repetition. It’s the same trail viewed through a different lens—you’ve gained altitude knowledge, your legs know what to expect, and the scenery feels more familiar.
On the return days, watch your energy. It’s common to feel like you should be able to sprint because you’ve already made it to the hard points. Don’t. The body still needs rest, especially after cold nights and high-altitude effort.
One of the best “value” parts of this return leg is that it keeps you in lodges with included meals and a guided plan. You’re not negotiating your way through the region with only a vague sense of direction. That matters when weather shifts or when you’re tired.
When you reach Lukla again, day eleven closes the loop. It’s a satisfying feeling: you started here with day-one nerves, and you leave with day-after confidence.
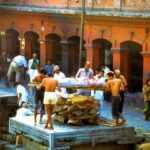
Kathmandu arrival and what you still need to budget
On day twelve, you fly from Lukla back to Kathmandu, returning to your meeting point area. The trek part finishes, and then the city part begins.
One important budgeting note: the trek package doesn’t include a Kathmandu hotel or meals. So you’ll want to plan your first and/or last Kathmandu meals on your own. This isn’t a dealbreaker, but it’s a real cost if you’re traveling from far away and want a comfortable end-of-trip setup.
Also remember the trekking pace. Even when the trek ends, you may feel it in your sleep for a day or two. Give yourself time to recover before planning anything strict in Kathmandu.
Price and logistics: is $1,390 worth it?
At $1,390 per person for about 12 days, the key question is what’s included—and this trek includes a lot of the expensive hassle pieces.
Included highlights:
- Both-way flight tickets between Kathmandu and Lukla
- Airport pickups and drops by private vehicle in Kathmandu
- Guest house/lodge during the trek with three meals a day (for the days counted in the package)
- Trekking guide plus the guide’s expenses like salary and insurance
- All necessary permits and taxes
Not included:
- Travel insurance for trekking
- Hotel and meal in Kathmandu
- Tips for guide(s), porter(s), and driver(s)
- Alcohol and other beverages
So what are you really paying for? You’re paying for altitude access plus the systems that keep you safe and fed: flights, permits, guide support, and daily meals in villages where you’d otherwise be figuring things out. If you try to DIY those pieces, the cost and stress can climb quickly.
The biggest “value warning” is the parts you must handle outside the package: insurance and tips. For many people, those are small compared to the price of flights and the logistics, but they still matter for a clean budget.
Guides who do more than point: the on-the-ground difference
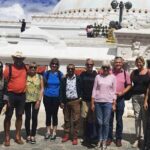
A standout theme is the team support. In particular, names like Hari, Ongchhu, and Nima come up in the way people describe this trek: lots of answers beforehand, then steady support on the mountain.
One practical detail I love in that feedback style is the long pre-trip checklist time. That’s not just friendly. It’s the difference between showing up unsure and showing up prepared—so you can spend your energy trekking, not worrying.
On the trail, a good guide does three things you feel right away:
- Helps you interpret how your body is reacting to altitude
- Keeps the day’s plan realistic
- Reduces wasted effort by preventing you from climbing too fast
With Everest Base Camp, small pacing decisions matter. This is where guide experience becomes visible, even if you can’t measure it on a spreadsheet.
Packing and pacing: how to handle all-weather trekking
This trek operates in all weather conditions, and you’re told to dress appropriately. That’s a hint to pack for cold, wind, and possible rain changes—because you’re moving through different zones and elevations every day.
I’d plan your packing around layers, not one magic jacket. Bring warm outer layers, a rain shell, and gloves or warm headwear so your body stays comfortable when temperatures drop. Good footwear also matters more here than on a low-altitude hike, because you’ll be on rocky trail and uneven steps.
Also, keep in mind the physical recommendation: you should have moderate physical fitness. That doesn’t mean you need to be a mountain athlete, but you do need endurance and willingness to go steady on acclimatization days. Treat rest days like part of the training plan.
Food is covered during the trek with three meals daily in lodges. And if you prefer vegetarian meals, there’s an option—just let the operator know when booking.
Should you book this Everest Base Camp trek?
Book it if you want a classic Everest Base Camp experience with the big logistics handled: Lukla flights, permits, lodge stays, meals, and a trekking guide. It’s especially a good fit if you’re not trying to manage the details yourself while also dealing with altitude.
Think twice if you don’t want to deal with cold and altitude realities. Even with moderate fitness, you’ll need to follow the acclimatization rhythm and dress for changing weather. And if you’re strict about budget, don’t forget insurance, Kathmandu meals/hotel, and tips.
If you’re ready for a structured, guided trek that balances mountains with culture—prayer flags, monasteries, and that gradual push toward the highest points—this one makes a lot of sense.
FAQ
Where does the trek start and when?
The trek starts at Tribhuvan Airport in Kathmandu, Nepal, with a stated start time of 6:00 am.
How long is the Everest Base Camp trek?
The duration is listed as approximately 12 days.
What does the price of $1,390 per person include?
It includes private airport pickup and drop in Kathmandu, both-way Kathmandu–Lukla–Kathmandu flights, lodge/guest house stays during the trek with three meals a day, a trekking guide, and necessary permits and taxes.
Are Kathmandu to Lukla flights included?
Yes. Both way flight tickets Kathmandu–Lukla–Kathmandu are included.
Is trekking insurance included?
No. Travel insurance for trekking is not included.
Is a vegetarian meal option available?
Yes. A vegetarian option is available if you advise at the time of booking.
Will there be a trekking guide with me?
Yes. A trekking guide is included, and their expenses like salary and insurance are covered in the package.
Is this trek private or shared with others?
It’s listed as private, meaning only your group participates.
What is the cancellation and refund policy?
There is free cancellation. You can cancel up to 24 hours in advance of the experience start time for a full refund, and refunds may not be issued if you miss the experience due to late or non-arrival connected to cruise ship timing.
What about tips for the guide or porter?
Tips for guide(s), porter(s), and driver(s) are not included, so you should plan for that expense.