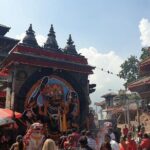
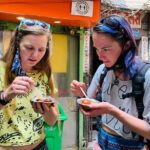
REVIEW · KATHMANDU
Everest Gokyo Valley Trek – 12 days
Book on Viator →Operated by Trekking Planner Nepal · Bookable on Viator
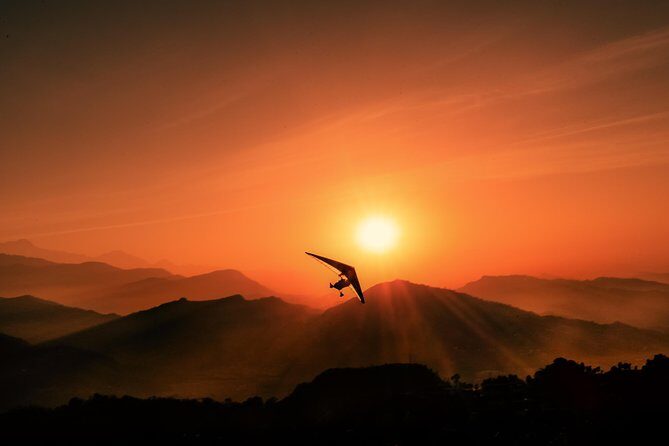
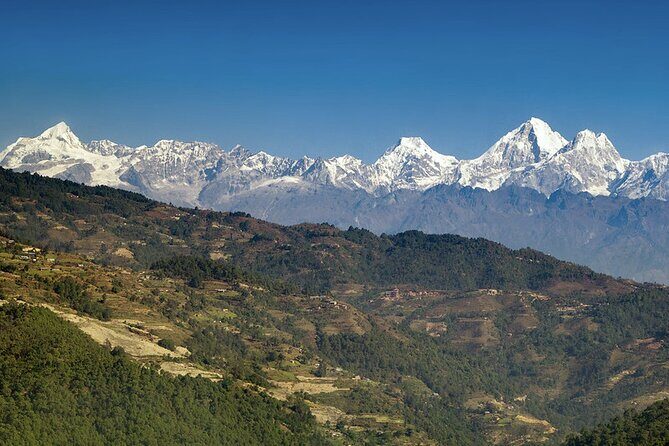
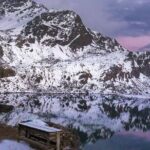
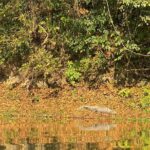
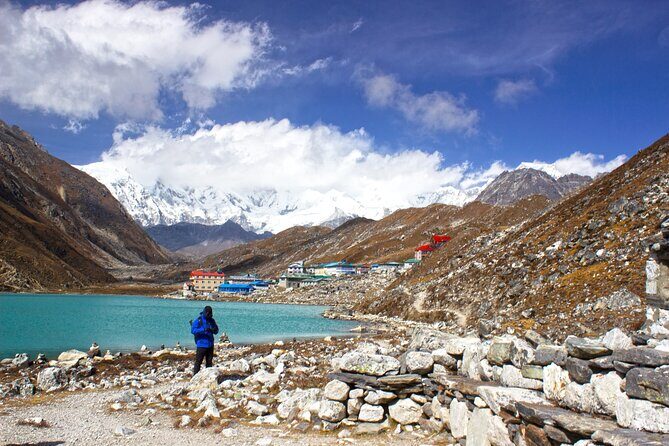
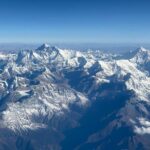
Gokyo Ri sunrise is pure payoff. This Everest-region trek pairs a quick Lukla flight with Sherpa town acclimatization, then delivers the unreal turquoise of the Gokyo Lakes and big-peak views. You’ll also hike past prayer wheels, colorful flags, and mani stones as the trail climbs from green foothills toward ice and glacier country.
I love the way this route builds altitude gradually, especially with a full Namche rest day and the pacing around Gokyo. I also like that the itinerary keeps pointing you at major viewpoints—Cho-Oyu along the way and Gokyo Ri for the sunrise panorama. Even if you’re not chasing Everest itself, the view logic is strong.
The main consideration is timing and weather: Lukla flights can be delayed in bad conditions, and the itinerary depends on good weather. That said, the operator has shown flexibility in handling reroutes and next-available flight options.
In This Review
- Key things that make this trek stand out
- What You’re Really Signing Up For: Everest-area views, with Gokyo as the star
- Price and Logistics: what you’re paying for at $1,399
- Day 1 in motion: Kathmandu to Lukla to Phakding
- Day 2: suspension bridges to Namche Bazaar (and Sagarmatha National Park)
- Day 3: Namche acclimatization day, plus Everest View Point morning
- Day 4: Phortse direction via Khumjung hill and monastery landmarks
- Day 5: into rhododendron forests and up toward Gokyo Lakes
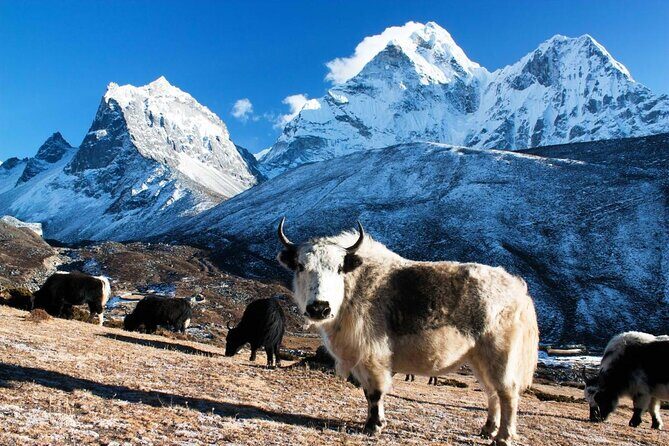
- Day 6: Machhermo at 4410m and a Cho-Oyu view day
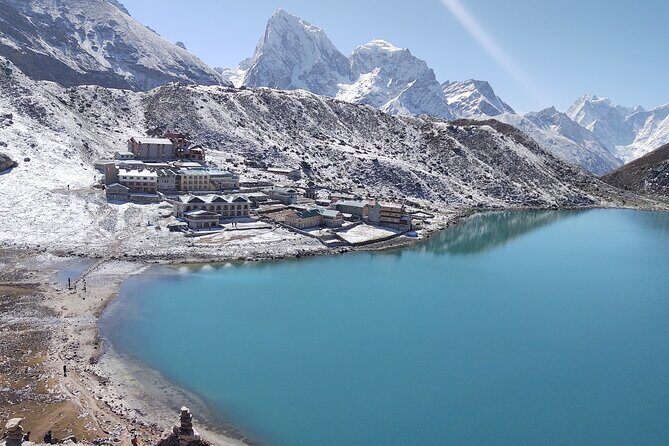
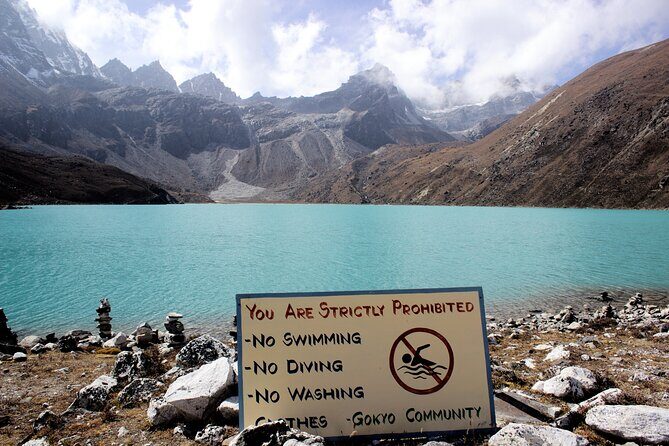
- Day 7: the terminal moraine of Ngozumpa Glacier to Gokyo
- Day 8: Gokyo Ri sunrise (5463m) plus afternoon lake exploration
- Day 9: retracing back via Machhermo to Dole
- Day 10: to Namche via Phortse Tanga and Mongla Dada
- Day 11: Lukla again, with a few ups and downs
- Day 12: Lukla to Kathmandu, then back to your hotel
- Guides, porter setup, and what support actually feels like on this route
- Should you book? Who this trek suits best
- FAQ
- FAQ
- Where does the trek start?
- How long is the Everest Gokyo Valley trek?
- Are airport transfers included?
- Are flights included?
- What permits or fees are covered?
- What’s included for meals?
- How does the porter arrangement work?
- What level of fitness do I need?
- What can I expect about cancellation or weather changes?
Key things that make this trek stand out
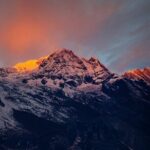
- Gokyo Ri sunrise (5463m): one morning, huge views across Everest-area giants and the lake basins below
- Ngozumpa Glacier time: the trail works glacier into your walk, not just into a distant photo
- Acclimatization built in: Namche rest day plus structured altitude increases toward Gokyo
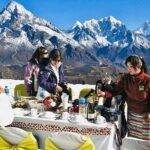
- Real village trail texture: Kharkas (summer herding settlements), prayer flags, suspension bridges, and tea-house rhythm
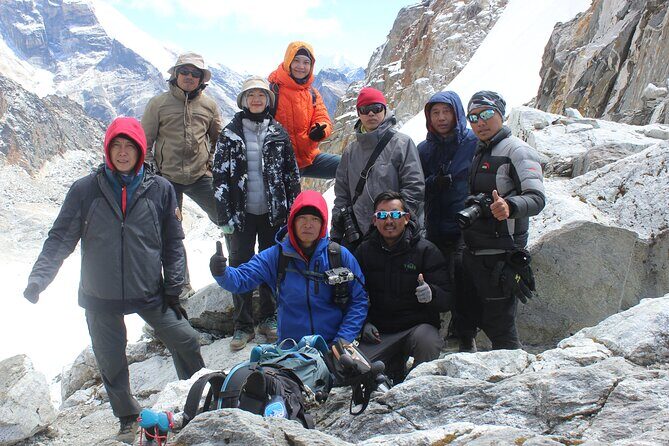
- Support that adapts: guides have been praised for staying calm during Lukla disruptions and for problem-solving on the trail
What You’re Really Signing Up For: Everest-area views, with Gokyo as the star
This is an Everest-region trek that trades the usual long focus on the Everest Base Camp approach for something more specific: Gokyo Valley and its emerald lake system. You still get the Everest skyline, but the day-to-day “wow” moments skew toward glacier textures, turquoise water, and big ridgeline viewpoints.
I like that the trip is designed around viewpoints you can actually reach without special climbing skills. You’ll have your standout moments at places like Namche’s early hike and, most importantly, Gokyo Ri at dawn. If your dream is to see the world’s tallest mountains in a single sweep while standing on a high ridge, this is the right kind of trekking route.
The other thing I’d underline: the itinerary connects cultural details to the walking. You pass Sherpa-world landmarks—stupas/chortens, monastery ties, prayer flags and stone traditions—so the hike feels grounded, not just like altitude treadmill time.
You can also read our reviews of more hiking tours in Kathmandu
Price and Logistics: what you’re paying for at $1,399
At $1,399 per person, the “value” mainly comes from what’s already built into the package. You get the Kathmandu to Lukla round-trip flights (with airport departure tax noted), private airport pick up and drop, national park entrance fee plus TIMS, and a guide.
You also get the human support structure: for every 2 guests, there’s 1 porter, with the porter covered by insurance, salary, food, accommodation, and equipment (as stated). Accommodation during the trek is twin/double sharing in the mountains, and you’re covered for 11 breakfasts.
What you should budget extra for:
- International airfare to/from Nepal and your Nepal visa
- Kathmandu meals and Kathmandu lodging (not included)
- Lunch and dinner during the trek (not included)
- Personal and health insurance, including helicopter evacuation coverage (not included)
- Tips for the trekking crew and driver
This matters because tea-house trekking is a cash-and-choices situation. Breakfast is covered, but lunches and dinners will be up to you. If you hate making spending decisions while tired and cold, plan for it before you go.
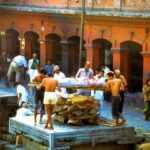
Day 1 in motion: Kathmandu to Lukla to Phakding
The trip starts early—6:15 am at Tribhuvan Airport area—then you’ll fly about 35 minutes to Lukla. The flight is short, but the scenery is the whole point: you get Himalayan foothills and terraced hills before the walking begins.
After landing, you hike around 3 hours to Phakding along the Dudh Koshi River, with a few up-and-down sections. This day is a gentle on-ramp. You’ll sleep in a tea house and get breakfast covered for the next days to keep the start smooth.
For your planning: Lukla day can be emotionally intense because it’s the first “are we really in the mountains?” moment. If you’re prone to stress, treat this day as a warm-up and don’t try to speed-run it.
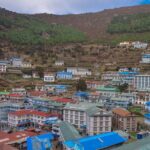
Day 2: suspension bridges to Namche Bazaar (and Sagarmatha National Park)
You’ll follow the Dudh Koshi banks and cross it multiple times via suspension bridges decorated with prayer flags. Then you enter Sagarmartha National Park, and the trail starts climbing more seriously toward Namche Bazaar.
The itinerary frames Day 2 as about 6 hours. That’s realistic for a steady trekkers’ pace while you’re still figuring out your breathing and stride. Tea-house living starts to feel normal here—same basic rhythm each night: dinner, gear check, early sleep, and then breakfast at the right time.
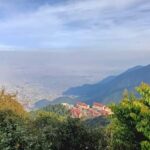
Namche is the gateway vibe. It’s also where acclimatization matters. You’re going higher fast enough that you’ll feel it, but you’re also not going so high that you’ll feel trapped by the first day of altitude.
Day 3: Namche acclimatization day, plus Everest View Point morning
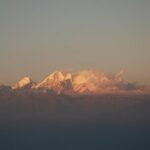
Day 3 is a rest and acclimatization day in Namche, and it’s not filler. You’ll do an early hike above town before the clouds move in, which is when the sunrise-style views tend to happen. The route description calls out views of Mt. Everest, Lhotse, Ama Dablam, and surrounding peaks.
This is also your chance to slow down and settle. Namche has shops and vendors, and the Sherpa community infrastructure makes it feel less like a remote camping expedition and more like a base where trekkers reset.
If you want something practical to do while you’re resting, include the Sherpa Museum stop (named in the itinerary). It’s a good way to make sense of what you’re walking through—Sherpa culture, daily life, and photography exhibits.
Your consideration: a rest day still means hiking early. If you’re exhausted, keep the pace easy and treat it as altitude education, not a workout.
Day 4: Phortse direction via Khumjung hill and monastery landmarks
Day 4 moves away from Namche and toward Phortse, and it includes a climb of Khumjung hill before descending again. The trail description also mentions a chorten on a ridge top at 3973m, and steep switchbacks down a sandy slope toward the Dudh Koshi.
This day is about legs plus rhythm. It’s not the kind of day where you want to gamble on fast pacing because steep switchbacks can punish your knees.
Cultural stops are part of the day’s texture too: the itinerary includes Mohang, described as the birth place of the re-incarnate Lama of Rongbuk monastery in Tibet who introduced Buddhism to the Khumbu region. Even if you only spend a short time here, it gives context to why you’ll see prayer traditions everywhere.
Day 5: into rhododendron forests and up toward Gokyo Lakes
Day 5 is the big “shift” day: you climb steeply out of the valley through rhododendron forests. The itinerary also describes Kharkas, which are summer settlements Sherpas used for herding yaks during grazing season. You’ll pass through places like Tongba (3950m) and Gyele (3960m) before overnighting in a tea house.
If you’re thinking about why this matters: rhododendron-to-ice transition is more than pretty. It’s a physical sign that you’re moving into a different climate zone, and your body will feel that transition. The steep climb is your early warning that Gokyo country means you’ll be thinking about altitude daily.
This is also the start of your visual setup for the glacier-and-lake payoff. You’re not at the lakes yet, but you’re getting “on route” to them.
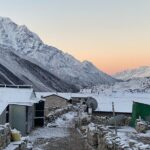
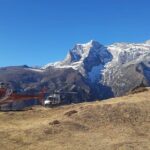
Day 6: Machhermo at 4410m and a Cho-Oyu view day
From Dole, you climb steadily along the valley side. The vegetation described moves from rhododendron forests into scrub juniper as altitude increases.
The itinerary notes excellent views of Cho-Oyu, with Kantiaga and Thamsherku visible behind the valley. Day 6 is framed as a short trek, arriving at Machhermo (4410m) around lunch.
That short day piece matters. At this stage, it can be the difference between feeling anxious about altitude and feeling like you’re in control. Instead of rushing, you can eat, hydrate, and get into a consistent routine for sleep.
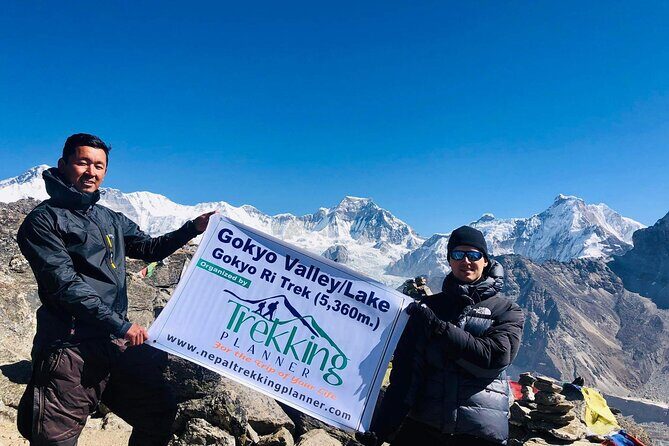
Day 7: the terminal moraine of Ngozumpa Glacier to Gokyo
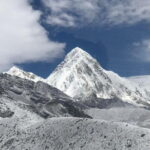
Day 7 is where Gokyo becomes real. After Machhermo, the route climbs a ridge for views both down toward Kantega and up toward Cho-Oyu (8153m) (noted in the description). Then the trail continues toward Pangram (4390m).
From there, the day includes a steep element: you descend to the river bank, then climb up to the terminal moraine of the Ngozumpa glacier. The itinerary explicitly calls out that this is a steep climb on the moraine. After that, the trail levels as it follows the valley.
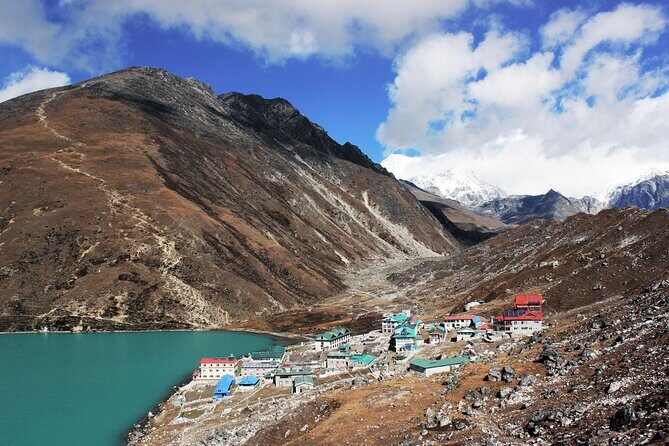
You’ll also reach Longponga (4690m) near a second lake, described as having Lama footprints, then continue along a boulder-strewn path up to Gokyo (4750m) on the edge of the third lake.
This is a high point day—literally. Your consideration is comfort: moraine walking can be uneven underfoot. Trekking poles can help here even if you’re not using them for every day.
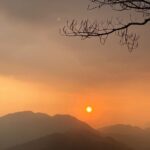
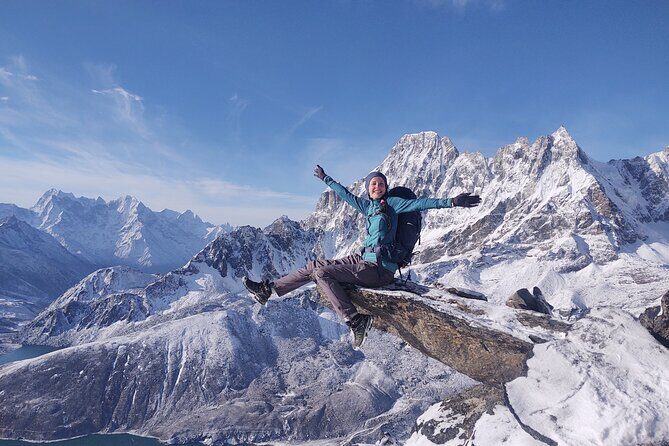
Day 8: Gokyo Ri sunrise (5463m) plus afternoon lake exploration
Day 8 is the signature day. You’ll start early for Gokyo Ri (5463m) sunrise views. The itinerary notes the chance to see Everest and Cho-Oyu fully, along with lakes in the valley and the biggest glacier named Na-Jumpa.
After returning for breakfast, you get an afternoon exploring session up to the fifth lake, passing by another lake described in the itinerary as the fourth. This is where the trek becomes more than a list of altitudes—you get time to look slowly.
Practical note: sunrise hikes always mean cold mornings and a tight timing window. Pack like you’ll be outside for longer than you think, even if the hike itself is shorter than you expect.
Day 9: retracing back via Machhermo to Dole
After Gokyo and Gokyo Ri, Day 9 is a return day: you retrace back to Dole via Machhermo, with an overnight tea house.
This sounds simple, but it’s mentally important. After a peak day, your body can feel both proud and tired. The retracing helps you adjust without adding new altitude pressures every day.
You’ll likely notice your stride feels different descending after high points. Go easy, keep steps controlled, and don’t treat it like you’re trying to “win back time.”
Day 10: to Namche via Phortse Tanga and Mongla Dada
Day 10 heads back toward Namche. The description mentions a big descend to Phortse Tanga, then an ascent to Mongla Dada, followed by a slow descent all the way to Namche.
This is a classic trekking pattern: you trade one kind of effort for another. Long descents can wear you out; the ascent to Mongla Dada can steal energy. It helps to keep your pace steady and your breathing calm—especially on the climb sections.
Your Namche return means you get a familiar environment at the right time: enough recovery space to reset before the final flight out.
Day 11: Lukla again, with a few ups and downs
On Day 11 you retrace back to Lukla with some up-and-down sections. You’ll sleep in a tea house in Lukla.
This is one of those days where you should avoid hero pacing. You’re tired, your muscles are adapting, and the last day is still part of the physical story. Treat it as finishing well, not finishing fast.
Day 12: Lukla to Kathmandu, then back to your hotel
You fly early from Lukla to Kathmandu—about 35 minutes—then you’re picked up by a representative and transferred to your hotel. Breakfast is included, and you’ll stay overnight in Kathmandu.
This ending matters because you’ll likely feel a mix of relief and emptiness. Don’t schedule heavy plans immediately after landing. Let your body come down from trekking mode.
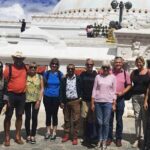
Guides, porter setup, and what support actually feels like on this route
This trek is operated with an experienced English-speaking guide, and the guide’s coverage includes salary, food, accommodation, and insurance (as stated). You also get the structured porter ratio: for 2 guests, 1 porter.
That ratio is practical. It helps you keep your pack weight manageable, which is a big deal when you’re going from forest trails up into moraine and high ridges. A lighter load usually means fewer decision-moments like should I push harder or should I rest. You just keep moving.
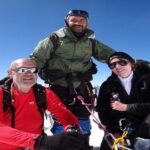
On the people side, the strongest praise in the past trip experiences has been about guidance under stress—especially around Lukla timing changes. Names that have come up in past feedback include Sonam and Kiran, FT Sherpa, Dibash, Dipendra, and Pasang. The operator has also been described as quick to respond to questions and calm in handling diversions, including arrangements like transport support if someone can’t continue carrying as planned.
You may not need that kind of help. Still, it’s reassuring when the team has already demonstrated problem-solving energy.
Should you book? Who this trek suits best
Book this trek if you want:
- Gokyo Lakes and glacier views as the main event
- a route that includes acclimatization instead of rushing from town to high camp
- guided logistics that handle the big moving pieces like Lukla flights, permits, and park fees
Skip it (or ask more questions first) if:
- you’re not comfortable with a weather-dependent mountain flight day at the start
- you hate paying for lunch and dinner during the trek
- you’re looking for a long series of extremely challenging passes (this itinerary is focused on Gokyo and Everest-area panoramas rather than multiple high pass crossings)
If your goal is the “big peaks in one view” feeling—especially from Gokyo Ri—this itinerary is built for that. The main trick is accepting that mountains run on their own clock, and your best move is to pack smart, pace patiently, and let the route do its altitude work.
FAQ
FAQ
Where does the trek start?
The trek starts at Tribhuvan Airport in Kathmandu, Nepal, with a start time of 6:15 am.
How long is the Everest Gokyo Valley trek?
It’s listed as 12 days approximately.
Are airport transfers included?
Yes. You get airport pick up and drop in Kathmandu by private vehicle.
Are flights included?
Yes. Kathmandu to Lukla and back to Kathmandu flights are included, with airport departure tax noted.
What permits or fees are covered?
National park entrance fees and a TIMS card (Trekkers’ Information Management System) are included.
What’s included for meals?
Breakfast is included (11 breakfasts). Lunch and dinner during the trekking days are not included, and meals in Kathmandu are not included.
How does the porter arrangement work?
For 2 guests, 1 porter is provided, and the porter coverage includes insurance, salary, food, accommodation, and equipment.
What level of fitness do I need?
The tour says travelers should have moderate physical fitness.
What can I expect about cancellation or weather changes?
Free cancellation is offered up to 24 hours in advance for a full refund, and the experience requires good weather. If it’s canceled due to poor weather, you’ll be offered a different date or a full refund.