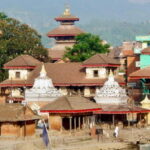
REVIEW · KATHMANDU
Everest Base Camp Trek from Kathmandu 12 Days
Book on Viator →Operated by My Dream Adventure (MDA) · Bookable on Viator
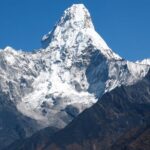
Everest comes at you fast. This 12-day Everest Base Camp trek pairs iconic Himalayan viewpoints with Sherpa culture stops like Namche Bazaar and Tengboche, led by an experienced English-speaking guide. The trade-off is you need strong physical fitness for long walking days and the added strain of altitude.
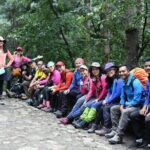
I also like that key logistics are handled up front: round-trip Kathmandu–Lukla flights plus trekking permits and TIMS are included, so you can focus on walking, acclimatizing, and enjoying the people you meet along the way. In past trips connected to this operator, guides such as Milan and Bikram earned praise for organization and for keeping safety and pacing front and center.
In This Review
- Key highlights that make this trek worth your time
- Why Everest Base Camp feels different from just a checklist
- Day 1 to Day 2: Kathmandu to Lukla, then Phakding’s calm start
- Day 3: Namche Bazaar, with that Dudh Koshi river pace
- Day 3 rest option (and why it’s smart): Namche Bazaar Stupa day
- Day 4: Tengboche and the monastery views
- Day 5: Dingboche, with alpine woods and older monastery vibes
- Day 6: Dingboche day to recover and see more
- Day 7: Lobuche, with boulder terrain and tougher walking
- Day 8: Gorakshep and Everest Base Camp, the iconic switch flips on
- Day 9: Kala Patthar in the early morning, then back to Pheriche
- Day 10: Pheriche back toward Namche, with the same villages in a new light
- Day 11: Phakding and the steep descent reality
- Day 12: Fly back to Kathmandu and land back in normal life
- Guides, guest houses, and what the included setup really means
- Price of $1,350: what you get for the money, and what you still pay yourself
- Who this trek fits best (and who should think twice)
- Book it or pass: my practical recommendation
- FAQ
- What is included in the Everest Base Camp trek package?
- What is not included in the price?
- Are flights between Kathmandu and Lukla included?
- Do I need a trekking permit and TIMS card?
- What kind of accommodation will I have?
- How fit do I need to be?
- What is the cancellation refund window?
Key highlights that make this trek worth your time

- Lukla flights round-trip are included, so you avoid the biggest planning headache
- Trekking permits and TIMS card are covered, handled as part of the package
- Sherpa village days plus monastery visits give you culture between viewpoint days
- Plenty of acclimatization structure with rest or day-hike options in key places
- Two major payoff moments: Everest Base Camp and the Kala Patthar viewpoint
- English-speaking guide plus first-aid kit is included, which matters when conditions change
Why Everest Base Camp feels different from just a checklist
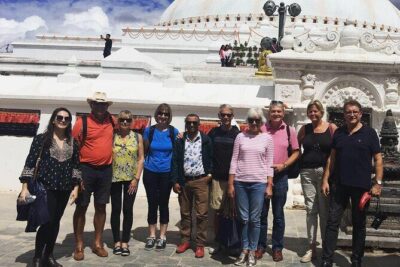
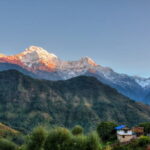
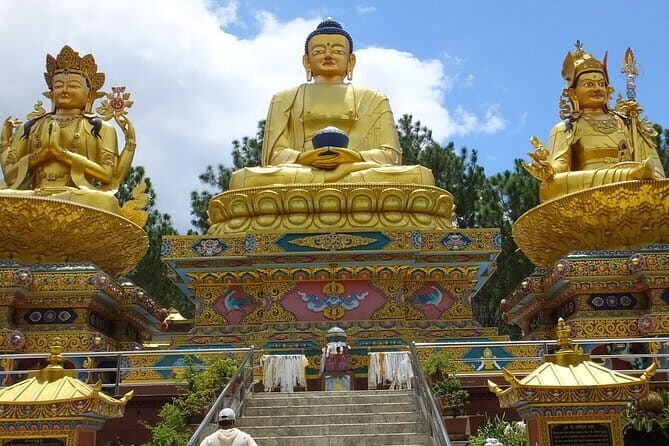
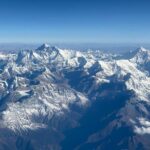
Everest Base Camp is often sold as a bucket-list stamp, but what makes this route work is the rhythm. You start low, you build gradually, and you spend real time in the places that make the Khumbu region more than a backdrop. Along the way, you’re walking through Sherpa villages, passing Buddhist monasteries, and getting those classic Himalayan panoramas that keep turning the trek into a moving viewpoint.
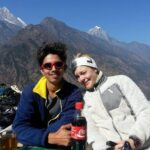
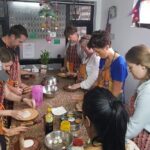
The best part is that the trek gives you both big scenery and human-scale experiences. You’re not only chasing height. You’re also meeting locals and seeing how the Sherpa community lives at different elevations, with tea houses and village life shaping your day-to-day pace.
One practical benefit: the trek is designed around acclimatization. You get rest-day choices and shorter walking days early on, which makes it more realistic for regular travelers with solid fitness (not just elite hikers).
You can also read our reviews of more hiking tours in Kathmandu
Day 1 to Day 2: Kathmandu to Lukla, then Phakding’s calm start
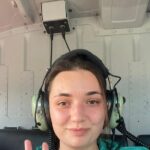
You kick off with a transfer from Kathmandu to the domestic terminal to catch your scheduled morning flight to Lukla. Lukla is where the trek truly begins, and the flight matters because it saves days of slow approach. It also sets expectations: you’re stepping into a mountain routine almost immediately.
After landing, you meet your trekking guide and start walking toward Phakding. Today is intentionally shorter to help your body adjust. This matters because the Everest region has a different feel right away. Even if you’re a strong hiker, the combination of altitude, frequent changes in terrain, and constant uphill moments can wear you down fast.
Phakding is also a good first taste of the trail’s texture: busy enough to feel like a real trekking corridor, but still calm. You’ll likely keep your effort steady rather than sprinting up hills, because you still need energy for the next stretch.
What to watch for: flight timing can feel like a lot on day one. If you’re the type who hates unknowns, give yourself a buffer in Kathmandu the night before, because the day starts early.
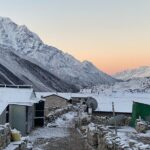
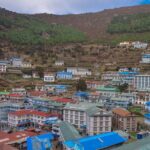
Day 3: Namche Bazaar, with that Dudh Koshi river pace
The second trekking day pushes you to Namche Bazaar. You’ll walk through pine forest and follow the Dudh Koshi River for long stretches, with suspension bridges along the way. That river corridor is one of the classic reasons people love this trek: it keeps your hiking moving, and the trail feels connected rather than random.
Namche is where the trek starts to shift into a real hub. You’re higher, the air is thinner, and you feel the village energy more strongly. This is also where you’ll start understanding how trekking life works in the Khumbu. Tea houses, guest rooms, and daily pacing become part of your schedule.
The big win here is the combination of effort and payoff. You’re working, but you’re also moving through scenery that changes hour to hour, not just elevation after elevation.
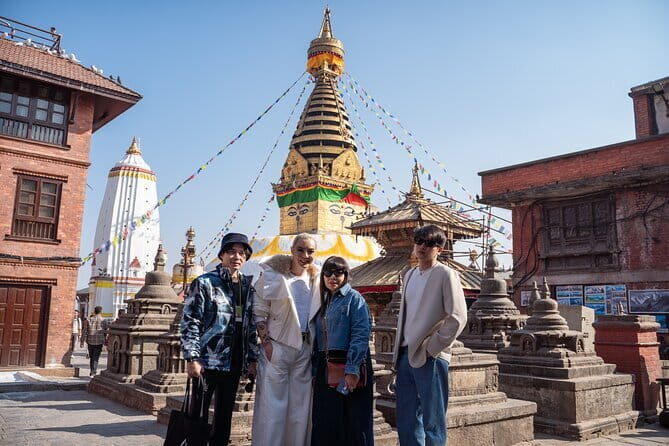
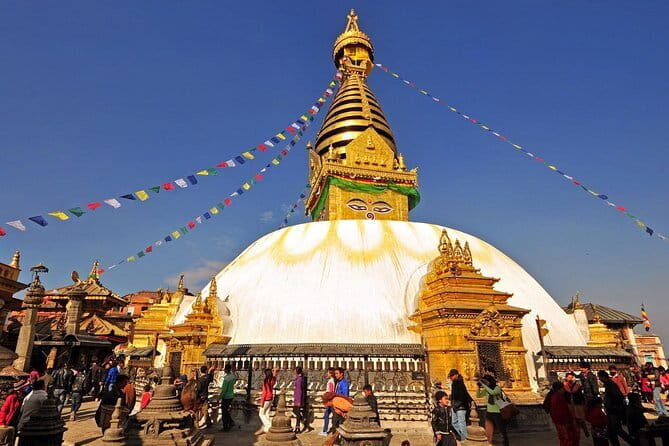
Day 3 rest option (and why it’s smart): Namche Bazaar Stupa day
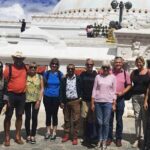
On the next day, you don’t simply march upward again. You stay in the Namche area and choose a day-hike plan. The route gives you an option to head to Thame or Khunde, or to relax and explore Namche itself. You also get a visit connected to the Namche Bazaar Stupa.
This is where I think the trek’s planning earns its keep. Rest days on Everest routes are not about being lazy. They’re about helping your body adapt while you stay active. You keep walking, just not all-day uphill. That’s a huge difference from itineraries that treat every day like a summit attempt.
From a practical viewpoint, a Namche rest-day also helps your mind. After early walking, you get time to organize gear, check how you’re feeling, and plan your next few climbs with less stress.
Day 4: Tengboche and the monastery views

Tengboche is a highlight stop for a reason. The walk there is described as dusty and winding, and that description matches what trekkers typically feel on this kind of route: the trail can be slow going, and you earn every good view. Still, once you reach the monastery area, the panoramic views make the effort feel worth it.
This day is also set up for photography time. That sounds small, but it’s a real gift. Many mountain treks move too quickly, leaving you with only snapshots. With Tengboche, you get time to sit with the scene and let it register.
Possible consideration: dusty trails can be uncomfortable if you’re sensitive to breathing issues. If that’s you, consider a face covering and keep your pace controlled.
Day 5: Dingboche, with alpine woods and older monastery vibes
From Tengboche to Dingboche, the trek begins with a visit to what’s described as the region’s oldest Buddhist monastery. You then pass through alpine woods, continue through settlements like Upper Pangboche, and go past Shomare and other stops toward Dingboche.
Dingboche is higher, and the terrain starts to feel more exposed. The walk length is listed as longer than some earlier days, and you’ll likely notice that the same effort feels harder now.
What I like about this part of the route is that it doesn’t only focus on elevation. It keeps giving you cultural markers: monasteries and village passing points. That helps the trek feel meaningful even when your lungs feel like they’re working overtime.
Day 6: Dingboche day to recover and see more
The schedule keeps you in Dingboche again, giving you time to rest before the next leg. You’re rewarded with spectacular views, but the day is still about managing your energy.
This is a key point in your trek strategy: if you feel even slightly off, a recovery day can be the difference between cruising later and struggling. The plan recognizes that reality by not forcing immediate, high-effort climbing every day.
Also, having time around Dingboche means you can walk a bit, explore nearby villages, and settle into a routine. When conditions change, routine helps.
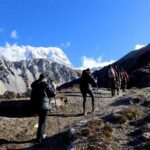
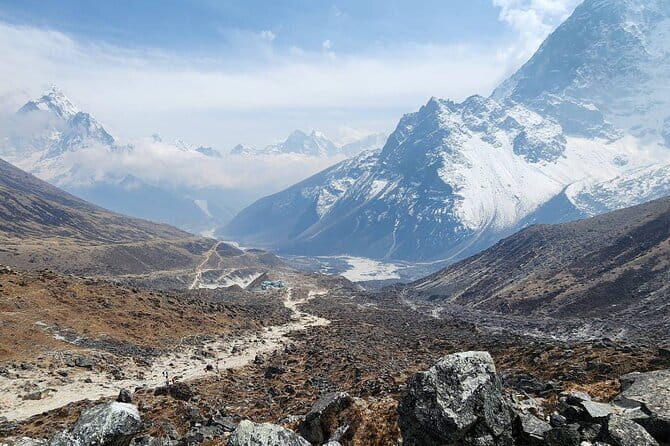
Day 7: Lobuche, with boulder terrain and tougher walking
Today pushes toward Lobuche. The trek climbs through the Khumbu Khola valley to Duglha, and then it gets more demanding as the valley shrinks near Dusa. The description flags difficulty with massive boulders and mountain yaks moving through the route.
This day tends to be where people start feeling the trek’s true weight. It’s not only the altitude anymore. The ground itself can slow you down. Boulders mean careful foot placement. That might sound obvious, but it matters because it affects how quickly you move and how tired you get.
Practical note: keep your pace steady and plan for slower going than you expect. If you rush, you’ll pay later.
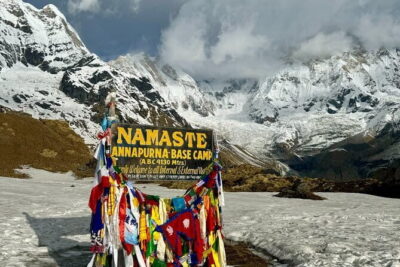
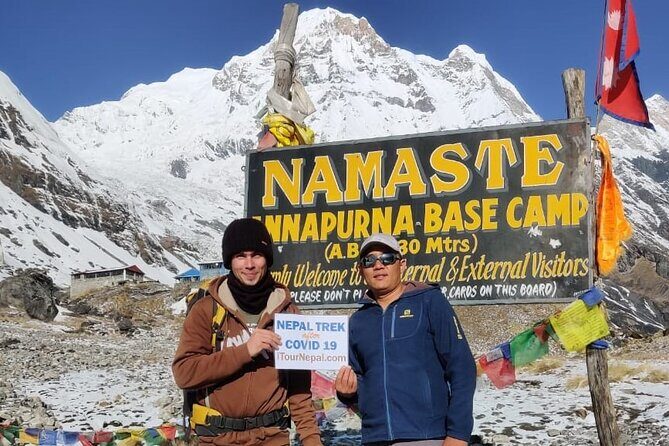
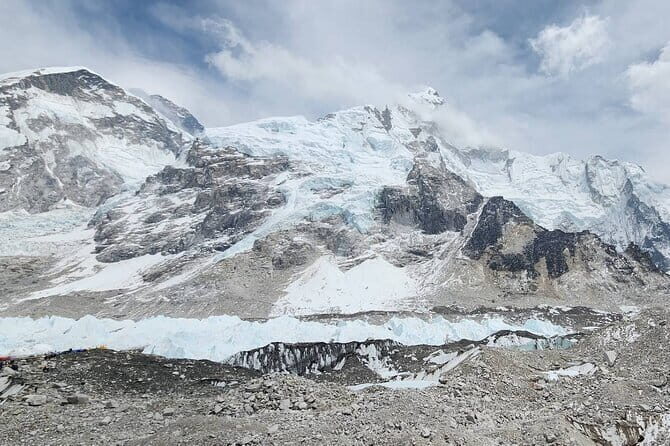
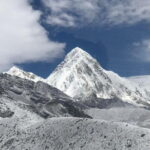
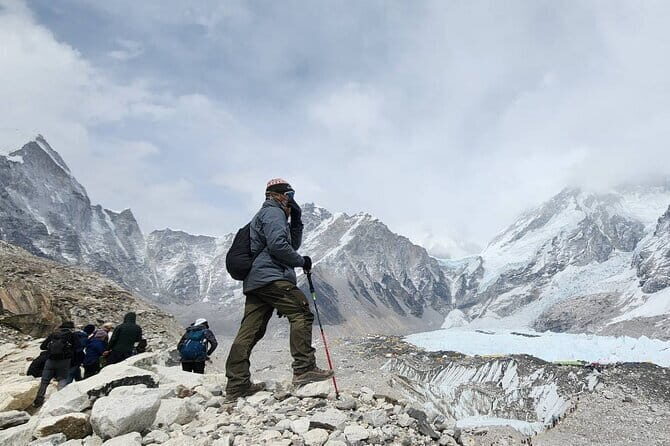
Day 8: Gorakshep and Everest Base Camp, the iconic switch flips on
Day 8 starts with the walk to Gorakshep, going ahead through the side of the Khumbu Glacier. You pass a pyramid signpost, and the route includes an ascent to a viewpoint area called Thangma Riju. Then you push onward to Everest Base Camp.
Once you reach Base Camp, you get the core payoff: unforgettable views of Mount Everest and surrounding mountains from your site. After spending time there, you return back to Gorakshep for the overnight stay.
This day is often the mental climax. If the early days built your body up gradually, Day 8 confirms it. You’ve done the hard part already. Now you get the reward.
Possible drawback: Gorakshep sits at a higher elevation than earlier stops, and you might feel the cold more strongly. Pack for changing weather and plan to move smartly rather than standing still for too long.
Day 9: Kala Patthar in the early morning, then back to Pheriche
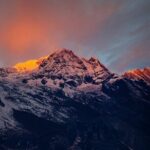
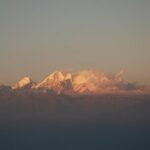
You start early to catch the dramatic views from Kalapatthar. Kala Patthar is widely considered one of the finest viewpoint spots on the Everest Base Camp route, and you’ll be able to look out over Everest and the surrounding peaks from there.
This is another “it looks better than photos” moment, because viewpoints at altitude have depth. Even if you’ve seen images before, the scale changes in real air.
After Kalapatthar, you descend back toward Gorakshep, rest for a while, and then continue down to Pheriche for the overnight. That downhill section is a relief, but it’s also where your legs start to complain. The trek turns from lung-power to knee-management.
Day 10: Pheriche back toward Namche, with the same villages in a new light
You return along a similar route, passing back through Sherpa villages and heading toward Namche Bazaar. You’re moving through places like Pheriche and other stops listed along the way, then reaching Namche.
This reverse direction does something useful: it lets you recognize landmarks you already climbed past. A trail can feel more friendly when you can say, I’ve been here before.
If Day 8 and Day 9 were your peak emotional highs, Day 10 can feel like your momentum stabilizes. You’re not chasing the impossible now. You’re bringing yourself home at an altitude that still demands respect.
Day 11: Phakding and the steep descent reality
Today descends steeply toward Phakding. The itinerary notes that you need to walk slowly and under control because rocky terrain can make your legs feel shaky. Once you get past the steep bits, the trail becomes more level and natural.
This is the day to treat like controlled hiking, not a finish-line sprint. Downhill fatigue is real. Even if your lungs feel better, your legs might not be ready for steep rocky sections.
Once you reach Lukla again, you stay overnight. That’s a helpful psychological moment: the trek is done in the sense that you’re back at the flight point, but you still need one final travel day.
Day 12: Fly back to Kathmandu and land back in normal life
On your final day you catch your morning flight from Lukla back to Kathmandu, about 35 minutes in the air. Once you land at Tribhuvan International Airport, the trip wraps up in Kathmandu.
This last day tends to feel oddly fast. You’ll likely notice how quiet Kathmandu seems compared to the trekking route. If you want a smooth ending, plan for a relaxed meal and an early night once you’re back, because your body will still be processing the trek.
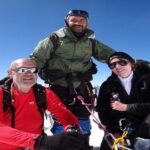
Guides, guest houses, and what the included setup really means
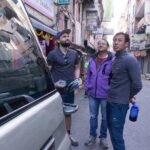
The package includes an English-speaking trekking guide, and most guides are Sherpas. That matters because the trail isn’t just about distance. It’s about how you move, how you pace, and how you handle altitude and changing trail conditions.
The best clue you have from the provided feedback is the repeated focus on guide professionalism and kindness. Names that come up in strong feedback include Milan and Bikram, praised for deep knowledge and for keeping the journey organized. Another name that appears is Bishnu, with support described as knowledgeable and helpful. Sagar is also mentioned in connection with strong organizational skills.
You also get guest house accommodation. In practice, that usually means basic comfort rather than luxury, but it’s the style that makes the trek possible. The operator also includes a first-aid kit with your guide, which is an important practical detail when you’re far from hospitals.
Value check: because permits (including TIMS and the trekking permit) are included, you’re not scrambling for paperwork that can delay things. You will need passport details and a photo (a selfie also works) for permit issuance, so have that ready.
Price of $1,350: what you get for the money, and what you still pay yourself
At $1,350 per person, this trek isn’t cheap. But the price includes several of the big-ticket items that can otherwise multiply costs on a Himalayan trek: round-trip flights Kathmandu–Lukla, trekking permits and TIMS, a guide, guest house stays, and hotel pickup/drop off.
It also includes a private setup for your group, meaning you should not be forced into a mixed group experience. You’re also given a mobile ticket, which can reduce admin friction.
What is not included is personal expenses. Since the operator lists this separately, plan to budget for day-to-day spending you choose to make while trekking.
My take on value: this cost makes sense if you want a guided, structured plan where logistics and permits are handled. If you’re the kind of traveler who enjoys building your own route and managing permits yourself, you might compare against DIY costs. But if you want the peace of mind to focus on trekking, the package price is doing real work for you.
Who this trek fits best (and who should think twice)
This trek is clearly aimed at people who can handle sustained hiking with a strong focus on fitness. The provided information says you should have strong physical fitness level to participate.
It can also suit travelers who want a mix of culture and high-altitude walking. If you like monastery visits, Sherpa village life, and the slower rhythm of day-hike or rest-day choices in Namche and Dingboche, you’ll probably appreciate this route more than a more rigid itinerary.
If you’re unsure about your readiness, the decision point is simple: be honest about your uphill endurance and your ability to walk in rocky terrain on descending days. Steep, rocky segments show up late in the trek, not just early.
Book it or pass: my practical recommendation
Book this trek if you want a well-structured 12-day Everest Base Camp itinerary with flights and permits handled, plus an experienced guide team that includes Sherpa-led expertise and keeps pacing and safety in mind. I especially like the planning around acclimatization through rest-day options in Namche and Dingboche, because that’s where many trekkers win or struggle.
Pass or at least ask more questions if you know you struggle with altitude or if steep, rocky downhill days can scare your knees. This trek works best when you go in strong, keep a steady pace, and accept that the payoff days (Everest Base Camp and Kala Patthar) only feel truly great when the earlier days weren’t rushed.
FAQ
What is included in the Everest Base Camp trek package?
The package includes hotel pickup and drop off, round-trip flights Kathmandu to Lukla to Kathmandu, trekking permits and TIMS card, an English-speaking trekking guide, accommodation in guest houses, a first-aid kit (with the guide), and a private trip.
What is not included in the price?
Personal expenses are not included.
Are flights between Kathmandu and Lukla included?
Yes. Round trip flight tickets from Kathmandu to Lukla and back to Kathmandu are included.
Do I need a trekking permit and TIMS card?
Yes. Trekking permit and TIMS card are included, and you’ll need to provide passport details and a photo (a selfie works) for the permit issuance.
What kind of accommodation will I have?
You’ll stay in guest houses during the trek.
How fit do I need to be?
You should have a strong physical fitness level, since the trek involves multiple days of trekking and high-altitude walking.
What is the cancellation refund window?
You can cancel up to 3 days in advance for a full refund. If you cancel less than 3 days before the start time, the amount you paid will not be refunded.